...
The deployment architecture is shown below. All Addressing and naming shown are for example purposes only.
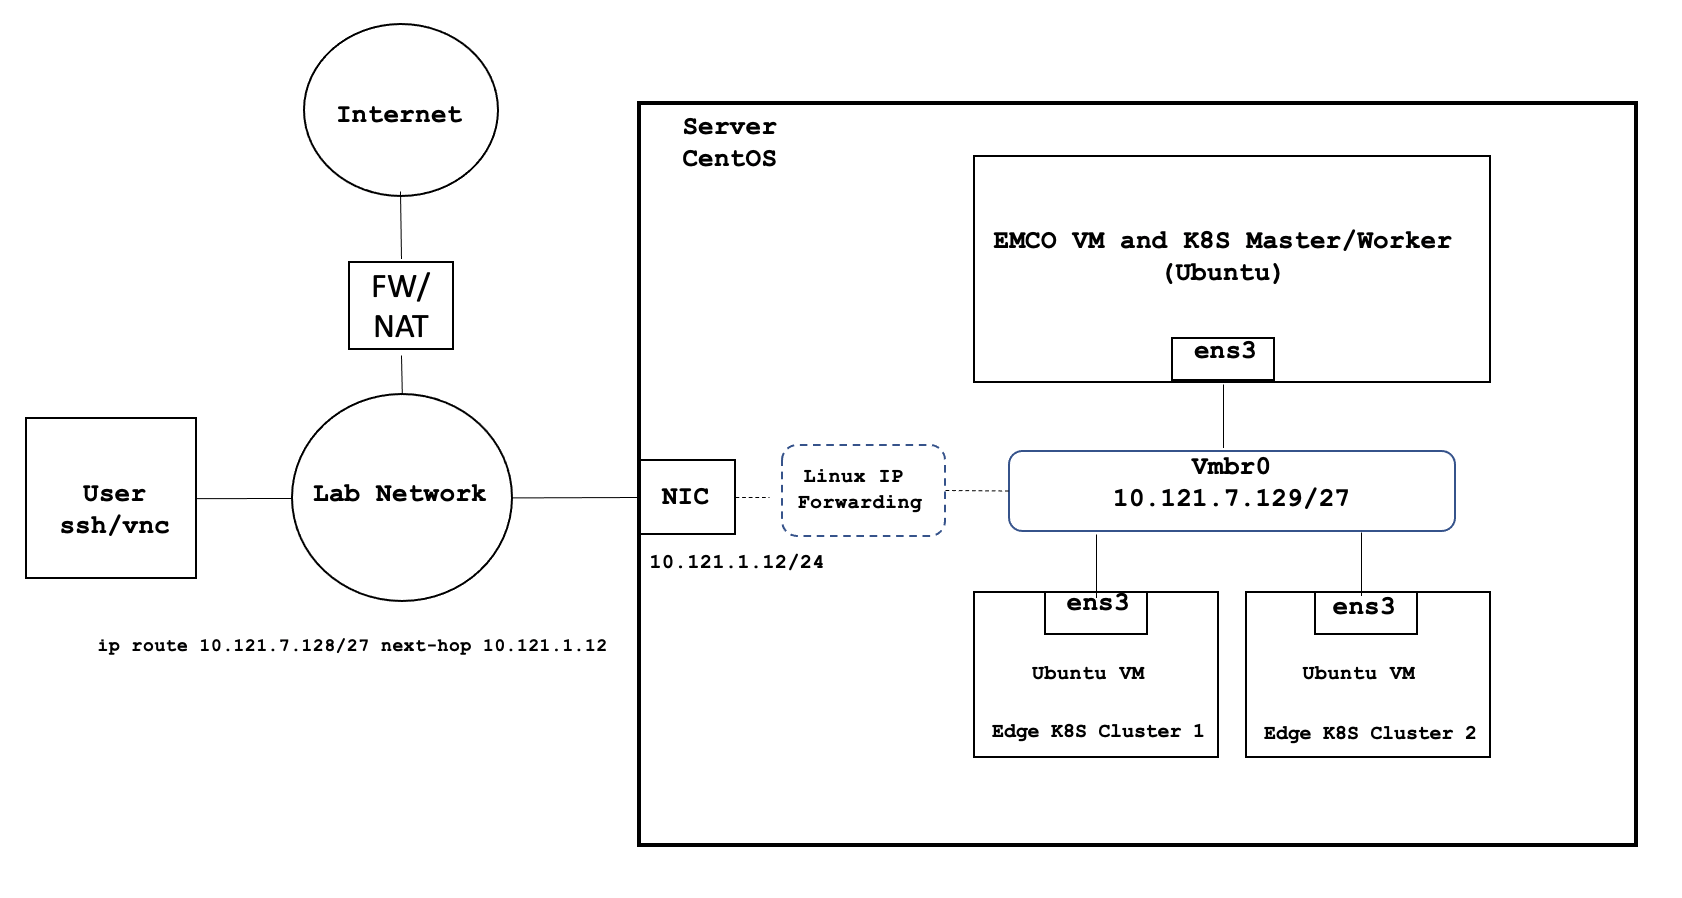
Deployment environment components:
...
- Internal Lab Network (RFC 1918 space)
- Internet access (NAT'd)
- IP routing in the Lab Network to reach VM interfaces
Software Prerequisites
| Requirement | Value |
|---|---|
| Server OS | CentOS 7.x or above |
| VM OS | Ubuntu 18.04 |
| Upstream SW | Refer to Deployment Guide Section |
Installation High-Level Overview
The installation/deployment process consists of the following steps:
- Install CentOS on Host Server.
- Prepare Host Server for EMCO Deployment.
- Deploy EMCO.
Deployment Guide
Install CentOS on Host Server
- Connect to Host Server iLO interface.
- Start Virtual Console.
- Mount Virtual Media with CentOS 7 ISO.
- Install CentOS
- Assign correct IP address, Subnet, Gateway and DNS to the NIC.
- Include OpenSSH Server.
Prepare Host Server for EMCO Deployment
Step 1. Enable sudo without entering sudo password:
| Code Block | ||
|---|---|---|
| ||
sudo -i
visudo
# Uncomment the line below
%wheel ALL=(ALL) NOPASSWD: ALL |
Step 2. Add sudo user to wheel group:
| Code Block | ||
|---|---|---|
| ||
usermod –aG wheel onaplab |
Step 3. Enable nested virtualization:
| Code Block | ||
|---|---|---|
| ||
# Login as super user
sudo -i

# Check for the following parameter
cat /sys/module/kvm_intel/parameters/nested
N
# If it is Y, there is nothing else to be done. It is already enabled!

# If it is N, do the following:
# Edit /etc/default/grub file, and include kvm-intel.nested=1
GRUB_CMDLINE_LINUX parameter
GRUB_CMDLINE_LINUX="crashkernel=auto
console=ttyS0,38400n8,kvm-intel.nested=1"

# Rebuild your GRUB configuration
sudo grub2-mkconfig -o /boot/grub2/grub.cfg

# Enable nested KVM capabilities in /etc/modprobe.d/kvm.conf
# By uncommenting the below line

options kvm_intel nested=1

### Reboot the server
reboot

# Now, we should have the nested KVM capabilities enabled
cat /sys/module/kvm_intel/parameters/nested
Y |
Deploy EMCO
Deployment Verification
Uninstall Guide
...