...
if the Jenkins container is restarting again and again then check the logs using below command
Code Block language bash sudo docker logs --tail 50 –follow --timestamps Jenkins
If the logs are showing like below Wrong volume permissions?
Code Block language bash touch: cannot touch '/var/jenkins_home/copy_reference_file.log': Permission denied Can not write to /var/jenkins_home/copy_reference_file.log.
The volume directory /data/jenkins need to be separated with the admin ownership to keep the Jenkins home
Code Block language bash sudo chown 1000 /data/Jenkins
Then run the command: (Now the container is up and running)
Code Block language bash sudo docker ps -a
Executing into Jenkins container
Code Block language bash sudo docker exec -it jenkins /bin/bash
Inside the Jenkins container, go to /var/Jenkins_home/secrets/ directory. Copy the initial admin password like this
Code Block language bash cat /var/Jenkins_home/secrets/initialAdminPassword
Accessing Jenkins Peer and continue setup
Default port for Jenkins is 8080 and this should be open. To set up your new Jenkins installation, open your browser and type your domain or IP address followed by port 8080
| Code Block | ||
|---|---|---|
| ||
http://your_ip_or_domain:8080 |
A screen like the following will appear, prompting you to enter the Administrator password that is created during the installation
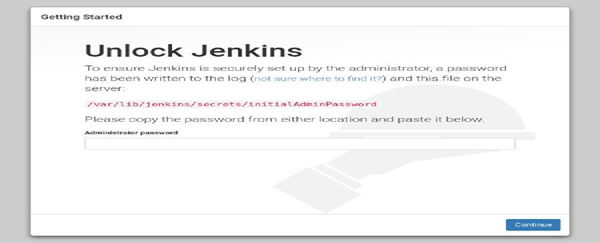
Use the following command to print the password on your Jenkins container
| Code Block | ||
|---|---|---|
| ||
cat /var/jenkins_home/secrets/initialAdminPassword
|
You should see a 32-character long alphanumeric password. Copy the password from your terminal, paste it into the Administrator password field and click Continue
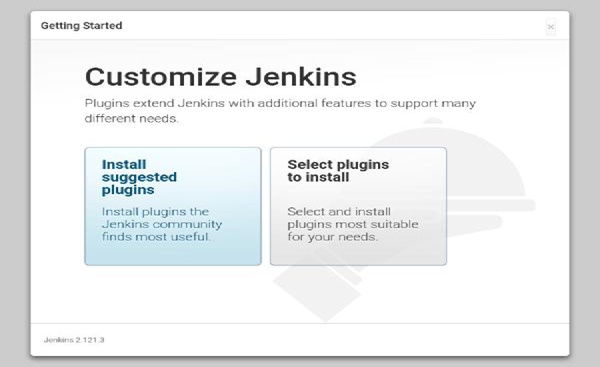
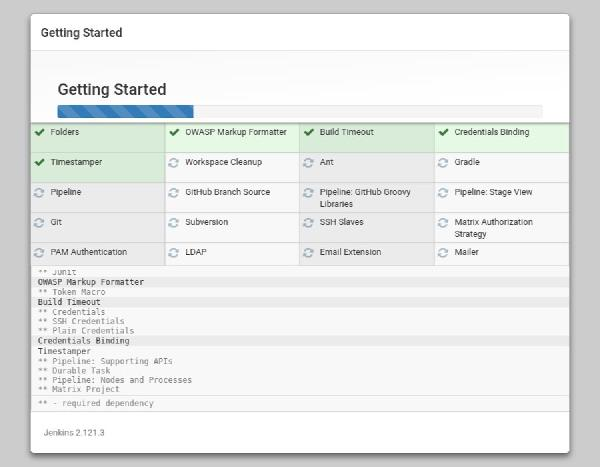
On the next screen, you will be asked whether you want to install the suggested plugins or to select specific plugins. Click on the Install suggested plugins box, and the installation process will start immediately.
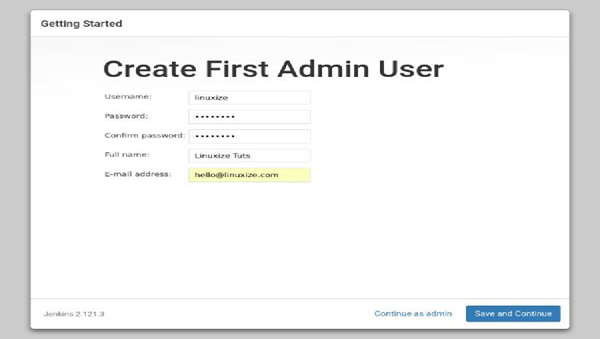
Once the installation is complete, you will be prompted to set up the first administrative user. Fill out all required information and click Save and Continue.
On the next page, you will be asked to set the URL for the Jenkins instance. The URL field will be populated with an automatically generated URL.
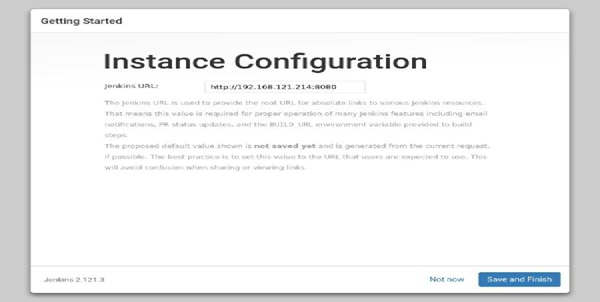
To complete the setup, confirm the URL by clicking on the Save and Finish button.

Finally, click on the Start using Jenkins button and you will be redirected to the Jenkins dashboard logged in as the admin user you have created in one of the previous steps.
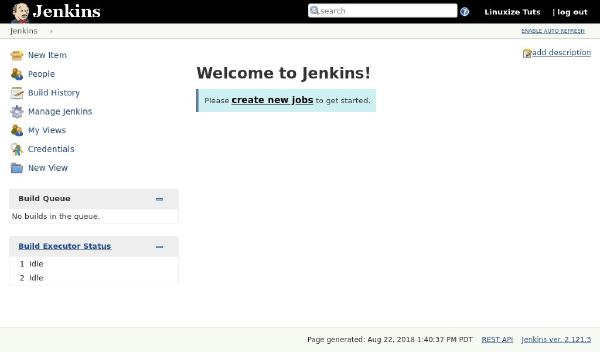
If you’ve reached this point, you’ve successfully installed Jenkins.