| HTML |
|---|
<script type="text/javascript" src="https://jira.akraino.org/s/c11c0bd6cdfdc04cacdf44e3072f7af4-T/ah7phx/78002/b6b48b2829824b869586ac216d119363/2.0.26/_/download/batch/com.atlassian.jira.collector.plugin.jira-issue-collector-plugin:issuecollector/com.atlassian.jira.collector.plugin.jira-issue-collector-plugin:issuecollector.js?locale=en-US&collectorId=c49ec9c2"></script> <script type="text/javascript">window.ATL_JQ_PAGE_PROPS = { "triggerFunction": function(showCollectorDialog) { jQuery("#myCustomTrigger").click(function(e) { e.preventDefault(); showCollectorDialog(); }); }}; </script>

<div style=" z-index:1000; background-color:#a00; position:fixed; bottom:0; right:-125px; display:block; transform:rotate(-45deg); overflow:hidden; white-space:nowrap; box-shadow:0 0 10px #888;" > <a href="#" id="myCustomTrigger" style=" border: 1px solid #faa; color: #fff; display: block; font: bold 125% 'Helvetica Neue', Helvetica, Arial, sans-serif; margin: 1px 0; padding: 10px 110px 10px 200px; text-align: center; text-decoration: none; text-shadow: 0 0 5px #444; transition: 0.5s;" >Report Issue</a> </div> |
| Table of Contents |
|---|
| Children Display | ||
|---|---|---|
|
Introduction
| draw.io Diagram | ||||||||||||||||||
|---|---|---|---|---|---|---|---|---|---|---|---|---|---|---|---|---|---|---|
|
This installation procedure creates a new Regional Controller on a bare metal server. The bare metal server which will become the RC is termed the 'Target RC' or just 'Target Server' in this guide.
...
- Modify the BIOS including DHCP and PXE boot configuration by issuing Redfish API commands to the Target Server's iDRAC or iLO BMC
- Install and update an Ubuntu 16.04 operating system
- Install Network Cloud Regional Controller specific software including
- PostgreSQL DB
- Camunda Workflow and Decision Engine
- Akraino Web Portal
- LDAP configuration
- Install a number of supporting supplementary software components including
- OpenStack Tempest tests
- YAML builds
- ONAP scripts
- Sample VNFs
Preflight requirements
Server iDRAC/iLO provisioning
The RC's iDRAC/iLO IP address and subnet must be manually provisioned into the server before installation begins.
Networking
The Target RC has multiple physical ND and VLAN interfaces. The Build Server uses different interfaces during the different stages of its creation of a RC on the Target Server. A very detailed description of the entire networking setup can be found in the the Network Architecture section section of this release documentation<INSERT LINK>. In addition the networking configuration used in the validation labs with example values similar to that used during validation testing is contained in the Validation Labs section of this release documentation <INSERT LINK> Ericsson Unicycle OVS-DPDK Validation HW, Networking and IP plan.
The Build Server must have IP connectivity to the Target Server's dedicated BMC port using ports 80 (http) <is 80 actually used?> and and 443 (https) in order to issue Redfish commands to configure the Target Server's BIOS settings. The Target Server's BMC IP address is denoted as <SRV_OOB_IP> in this guide. The Target Server's BMC must be manually preconfigured with the <SRV_OOB_IP> address.
...
To verify the necessary IP connectivity from the Build Server to the Target Server's BMC confirm from the Build Server that at least port 443 is open to the Target Server' iDRAC/iLO BMC IP address <SRV_OOB_IP> : <INSERT_IP ADDRESS BELOW>
| Code Block | ||
|---|---|---|
| ||
build_server# #nmap -sS <SRV_OOB_IP> build_server# nmap -sS <INSERT_IP ADDRESS>10.51.35.146 Starting Nmap 7.01 ( https://nmap.org ) at 2018-07-10 13:55 UTC Nmap scan report for <INSERT_IP ADDRESS> Host report for 10.51.35.146 Host is up (0.00085s latency). Not shown: 996 closed ports PORT STATE SERVICE 22/tcp open ssh 80/tcp open http 443/tcp open https 5900/tcp open vnc Nmap done: 1 IP address (1 host up) scanned in 1.77 seconds |
<IS THIS NEXT STEP REALLY NECESSARY - DOESN:T THE INSTALL SCRIPT FORMAT THE SERVER BY DEFAULT?>
Next, use nmap to check for a "clean slate" Bare Metal Server. The results will show the host as being down (due to no OS).
| Code Block | ||
|---|---|---|
| ||
# nmap -sS <SRV_HOST_ADDRESS>

# nmap -sS <INSERT HOST ADDRESS>

Starting Nmap 7.01 ( https://nmap.org ) at 2018-07-10 13:55 UTC
Note: Host seems down. If it is really up, but blocking our ping probes, try -Pn
Nmap done: 1 IP address (0 hosts up) scanned in 0.63 seconds |
Note: The enumerated IP shown (10.51.35.146) is an example iDRAC address for a RC deployed in a validation lab.
Preflight RC Region Specific
...
Input Data
The automated deployment process configures the new RC based on a set of user defined values specific to each RC. These values must be created and stored in a yaml configuration file before the RC deployment process can be started.
During the previous Build Server installation a generic template called serverrc.template was created on the Build Server in /opt/akraino/redfish/. This template should be used to create the deployment specific input file for the new RC. The example below is for a RC called aknode29file called aknode29rc to create a RC on a server called aknode29.
| Code Block | ||
|---|---|---|
| ||
root@build-server# mkdir -p /opt/akraino/server-config root@build-server# #cp /opt/akraino/redfish/serverrc.template /opt/akraino/server-config/<NEW_RC<TARGET_SRV_NAME>rc root@build-server# cp /opt/akraino/redfish/serverrc.template /opt/akraino/server-config/aknode29rc root@build-server# #vi /opt/akraino/server-config/<NEW_RC<TARGET_SRV_NAME>rc root@build-server# vi /opt/akraino/server-config/aknode29rc #Now edit the file and insert the site specific data for the new RC |
An The actual serverrc input file used in the a validation labs lab to build their RCs an RC is shown in at the Validation Labs section of the release documentation <INSERT LINK>end of this page.
Deploying the RC
The RC is deployed in two stages, first the bare metal and Linux OS installation occurs then the Network Cloud specific software is installed on the Target RC server.
...
During the installation the progress can be monitored by viewing the following logfile on the Build Server <INSERT CODE SHOWING LOG FILE>in /var/log/akraino/install_server_os_<DATE>
The BIOS configuration and Linus installation results in numerous reboots of the Target Server which each take many minutes. In addition software packages are transferred and updated on the Target RC server resulting in a total installation time of <INSERT BALL PARK FIGURE> approximately 20 to 30 minutes. The actual time will vary depending on the time taken to retrieve packages from their external repos.
...
| Code Block | ||
|---|---|---|
| ||
root@build-server# Completed bare metal install of regional server [aknode44aknode29] at Mon Jul 2 20:09:35 UTC 2018 SUCCESS: Try connecting with 'ssh root@192root@10.16851.234.42230' as user root Elapsed time was 9 minutes and 22 seconds |
...
During the second stage of the RC deployment process the Build Server will <SSH into?> use the Target RC server's 'host' address. to complete the operating system installation The RC's planned 'host' address must be manually configured in a file on the build called akrainrc in /opt/akraino/region/.
...
| Code Block | ||
|---|---|---|
| ||
root@build-server# vim /opt/akraino/region/akrainorc |
Note: The enumerated IP shown (10.51.34.230) is an example 'host' address for a RC deployed in a validation lab.
Once this has been set and the file saved export the value using <INSERT ADDRESS BELOW>using
| Code Block | ||
|---|---|---|
| ||
root@build-server# #export TARGET_SERVER_IP=<RC<TARGET_plannedSERVER_host_address>IP> root@build-server# #export TARGET_SERVER_IP=<INSERT ADDRESS>10.51.34.230 |
Note: The enumerated IP shown (10.51.34.230) is an example'host' address for a RC deployed in a validation lab.
The final step installs the Regional Controller software:
| Code Block | ||
|---|---|---|
| ||
root@build-server# /opt/akraino/region/install_akraino_portal.sh |
This will also take many 10 to 20 minutes. <INSERT BALL PARK> .
A successful installation will end with the following messagemessage
| Code Block | ||
|---|---|---|
| ||
... Setting up tempest content/repositories Setting up ONAP content/repositories Setting up sample vnf content/repositories Setting up airshipinabottle content/repositories Setting up redfish tools content/repositories SUCCESS: Portal can be accessed at http://19210.16851.234.44230:8080/AECPortalMgmt/ SUCCESS: Portal install completed |
Note: The enumerated IP shown (10.51.34.230) is an example 'host' address for a RC deployed in a validation lab.
The Regional Controller Node installation is now complete.
...
Please note: It will be necessary to generate rsa keys on the newly commissioned RC which must then be copied and inserted into the 'genesis_ssh_public_key' attribute in site input yaml file used when subsequently deploying each Unicycle pod at any edge site controlled by the newly built RC. This will be covered in the Unicycle installation instructions.
Accessing the new Regional Controller's Portal UI
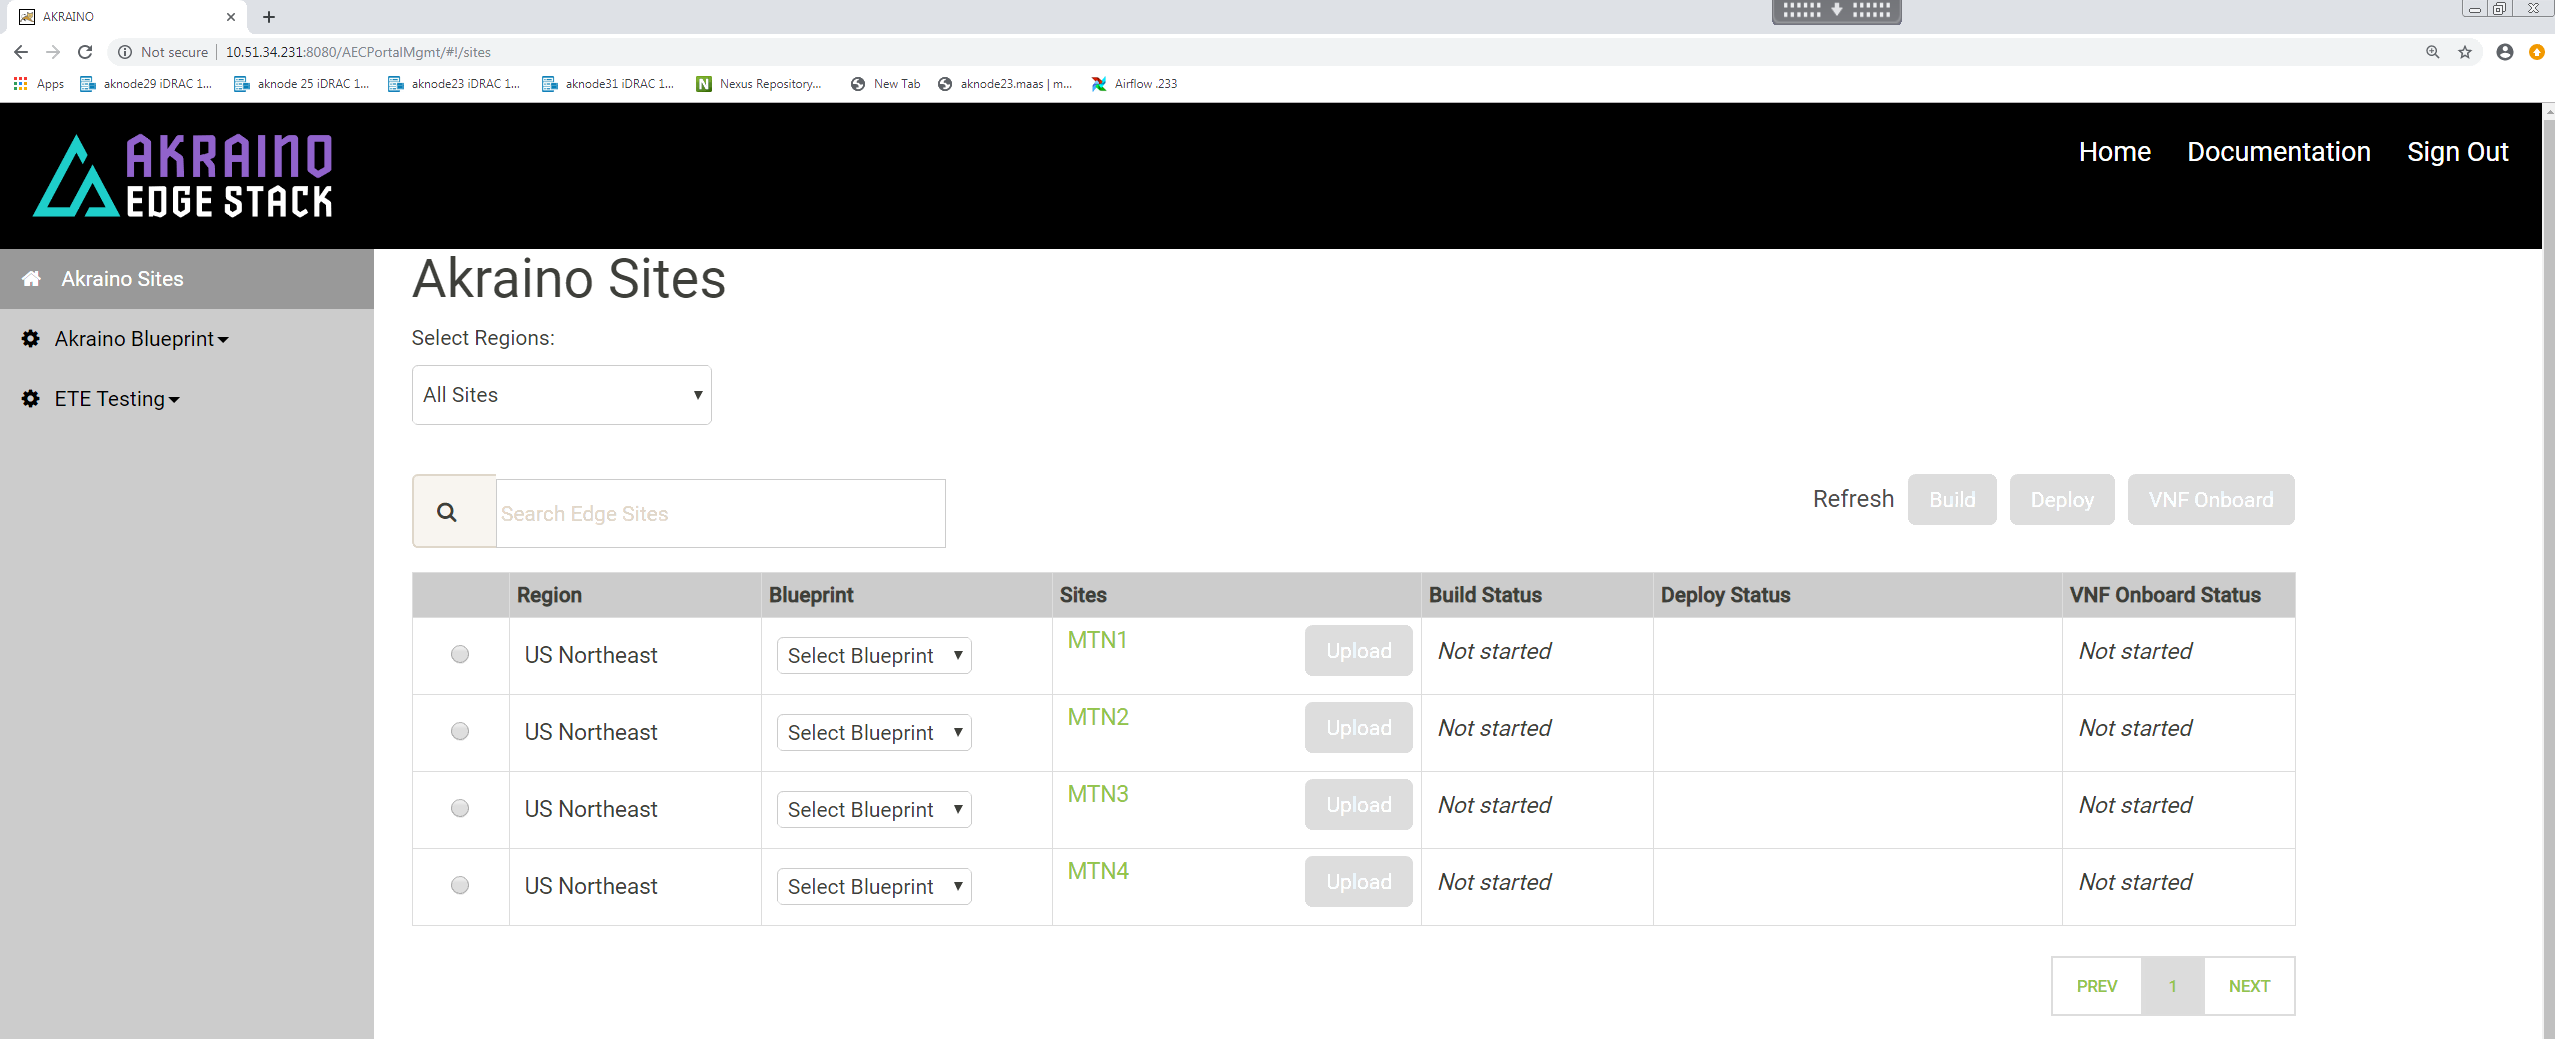
During the final stage of the installation a UI will have been installed on the newly deployed RC. This UI will be used to subsequently deploy all Rover and Unicycle pods to edge locations. The RC's portal can be opened in Chrome via the portal URL http://TARGET_SERVER_IP:8080/AECPortalMgmt/ where TARGET_SERVER_IP is the RC's 'host' IP address. Note: IE or Edge browsers may not currently work with this UI.
Use the following credentials:
- Username: akadmin
Parameter Summary
- Password: akraino
Upon successful login, the Akraino Portal home page will appear.
Parameter Naming
RC's iDRAC BMC address: OOB_SRV_IP
RC's 'host' network address : TARGET_SERVER_IP
RC's host name: NEW_RC_SRV_NAME
Regional Controller Region Specific Input File
This section includes an example input file similar to that used during Ericsson Validation testing to build a Regional Controller for the R1 release. Being region specific the enumerated values will differ for RCs in different regions. Full details of the relevant validation lab setup that should be referenced when looking at these files is contained in the Ericsson Validation Labs section of this documentation.
| Children Display | ||
|---|---|---|
|