This guide will show you how to run Akraino apps on TKE of Tencent Cloud.
Sign Up for An Account of Tencent Cloud
Go to https://intl.cloud.tencent.com, click Sign up.
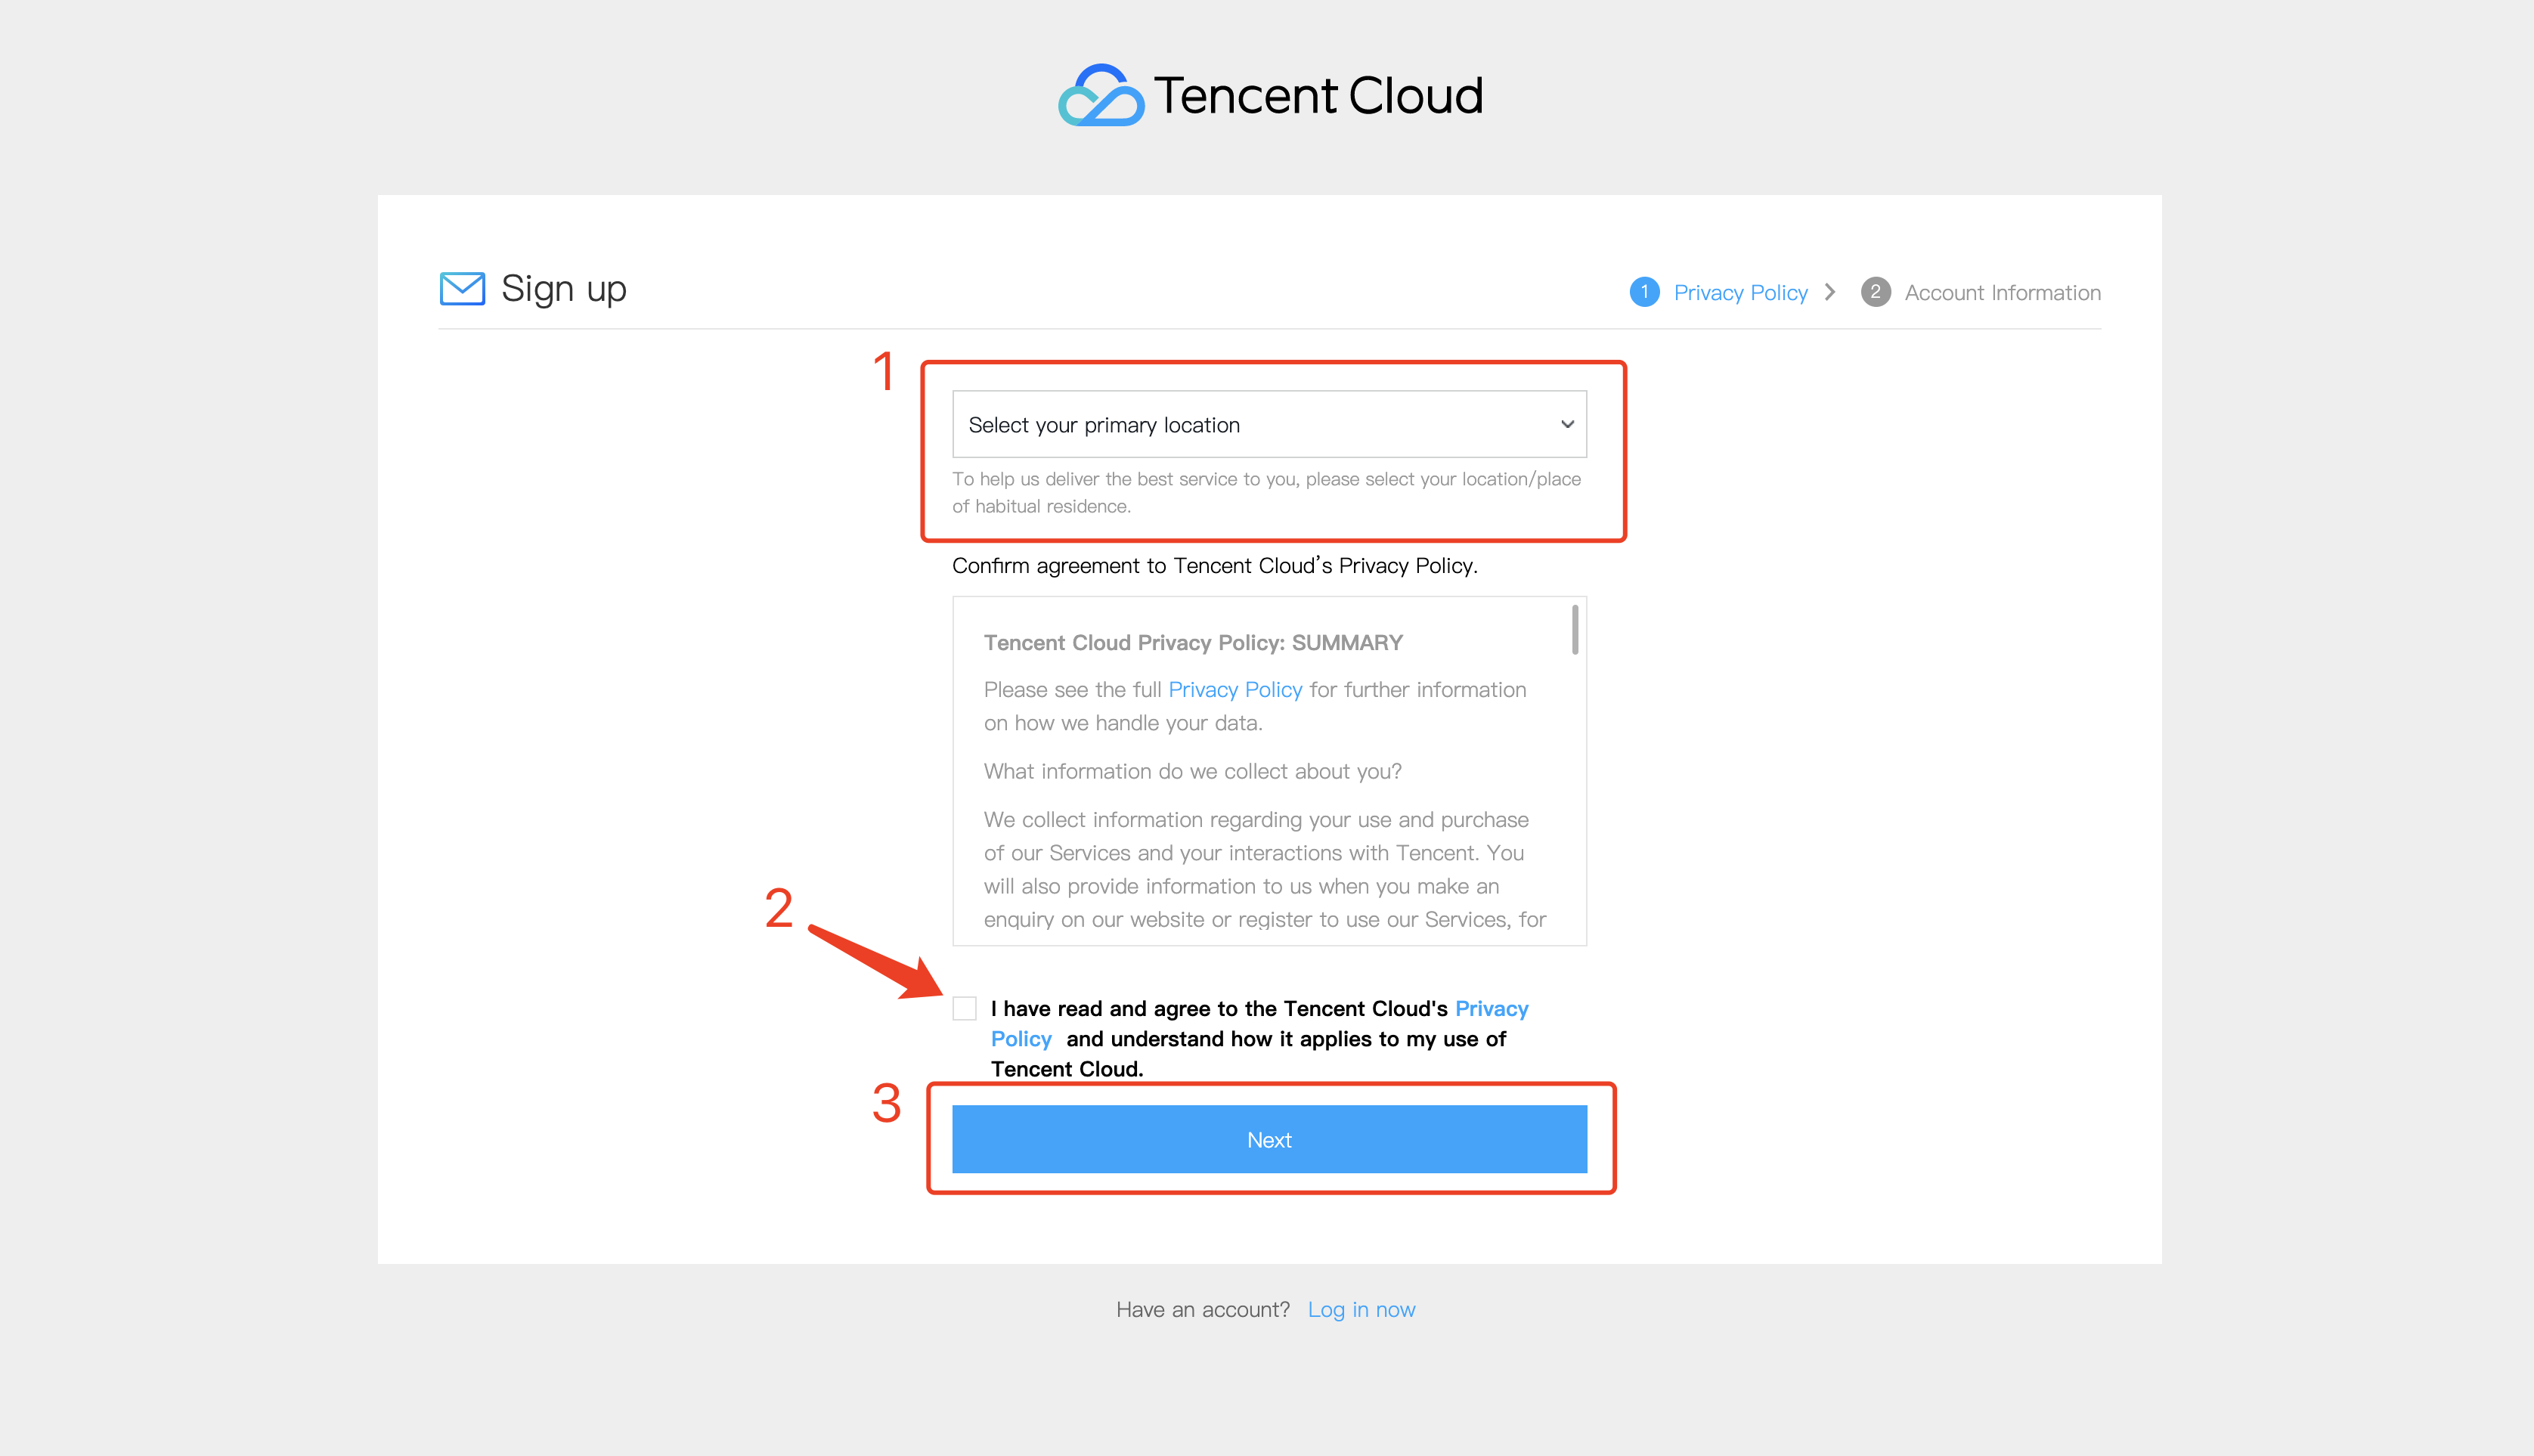
Select your location and click Next
Configure your email, password, and your phone number. And click Confirm to the agreement and submit to finish it.
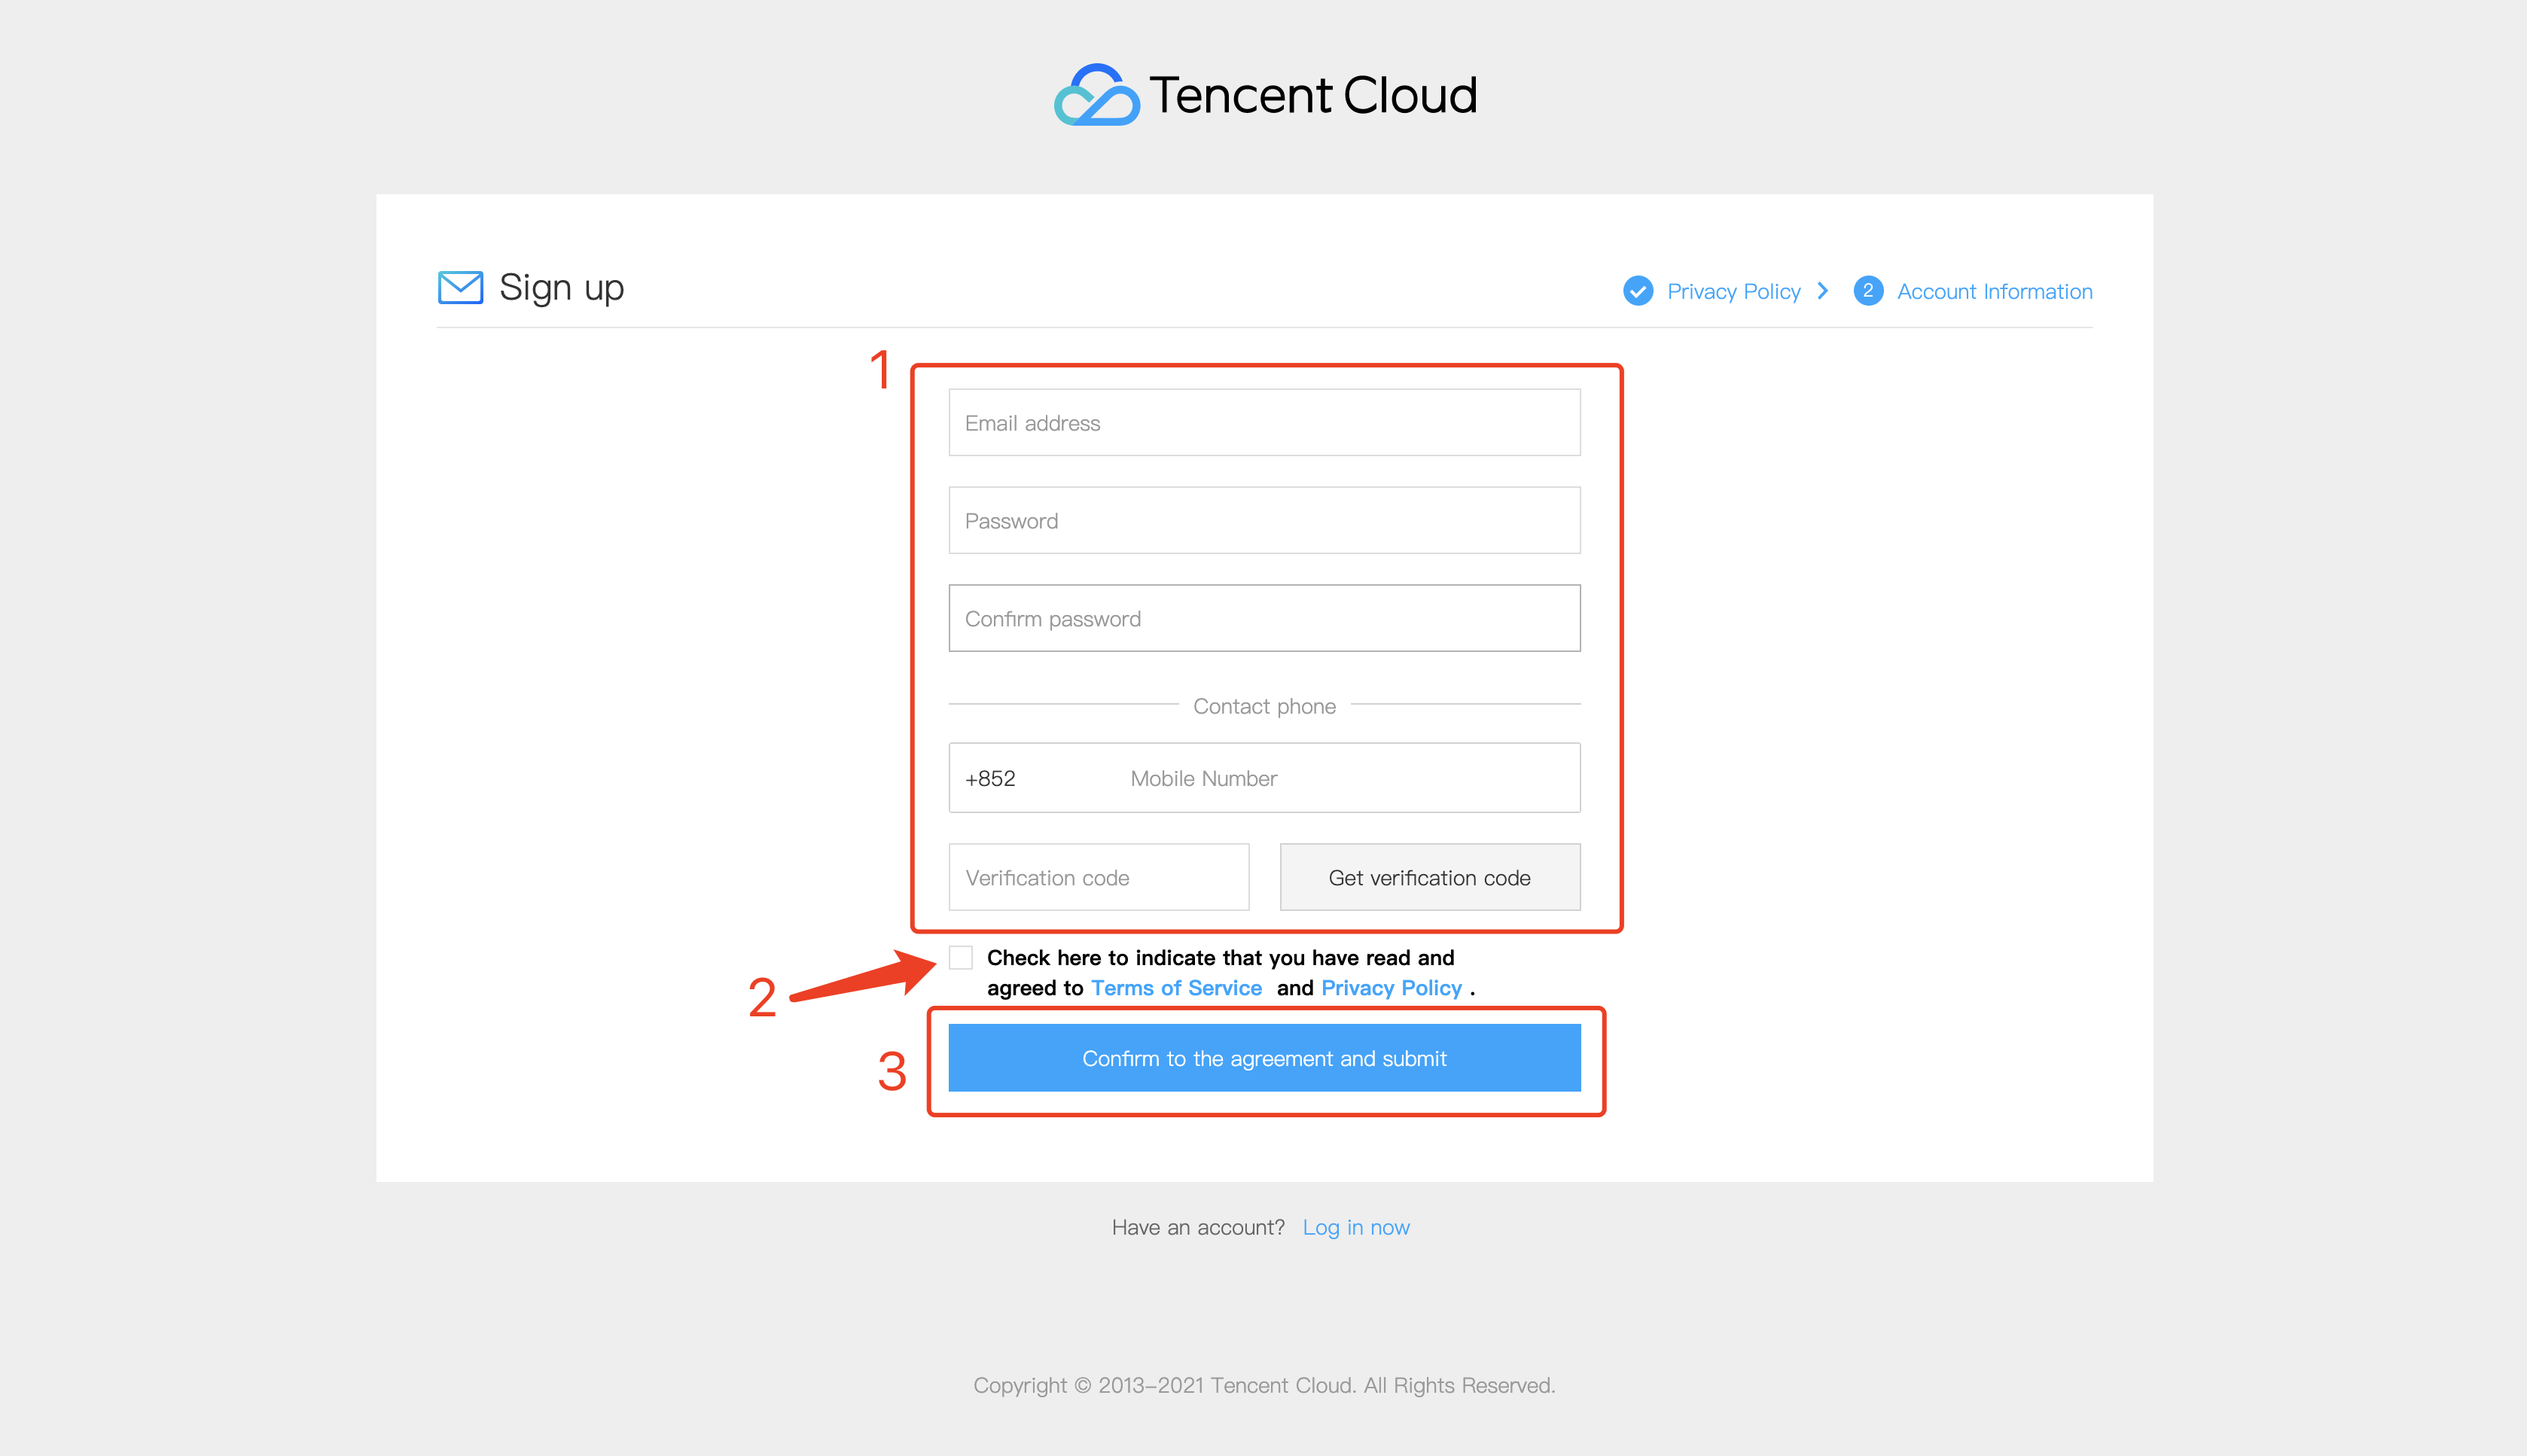
After that, you may receive an email to verify your account. You just need to follow the steps in the email.
Create a TKE Cluster
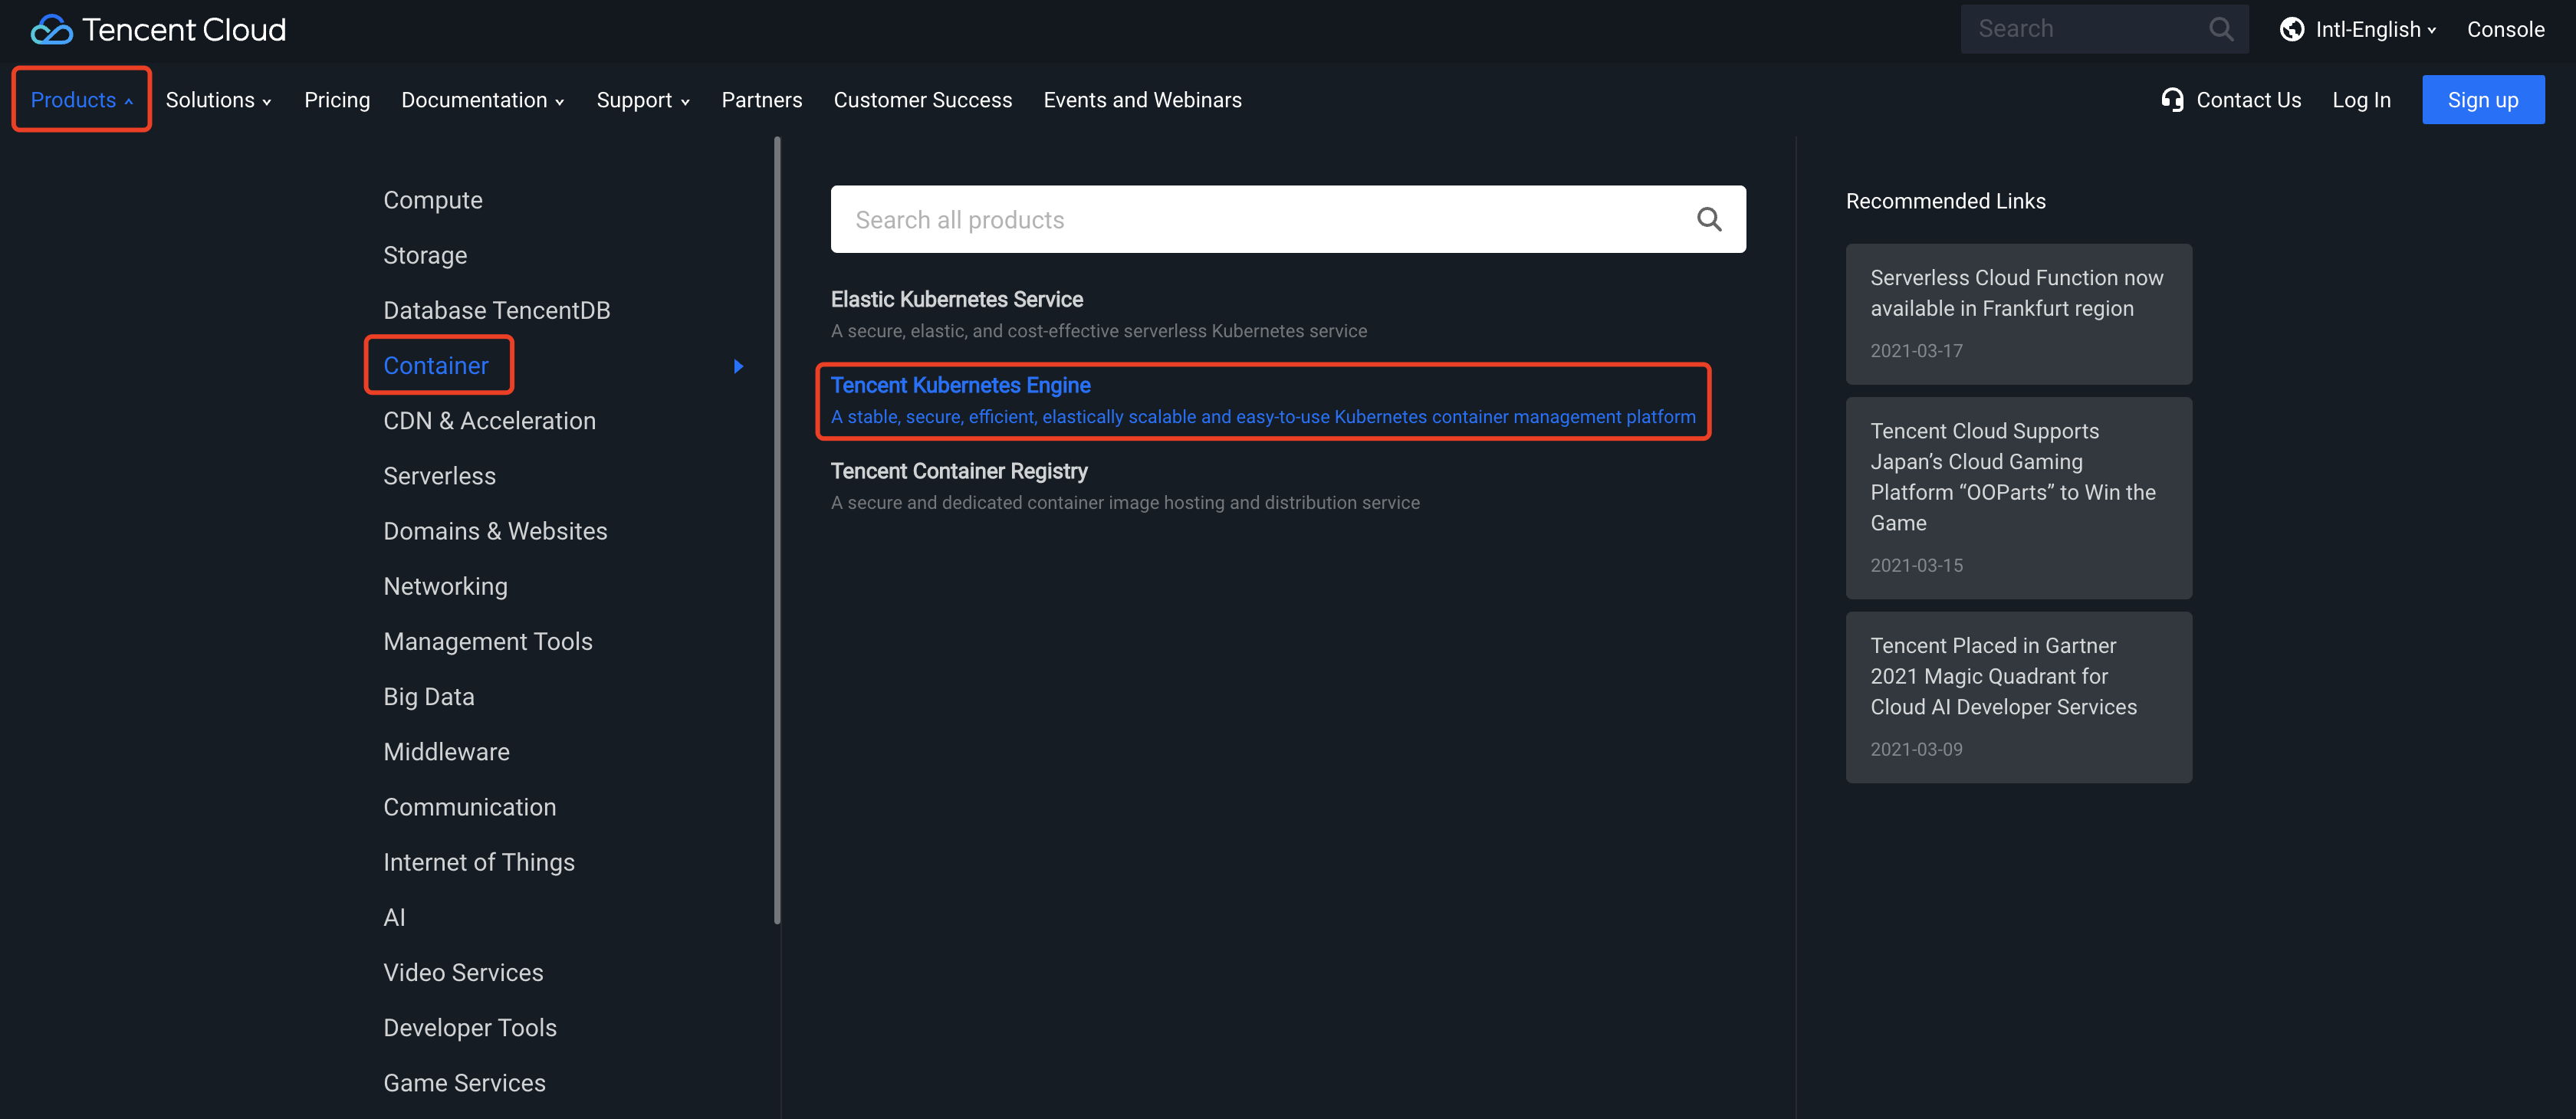
Go to the TKE (Tencent Kubernetes Engine) page.
Click New to create a cluster.

Configure your cluster name, location, and network. If you do not have a private network, you can click Create a new one now to create.

Select your billing model, node network, and machine model, and click Next step
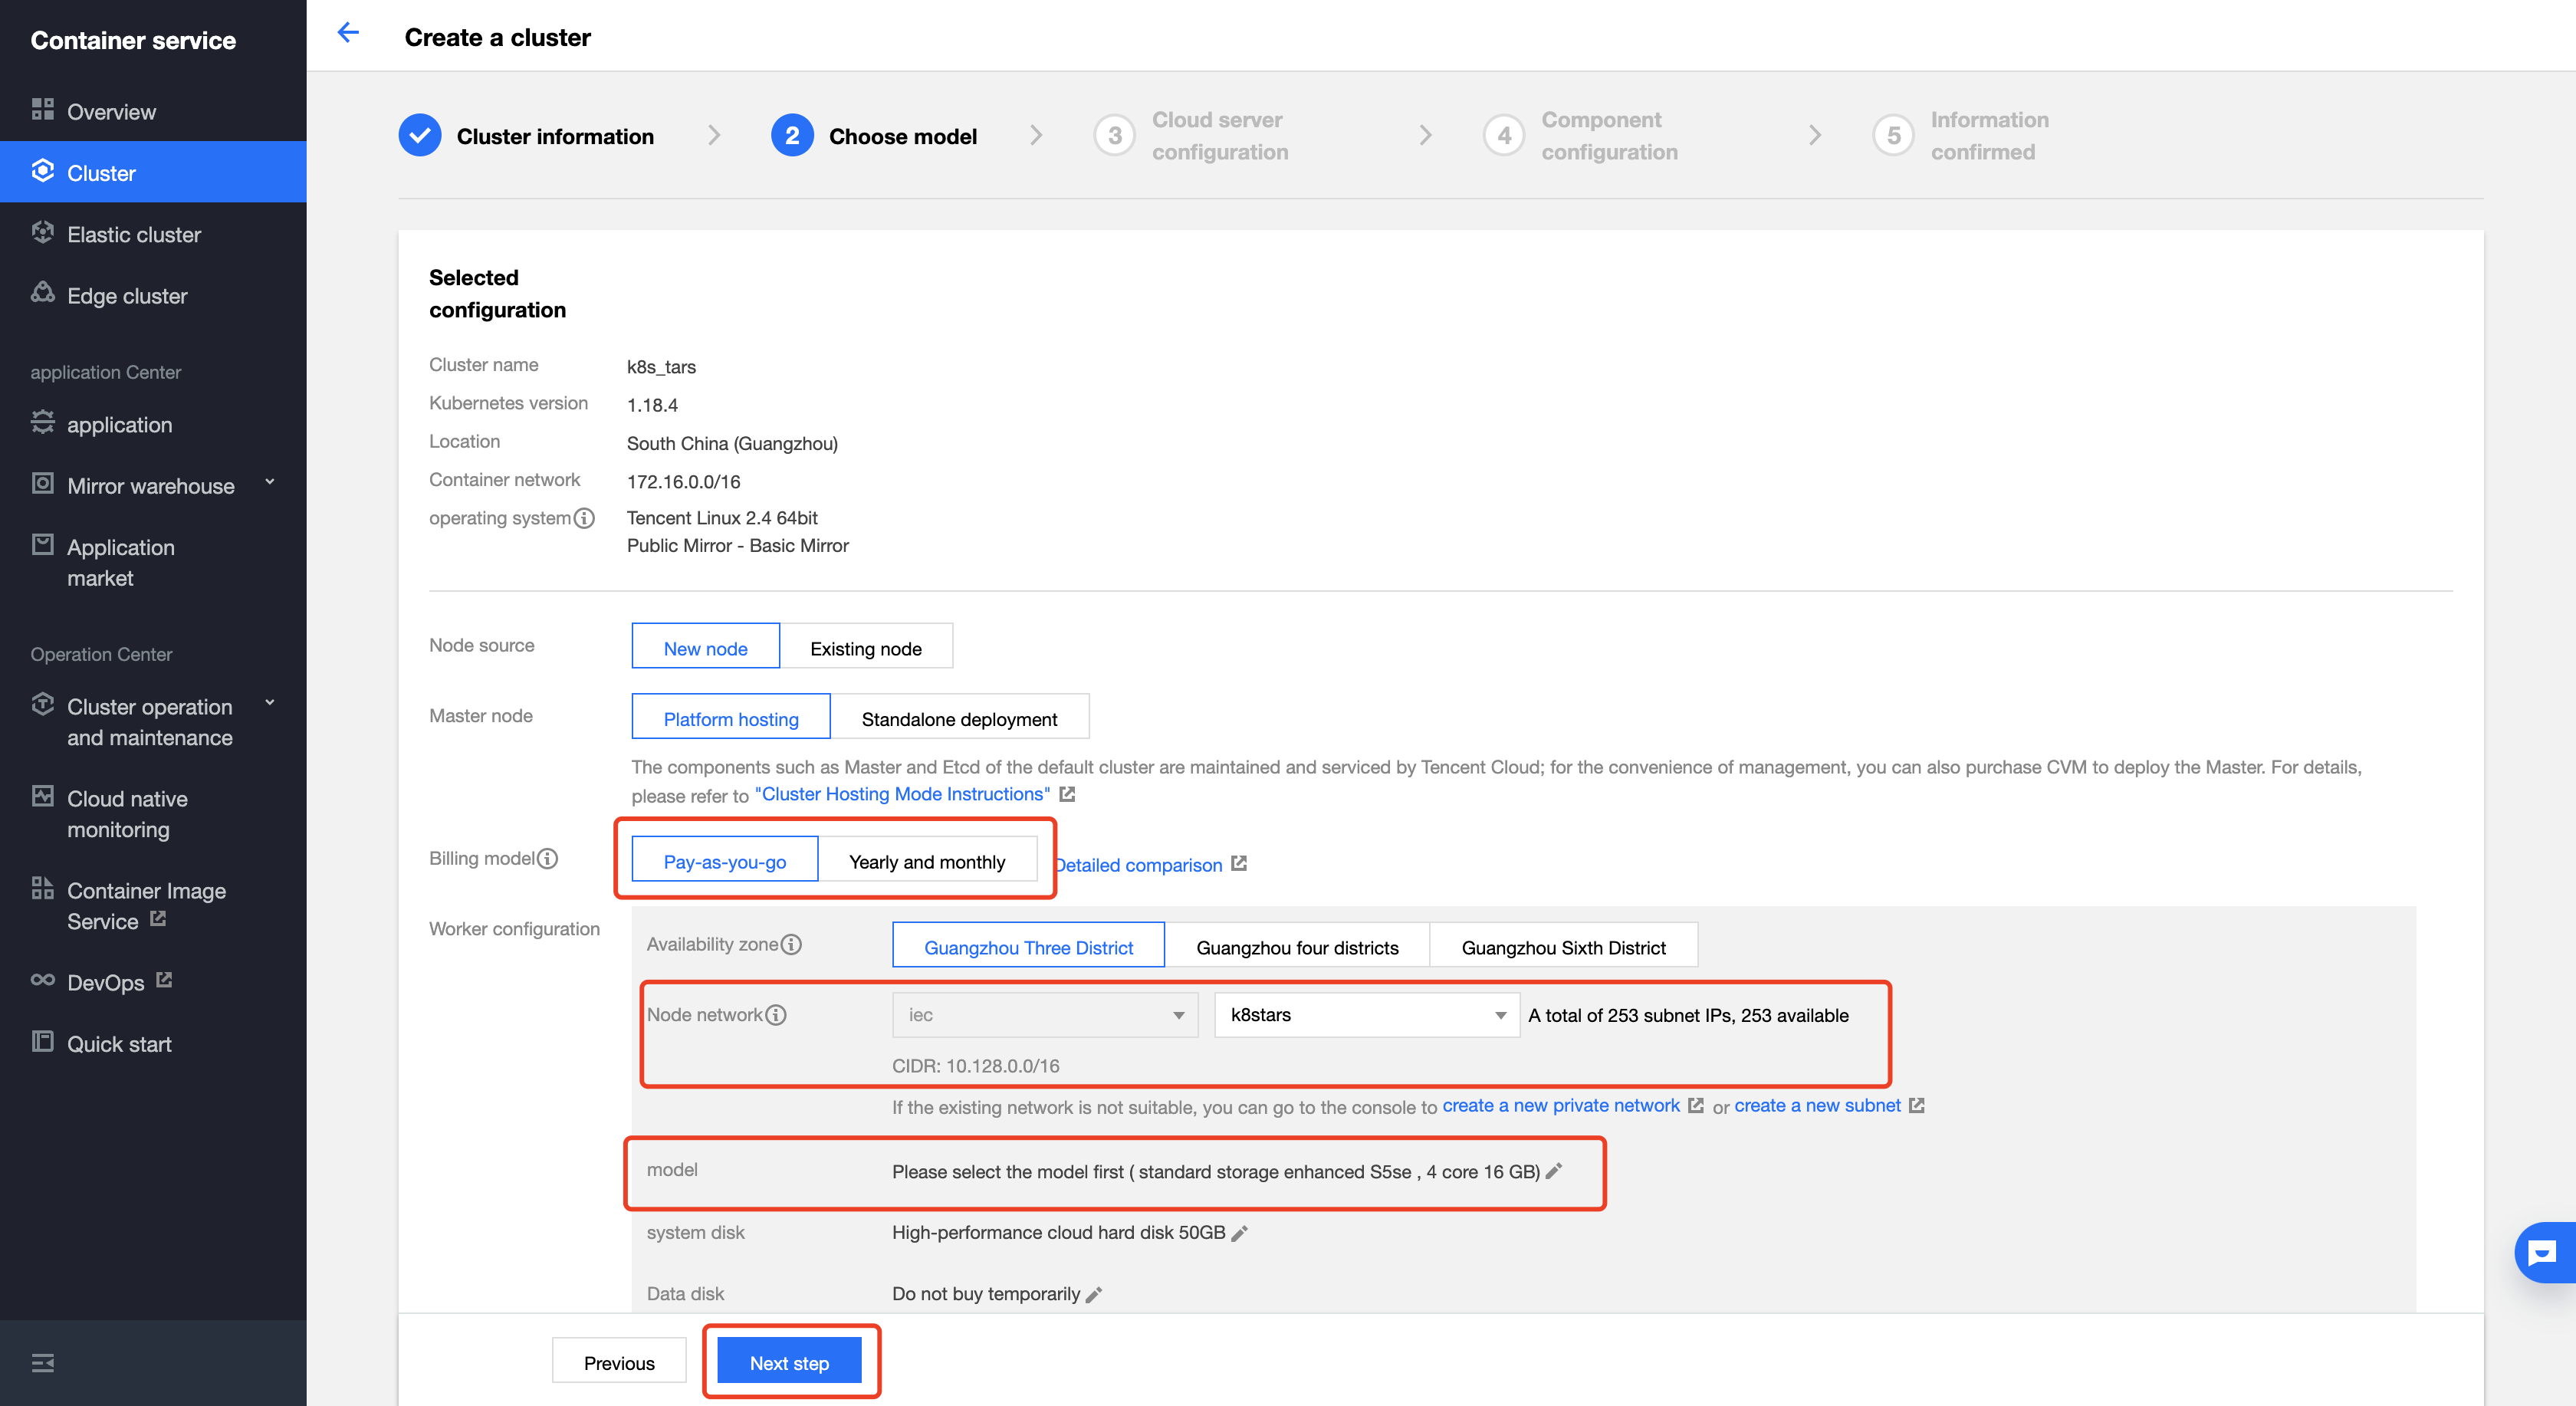
Select your login method. For example, we use the Associate key. You also can just set a password for your node.
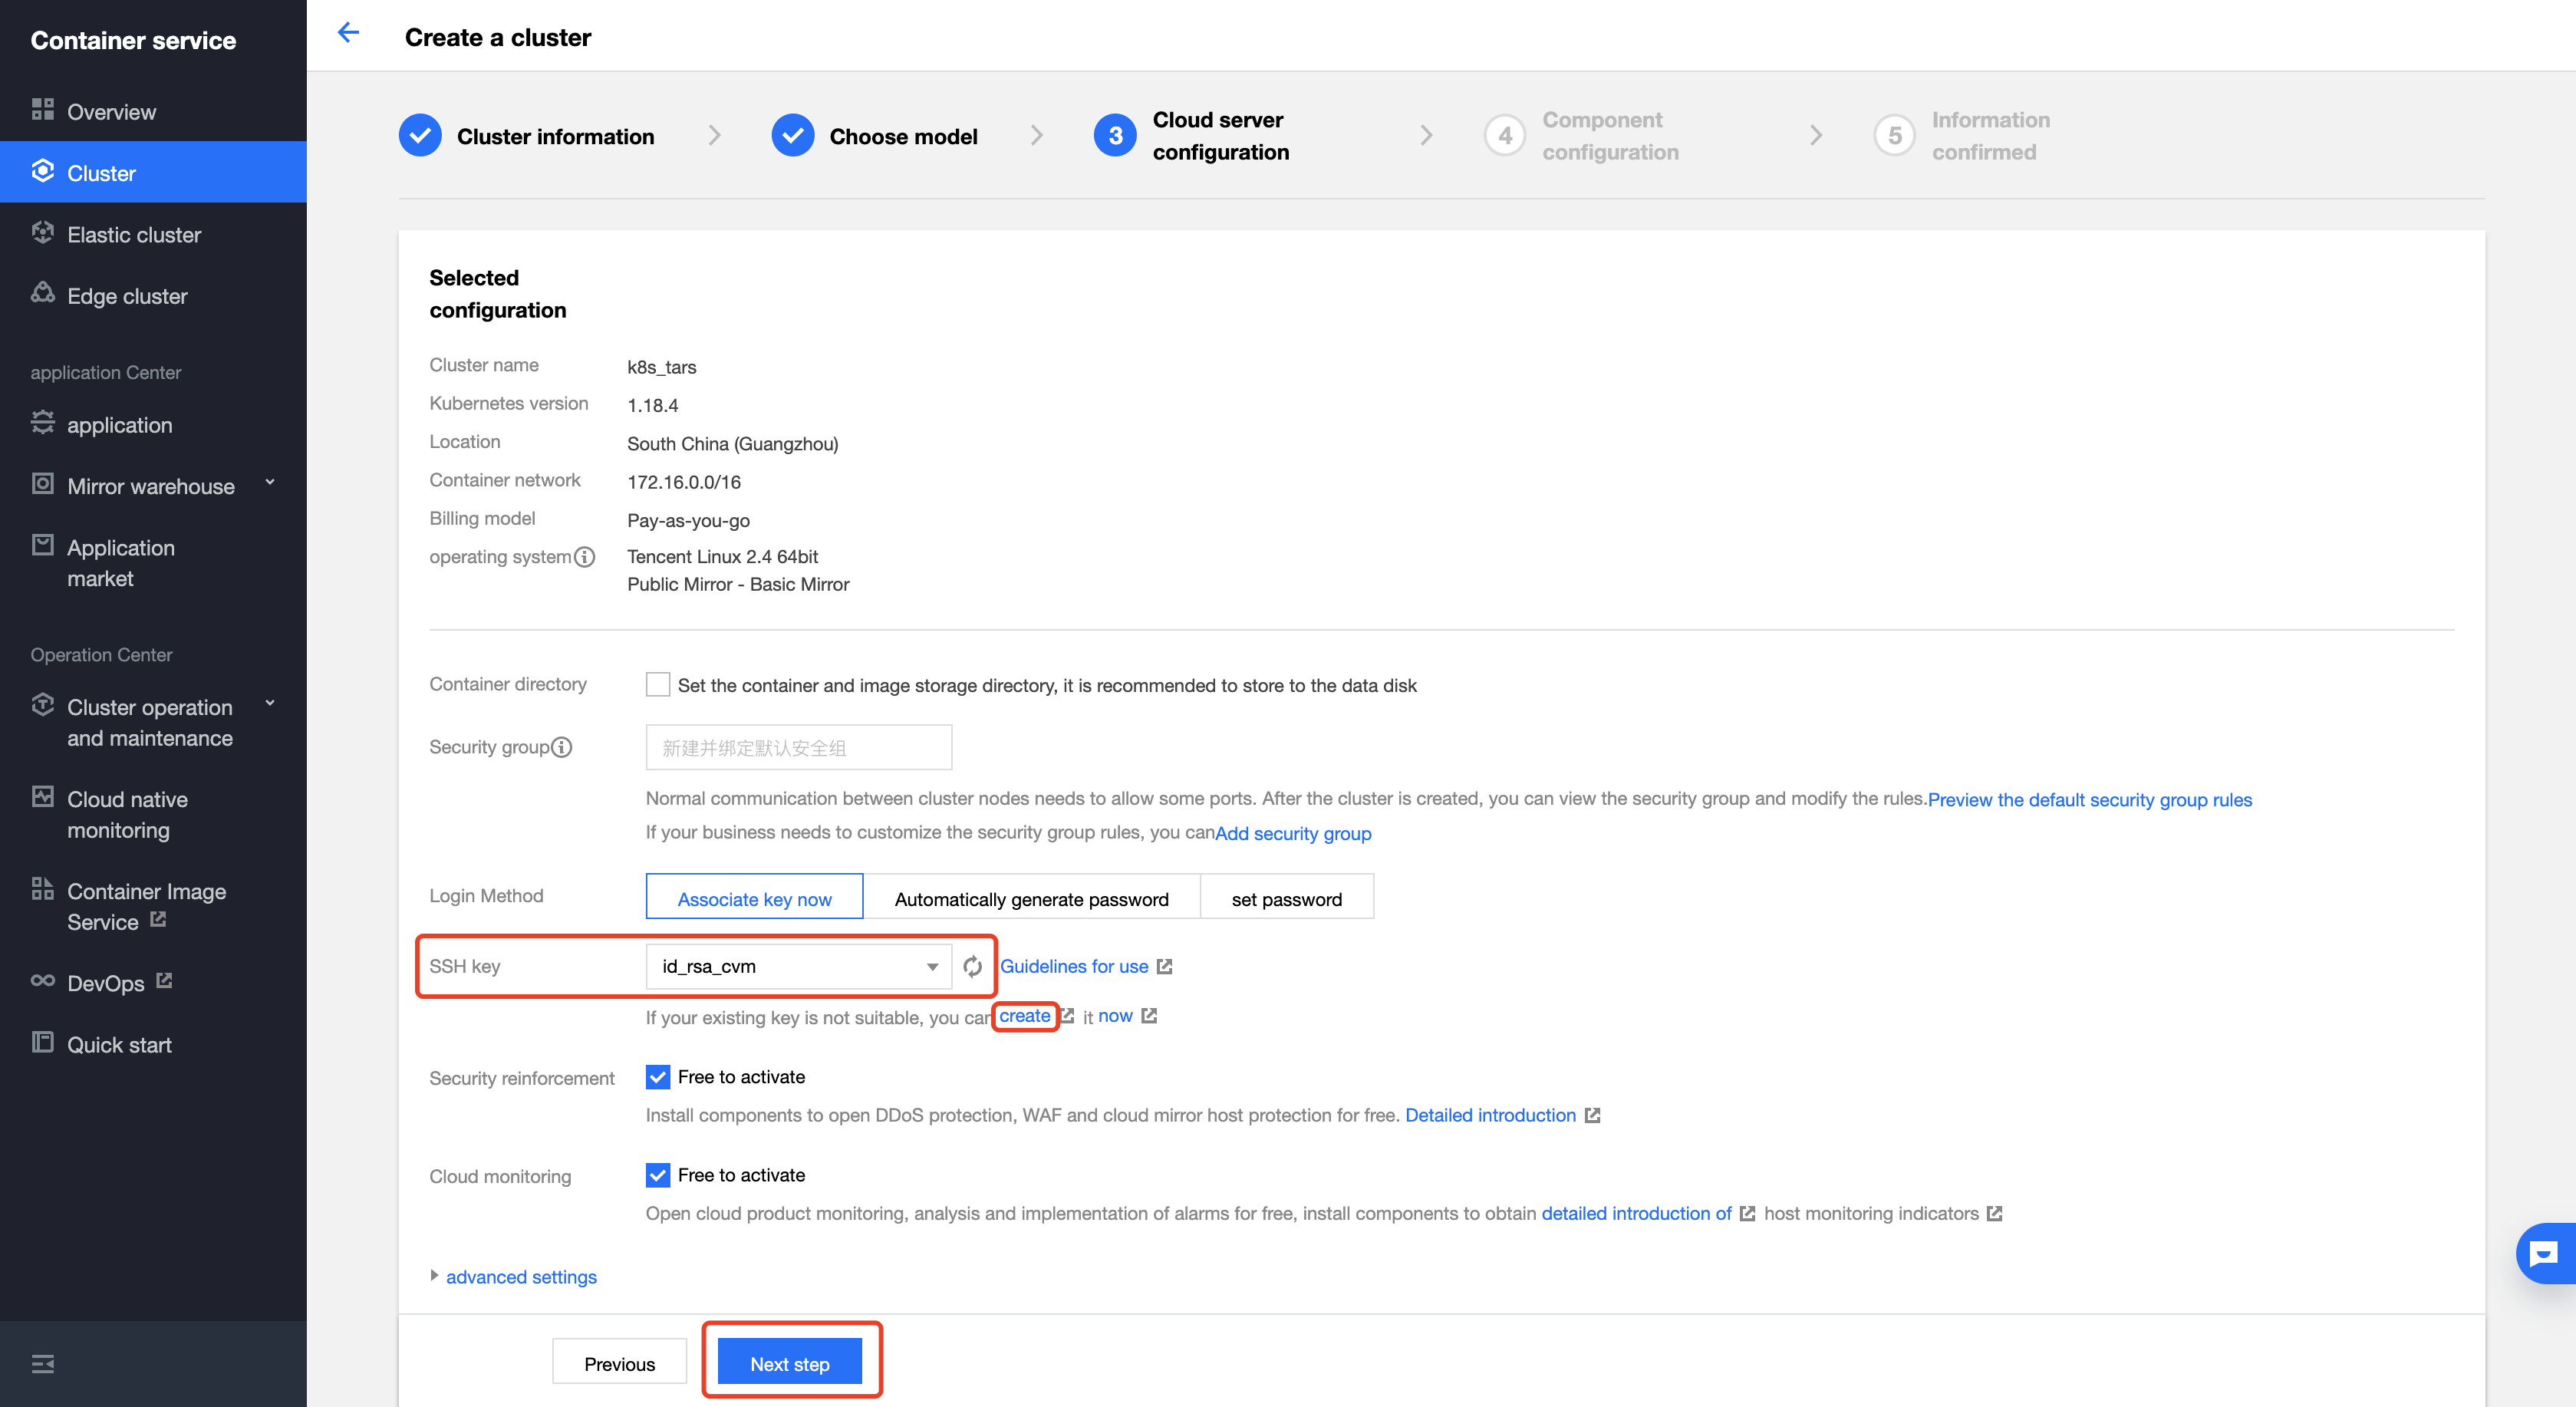
Configure the components of your node. You just need to choose the components you need to install.

After that, we will jump to the Information confirm page. Make sure you have enough balance in your account.
Install kubectl
In this part, we will introduce how to install kubectl on Linux.
For other operating system, refer to https://kubernetes.io/docs/tasks/tools
Install kubectl binary with curl on Linux
Download the latest release with the command:
curl -LO "https://dl.k8s.io/release/$(curl -L -s https://dl.k8s.io/release/stable.txt)/b in/linux/amd64/kubectl"
Install kubectl
sudo install -o root -g root -m 0755 kubectl /usr/local/bin/kubectl
Note: If you do not have root access on the target system, you can still install kubectl to the ~/.local/bin directory:
mkdir -p ~/.local/bin/kubectl
mv ./kubectl ~/.local/bin/kubectl
# and then add ~/.local/bin/kubectl to $PATH
Test to ensure the version you installed is up-to-date:
kubectl version --client
Install using native package management
Debian-based distributions
Update the apt package index and install packages needed to use the Kubernetes apt repository:
sudo apt-get update
sudo apt-get install -y apt-transport-https ca-certificates curl
Download the Google Cloud public signing key:
sudo curl -fsSLo /usr/share/keyrings/kubernetes-archive-keyring.gpg https://packages.cloud.google.com/apt/doc/apt-key.gpg
Add the Kubernetes apt repository:
echo "deb [signed-by=/usr/share/keyrings/kubernetes-archive-keyring.gpg] https://apt.kubernetes.io/ kubernetes-xenial main" | sudo tee /etc/apt/sources.list.d/kubernetes.list
Update apt package index with the new repository and install kubectl:
sudo apt-get update
sudo apt-get install -y kubectl
Red Hat-based distributions
cat <<EOF > /etc/yum.repos.d/kubernetes.repo
[kubernetes]
name=Kubernetes
baseurl=https://packages.cloud.google.com/yum/repos/kubernetes-el7-x86_64
enabled=1
gpgcheck=1
repo_gpgcheck=1
gpgkey=https://packages.cloud.google.com/yum/doc/yum-key.gpg https://packages.cloud.google.com/yum/doc/rpm-package-key.gpg
EOF
yum install -y kubectl
Connect To TKE Cluster
Open APIServer of your Cluster
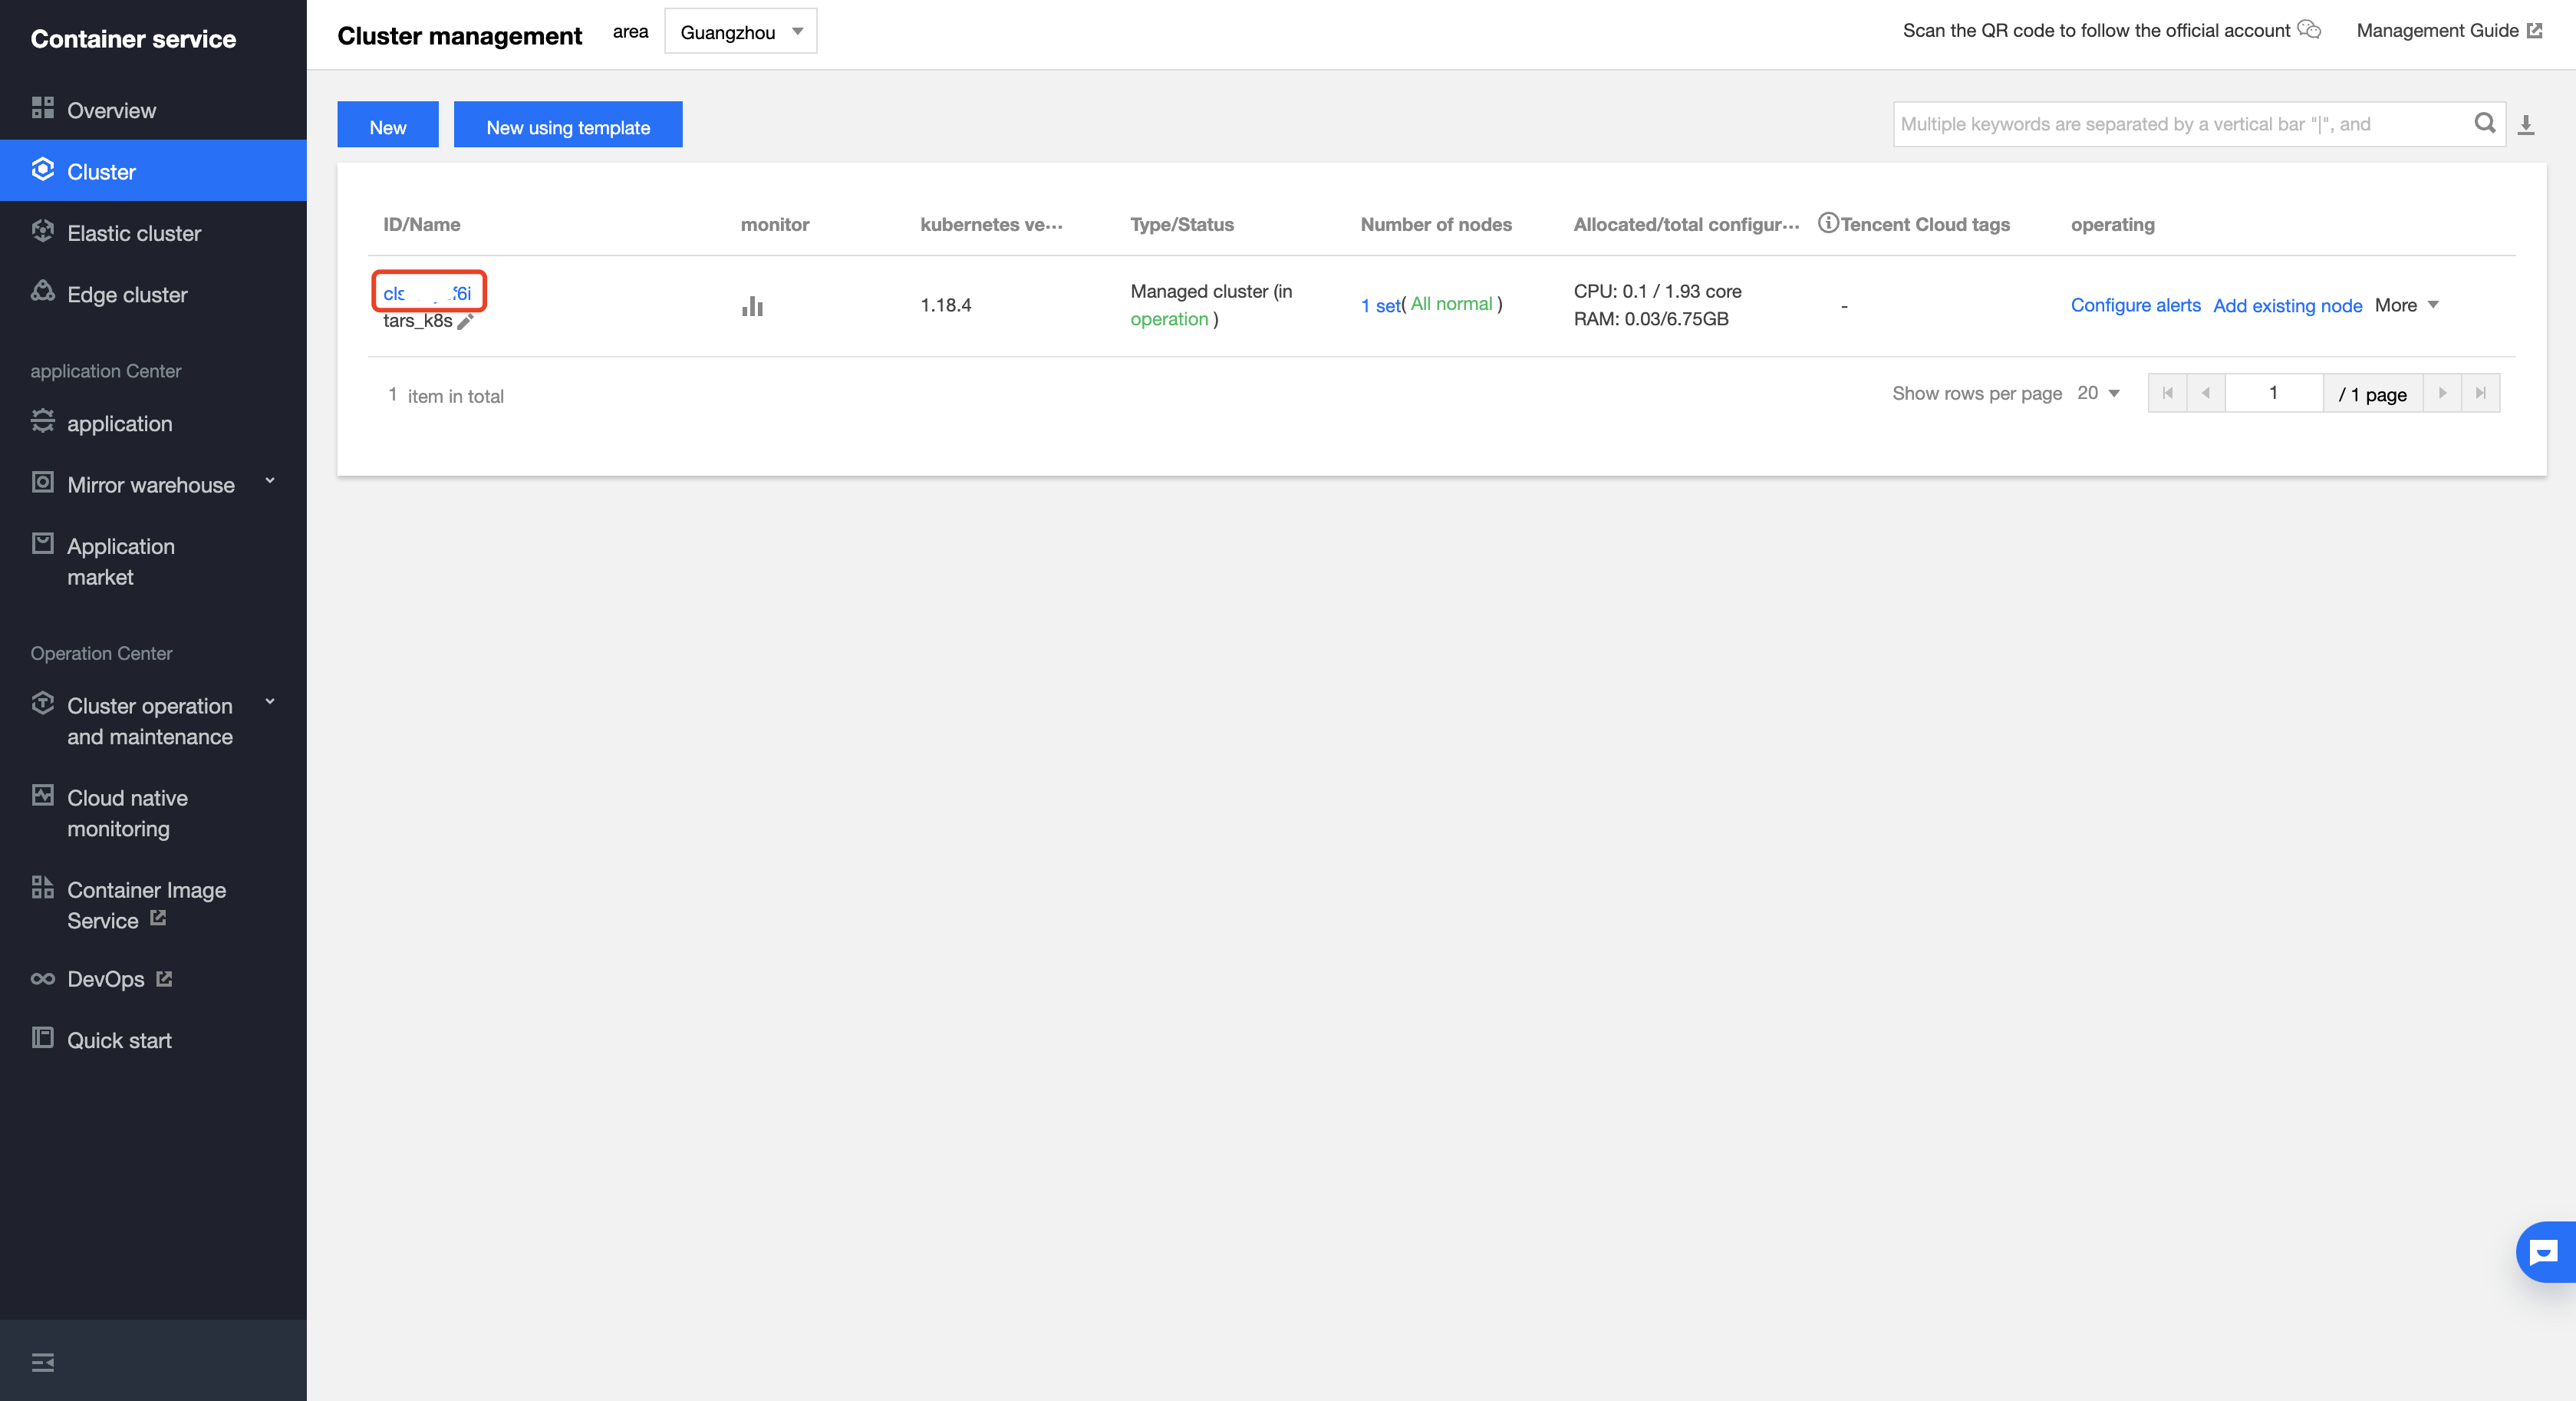
On the page of cluster management, click the name of your cluster to jump to the information page of your cluster.
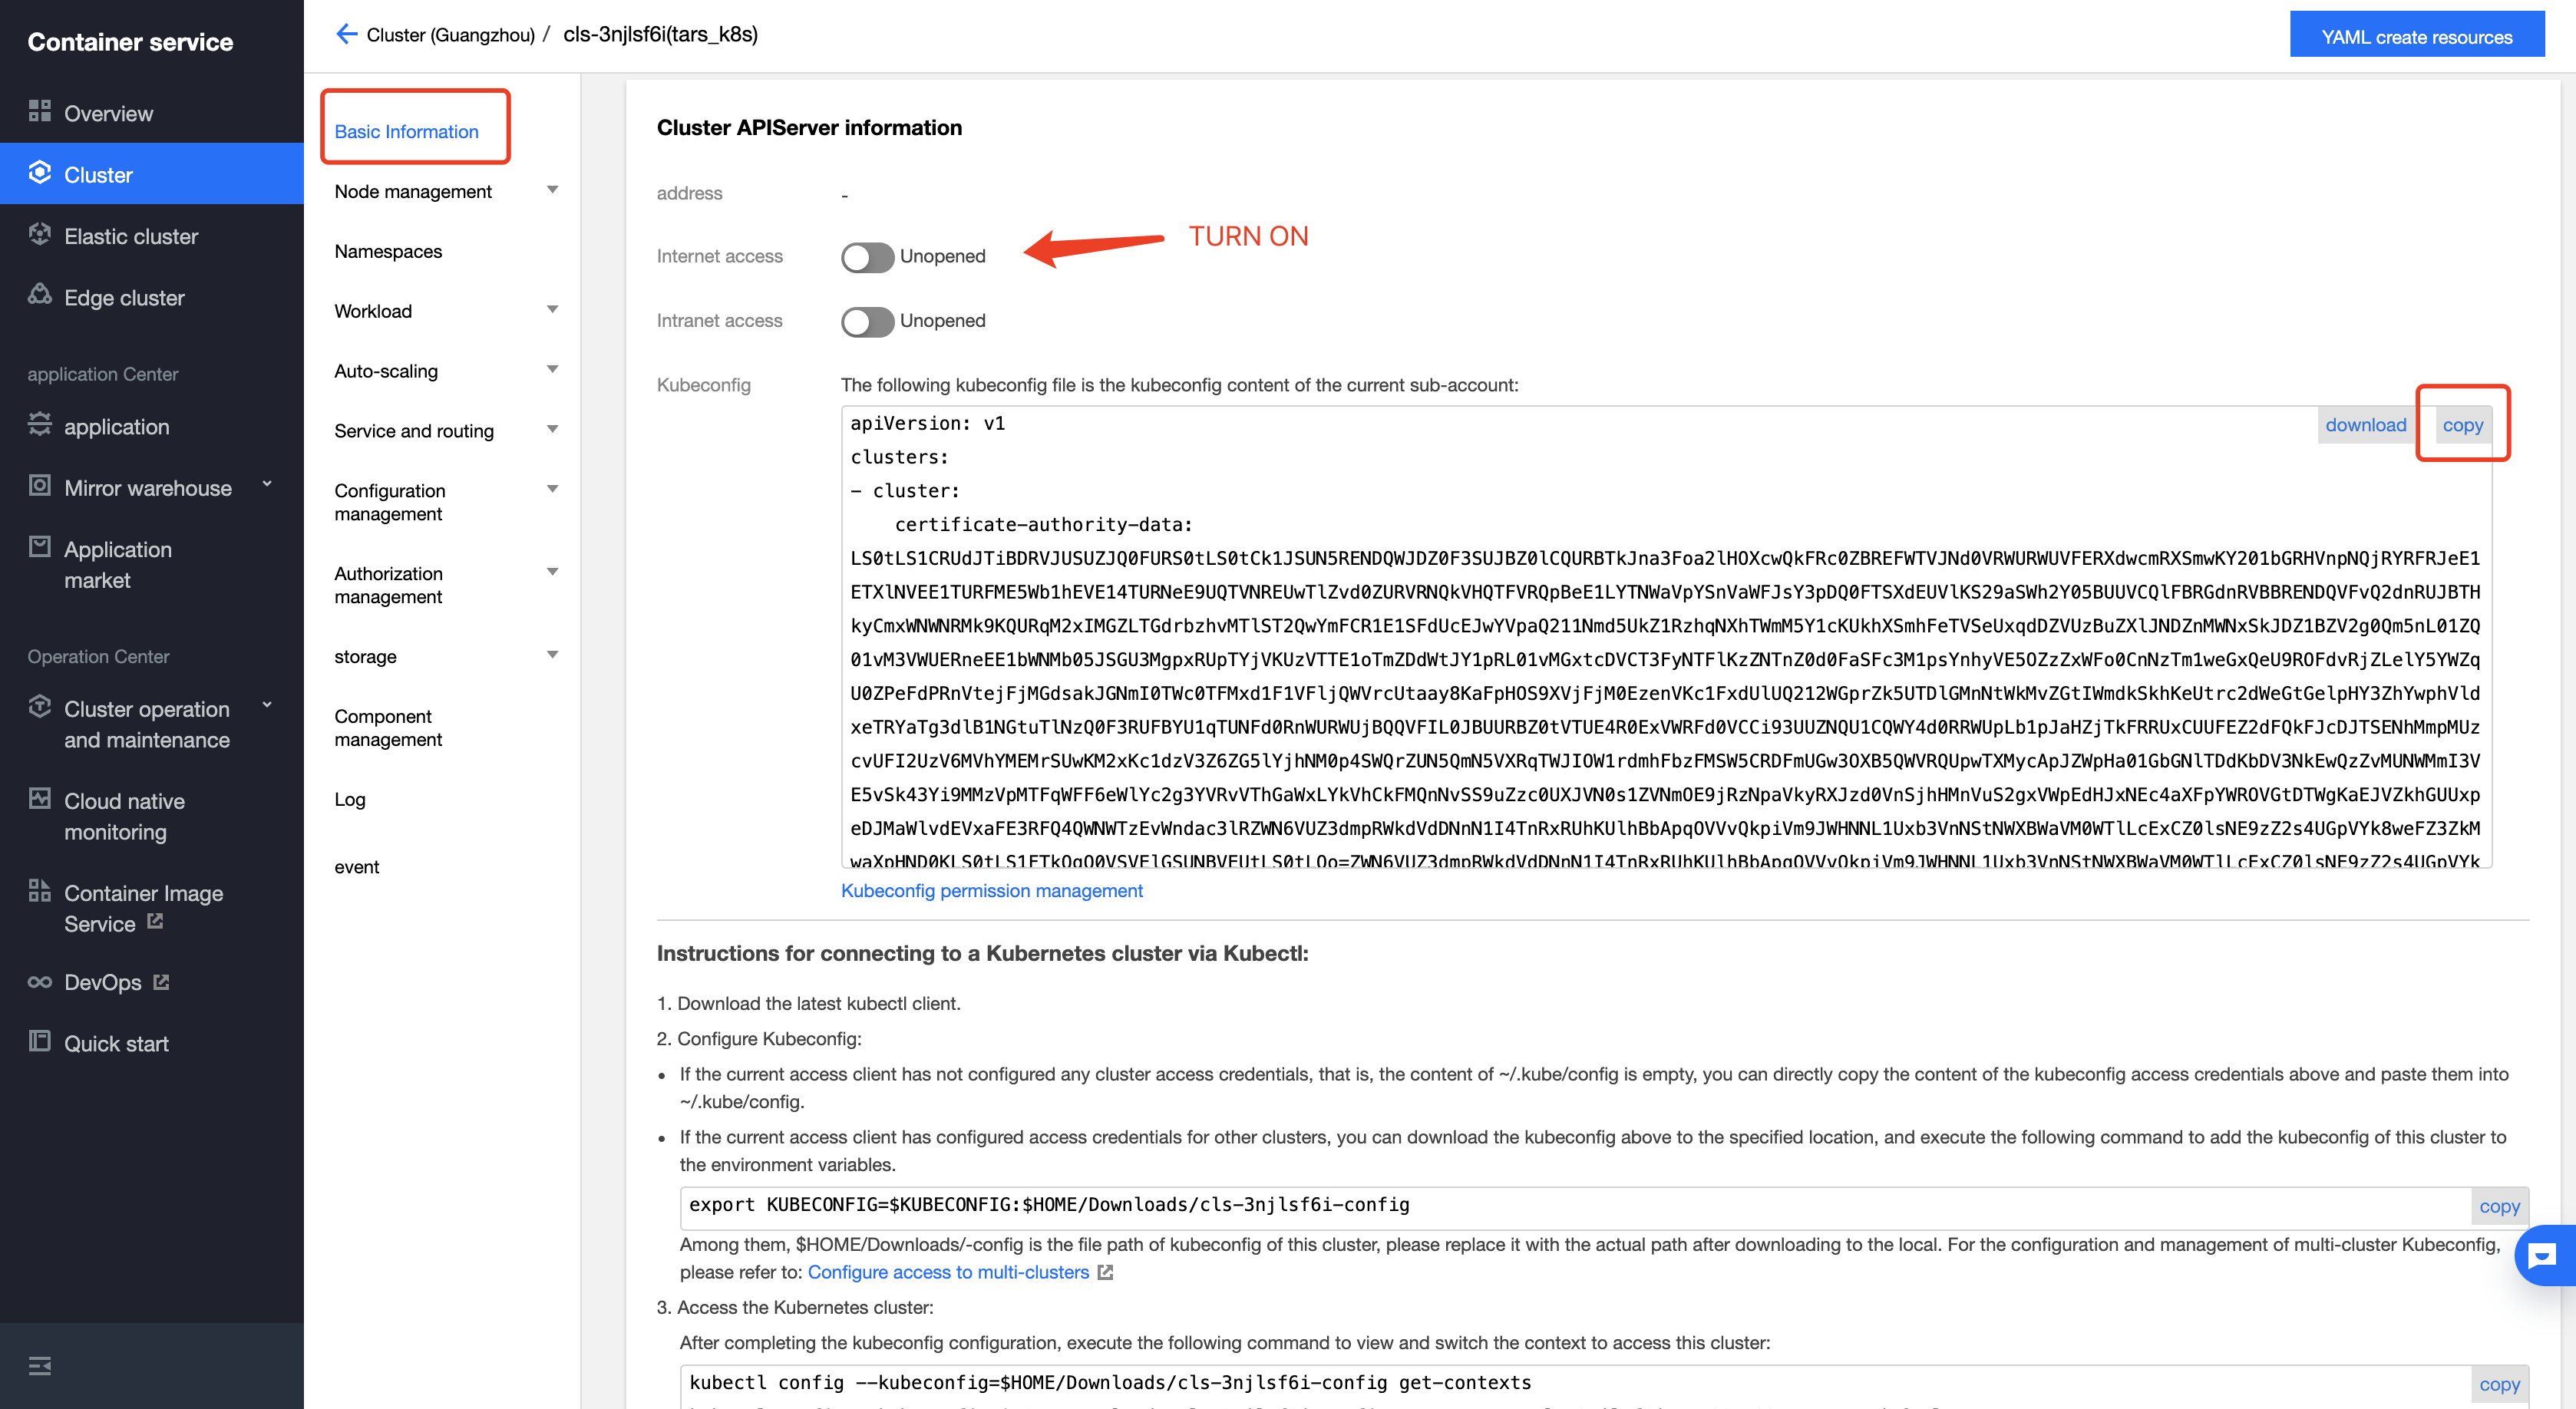
At Basic Information > Cluster APIServer Information, turn on Internet access and copy the Kubeconfig.
Add IP or CIDR of your client machine, witch you just install tool kubectl.
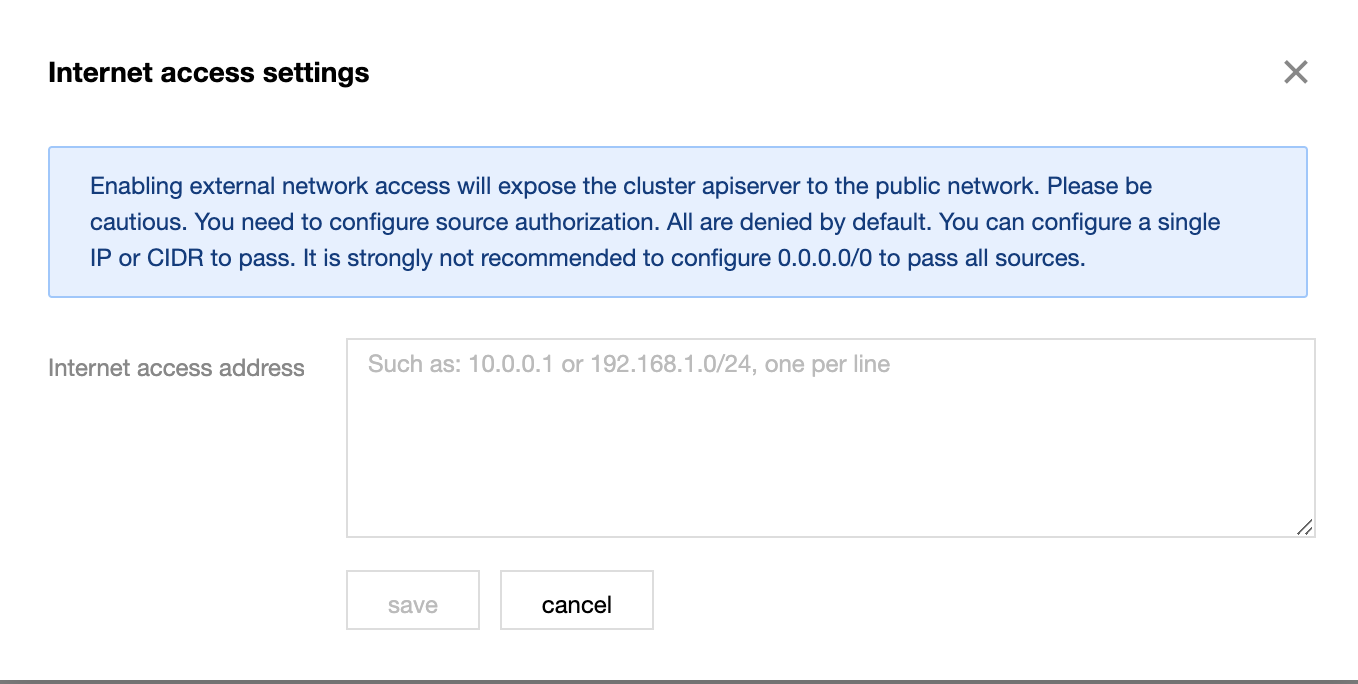
Click save to finish.
Configure Kubeconfig
vim ~/.kube/config
Paste the kubecofnig content of your cluster you just copied and save.
Execute the command on the dashboard of your cluster to switch the context to access your cluster.
For example
kubectl config --kubeconfig=/root/.kube/config get-contexts
kubectl config --kubeconfig=/root/.kube/config use-context xxxxx-context-default
Specially, xxxxx-context-default base on your cluster name. You can find it on the dashboard.Check Connection
kubectl get node
Install IEC Type 4 ARVR Blueprint - Virtual Classroom
Install TARS
Run the following command to install TARS on your cluster.
git clone https://github.com/TarsCloud/K8STARS

# Create namespace tars-system
kubectl create namespace tars-system

# Set up default namespace
kubectl config set-context --current --namespace=tars-system

# Build deploy files
cd K8STARS/baseserver
make deploy

# Create a mysql service
kubectl apply -f yaml/db_all_in_one.yaml

# Check pods status
kubectl get pods

# Get db_pod name
export db_pod=$(kubectl get pod -l  app=tars-db-all-in-one -o jsonpath='{.items[0].metadata.name}')

# Install db
sh db/install_db_k8s.sh

# Install node registry
kubectl apply -f yaml/registry.yaml

# Install tarsweb
kubectl apply -f yaml/tarsweb.yaml

# Install other nodes
kubectl apply -f yaml/tarsnotify.yaml
kubectl apply -f yaml/tarslog.yaml
kubectl apply -f yaml/tarsconfig.yaml
kubectl apply -f yaml/tarsproperty.yaml
kubectl apply -f yaml/tarsstat.yaml
kubectl apply -f yaml/tarsquerystat.yaml
kubectl apply -f yaml/tarsqueryproperty.yaml
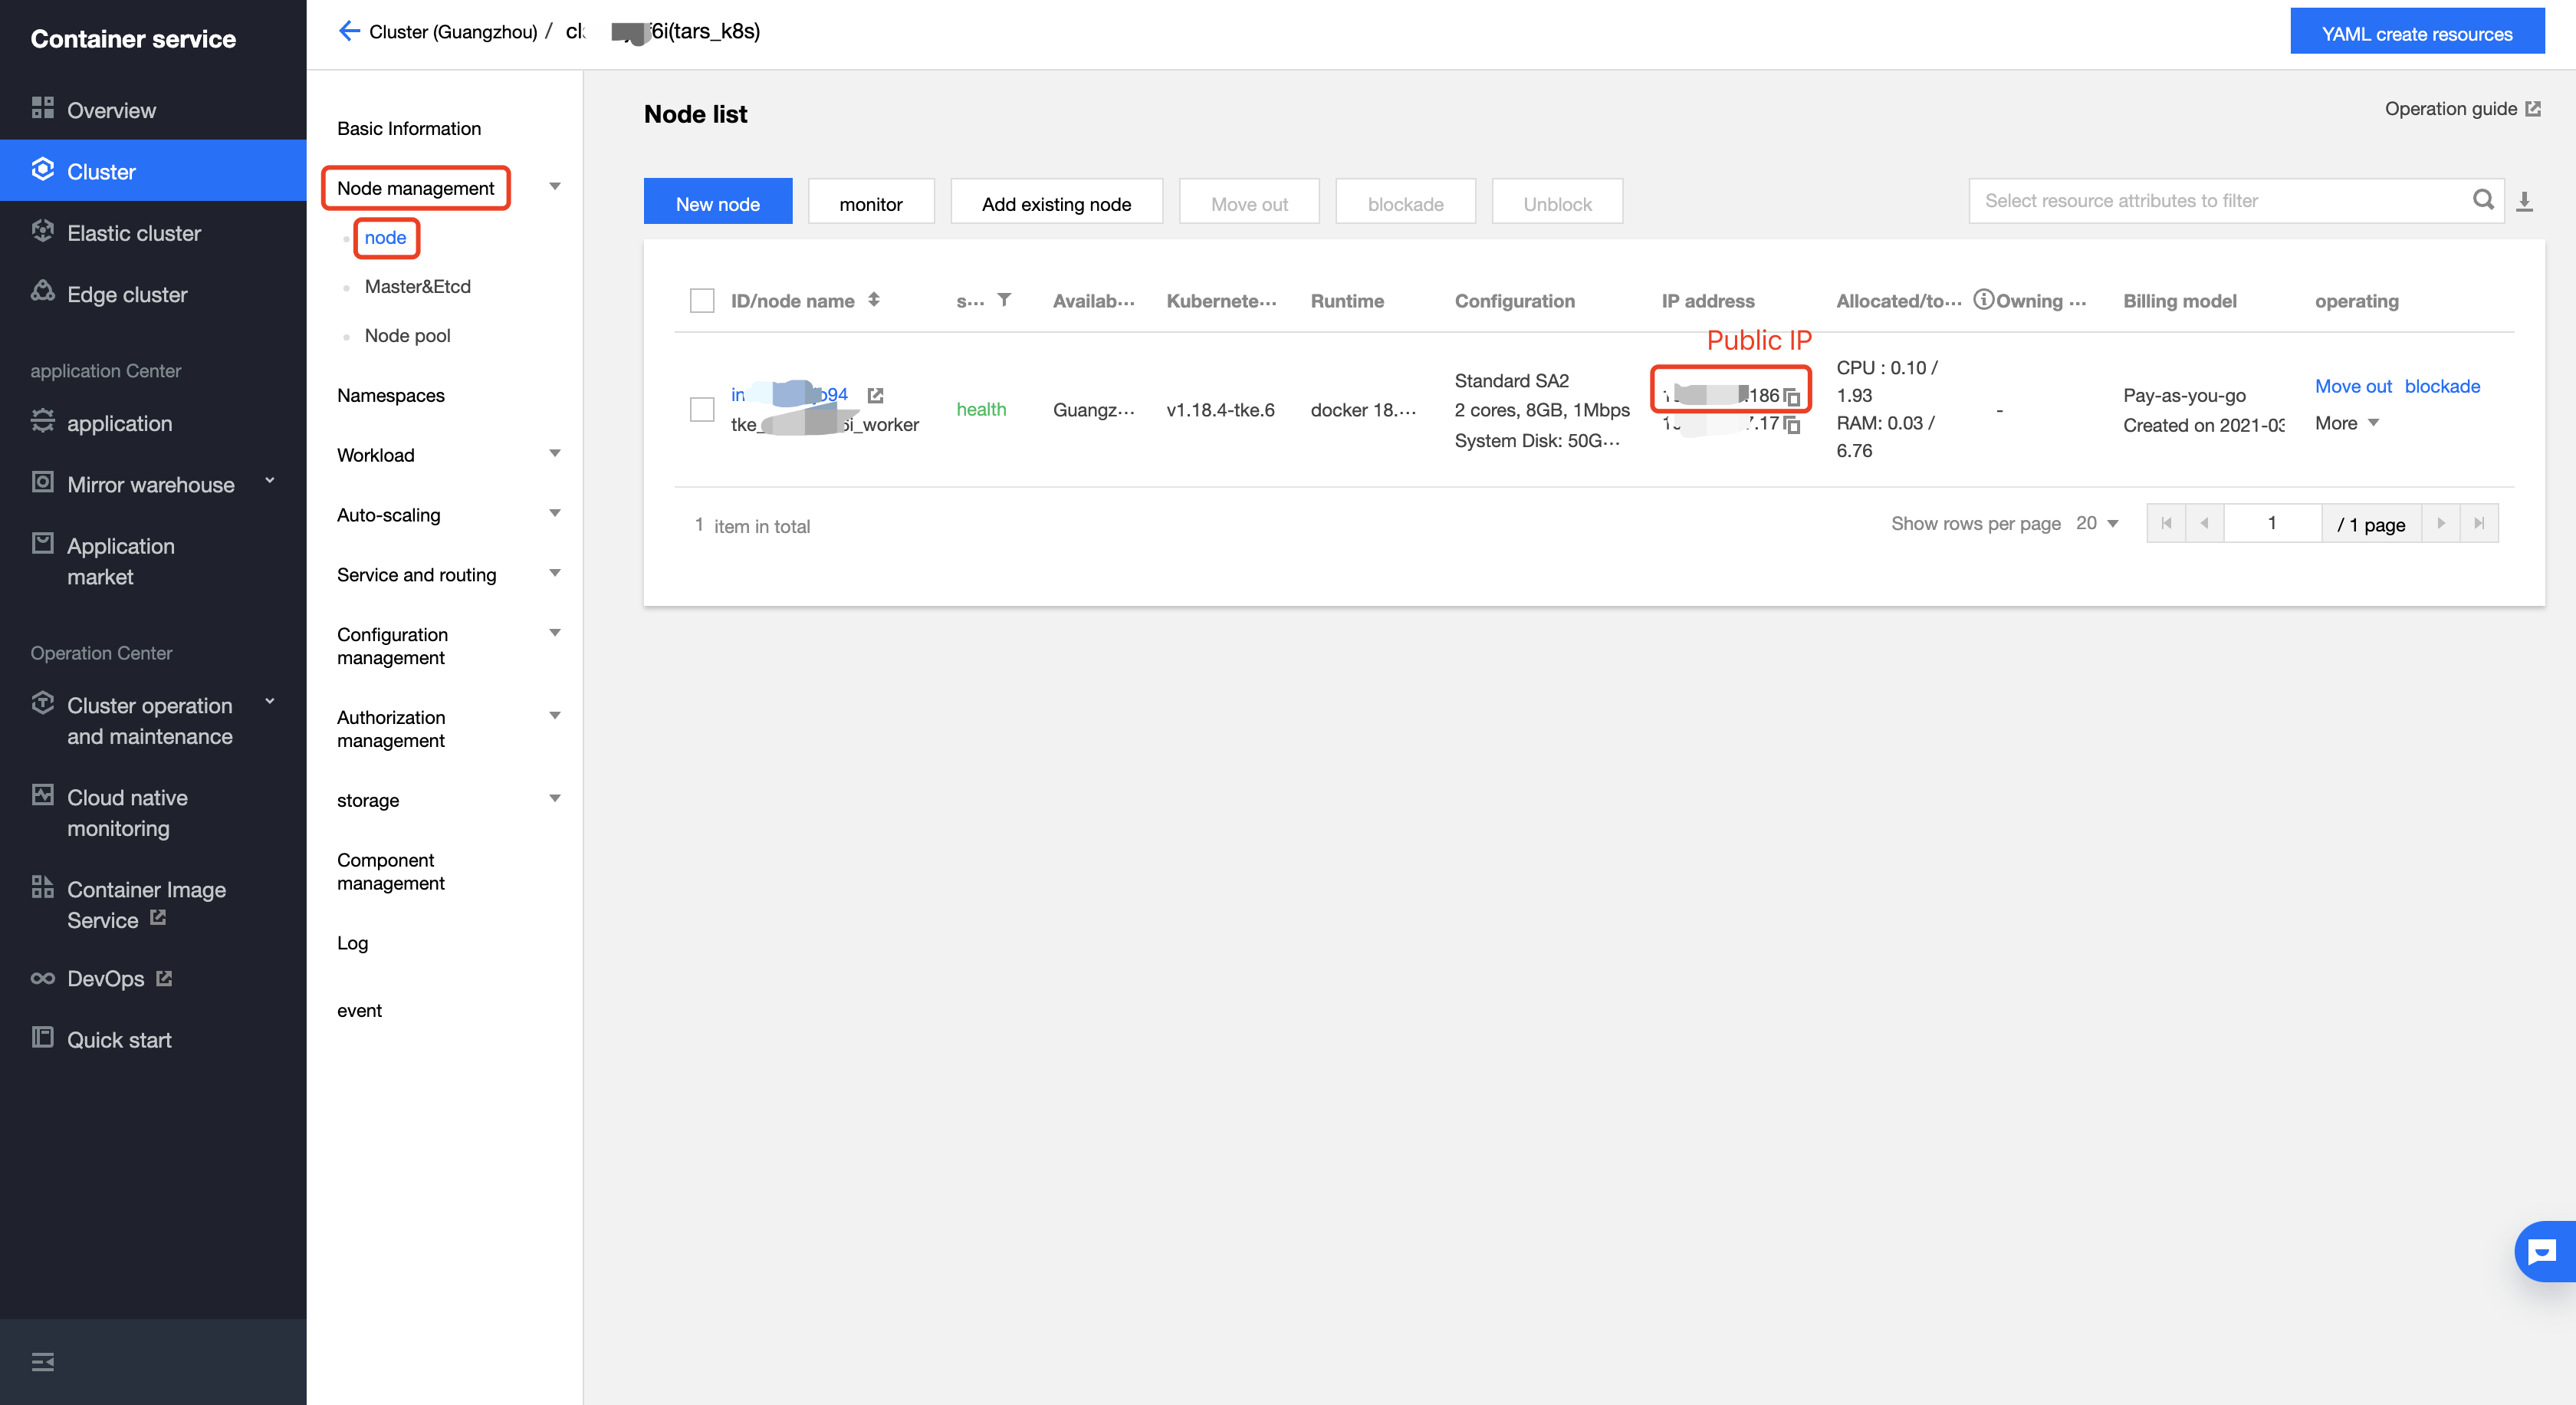
After that, you can open page of TarsWeb by address http://{NodeIP}:30000, NodeIP is the Public IP of the node which TarsWeb deploy on in your cluster. You can find it in Node management > node.
Open TarsWeb page in browser.
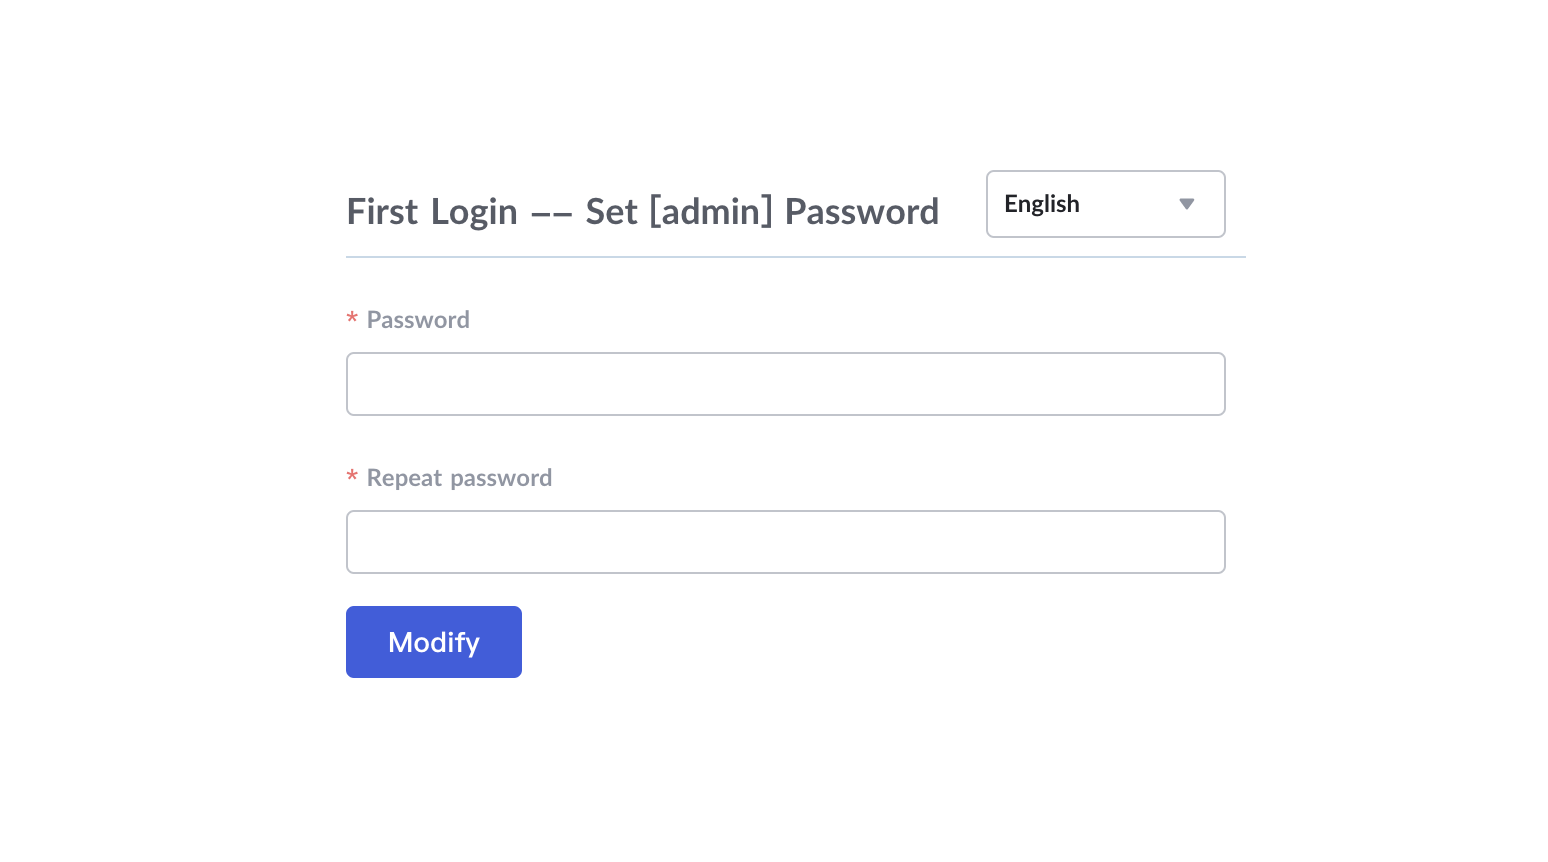
After configure the password of admin and login, you will jump to the index.
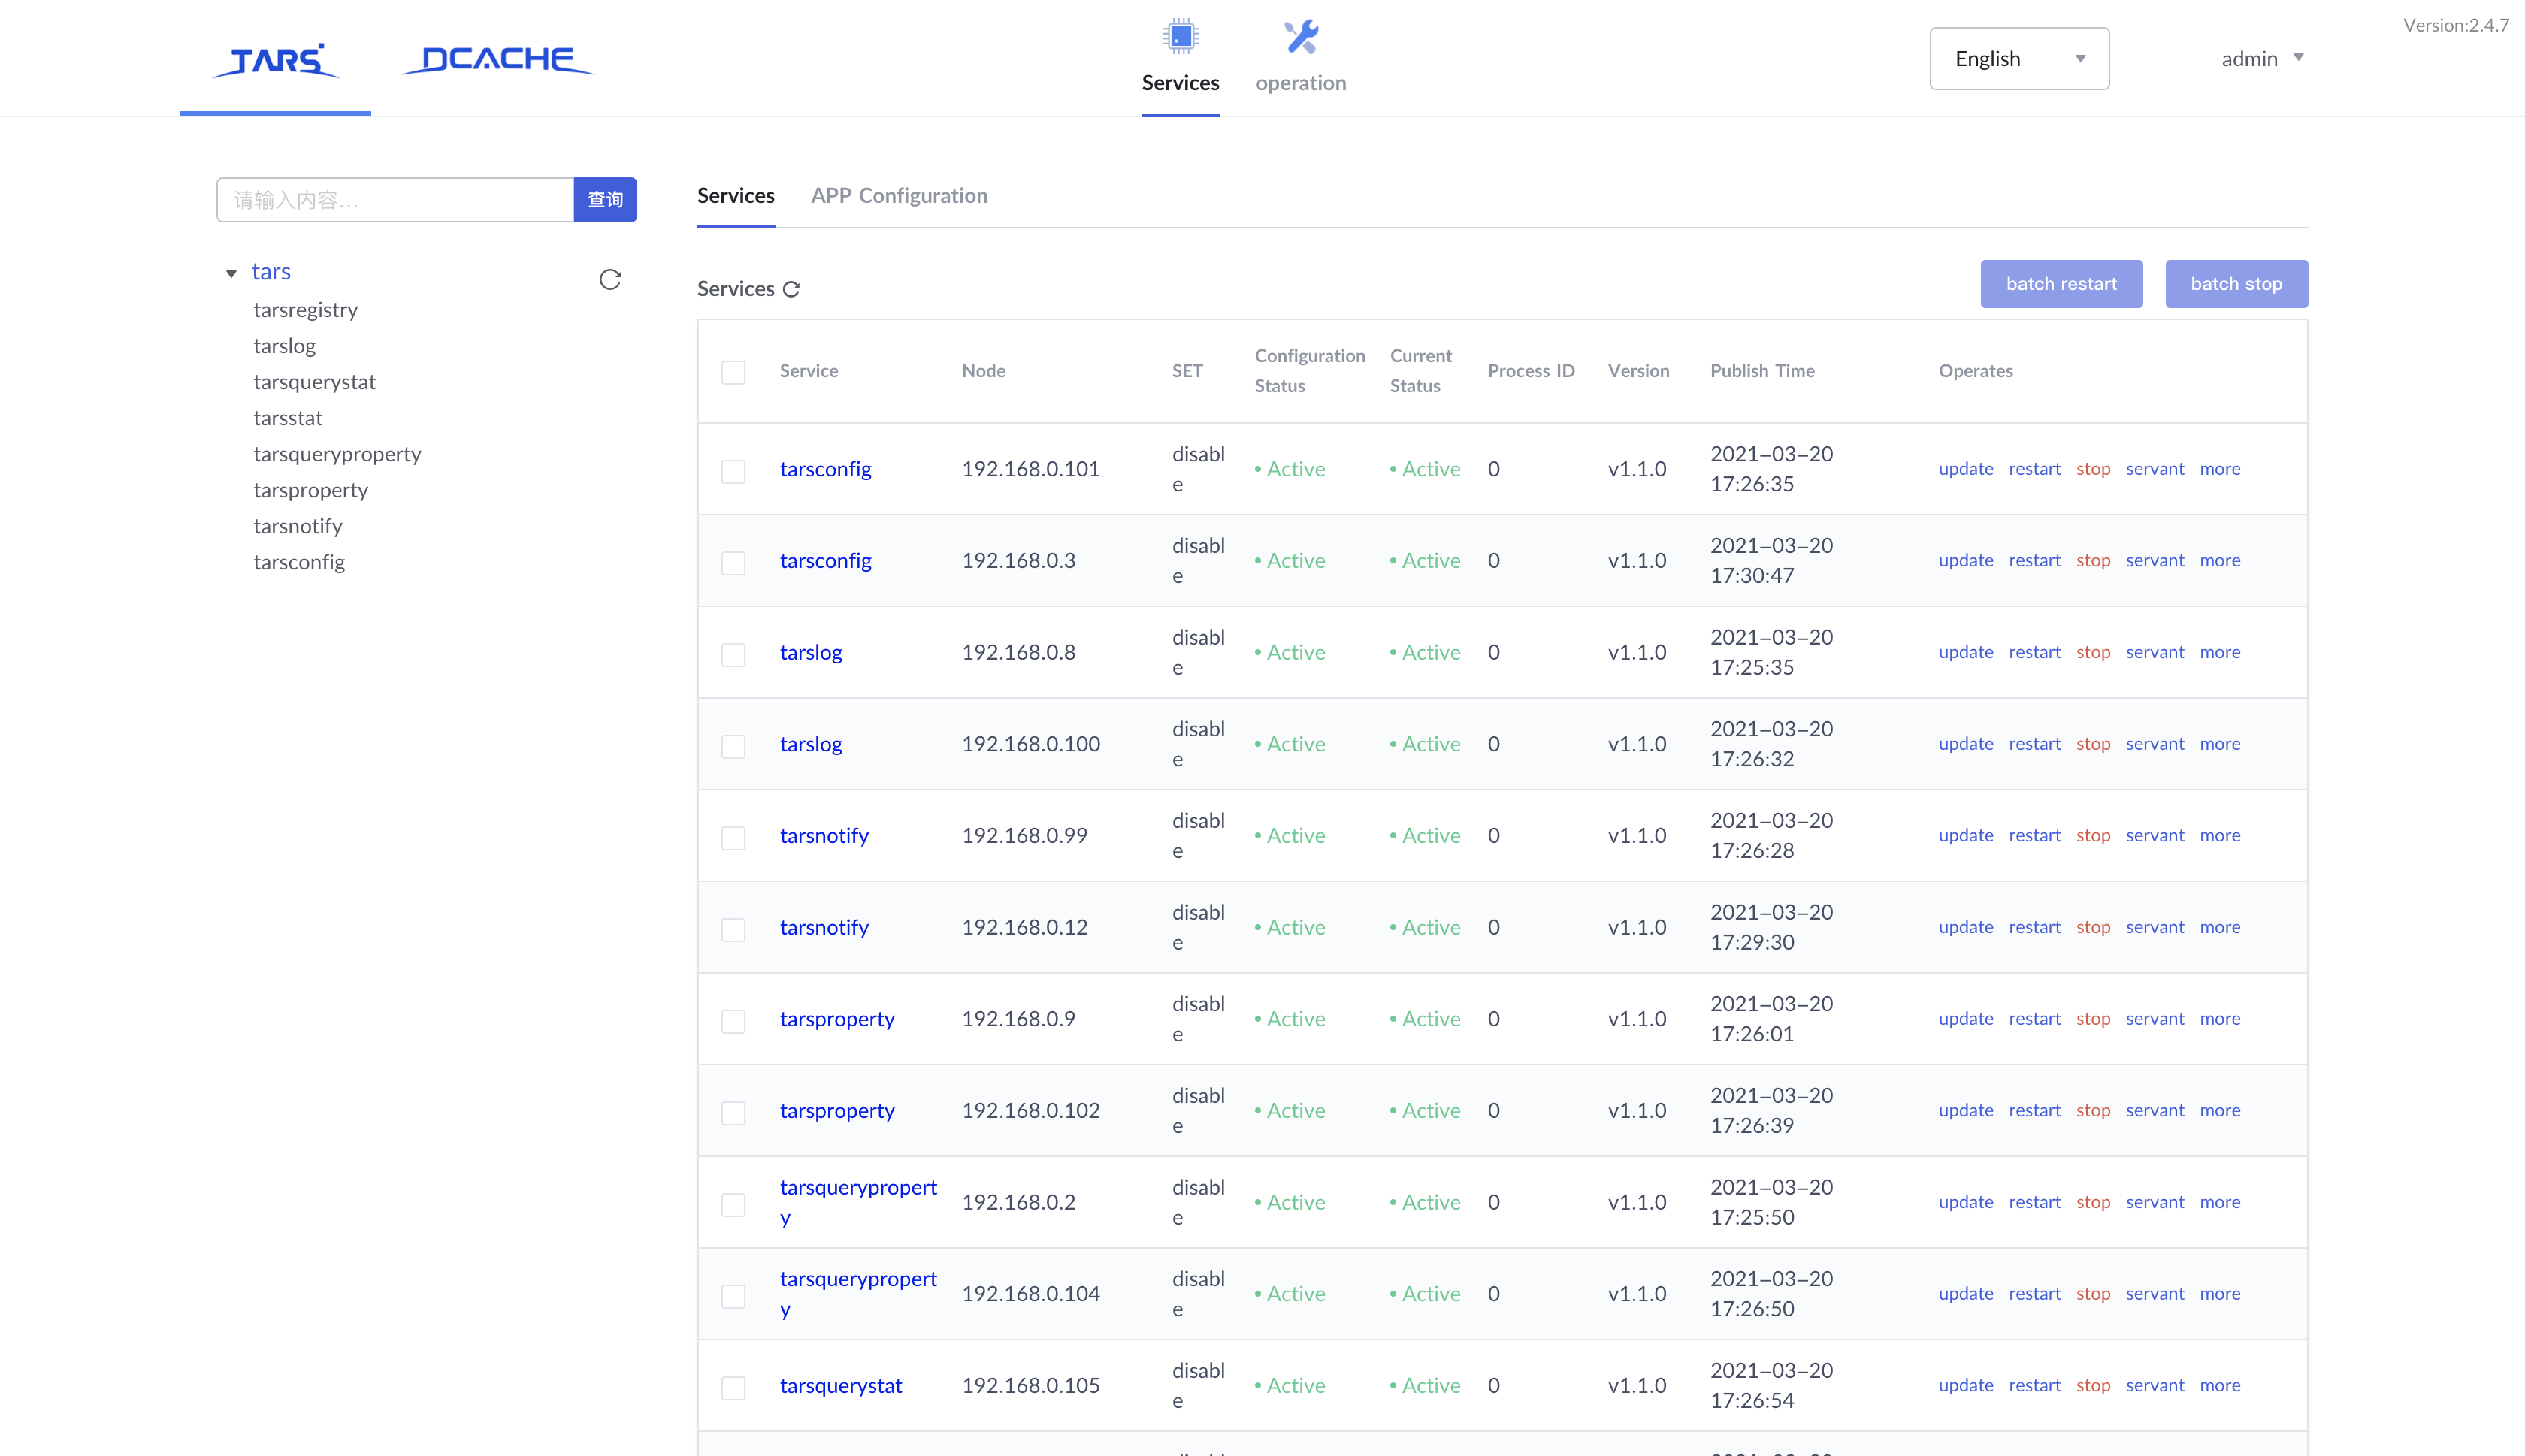
Now, you have finished the installation of K8STARS.
Install Openvidu
As Openvidu hasn't supported deployment on Kubernetes, we will just install it on a node.
We have configured the login method of the node in your cluster. So we can just connect to the node by SSH with the login method you configured. Here we use a SSH key to log in.
Connect to a Node
We just copy the public IP of the node you choose, and connect to the node through the following command:
ssh -i .ssh/id_rsa_iec_type_4 172.123.123.123
It means connecting to the node with public IP 172.123.123.123 by identity file id_rsa_iec_type_4.
Install Openvidu-server
Prepare
Install docker and docker-compose.
# Configure repo
cd /opt
yum-config-manager \
    --add-repo \
    https://download.docker.com/linux/centos/docker-ce.repo

# Install docker
yum install -y docker-ce docker-ce-cli containerd.io
systemctl enable docker

# Install docker-compose
curl -L https://github.com/docker/compose/releases/download/1.25.0/docker-compose-`uname -s`-`uname -m` -o /usr/local/bin/docker-compose
chmod +x /usr/local/bin/docker-compose
docker-compose --version
Install Openvidu
curl https://s3-eu-west-1.amazonaws.com/aws.openvidu.io/install_openvidu_2.13.0.sh | bash
Configuration
Edit file .env , add your host public IP and admin password.
vi /opt/openvidu/.env

# Add your host IP and admin password
OPENVIDU_DOMAIN_OR_PUBLIC_IP= $your_host_IP
OPENVIDU_SECRET= $admin_PW
Start Openvidu
cd /opt/openvidu/
./openvidu start
Install Frontend
Install http-server-ssl and clone frontend code, edit app.js
# http-server install
npm install -g http-server-ssl

# Virtual Classroom front-end setup
git clone https://github.com/OpenVidu/openvidu-vr.git
cd openvidu-vr/openvidu-vr-room
vi app.js
Modify the values of OPENVIDU_SERVER_URL and OPENVIDU_SERVER_SECRET, which you just set in last section.
// modify line 163
var OPENVIDU_SERVER_URL = 'https://demos.openvidu.io'; // backend IP
var OPENVIDU_SERVER_SECRET = 'MY_SECRET'; // backend password
Start server.
http-server-ssl -S &
And you can access it through https://$your_host_IP:8080 on browser.