Introduction
In this document, we will give a guide about deploying an application step by step in OTE-stack platform on AI Edge for testing.
Test Requirements
3 Arm servers for IEC edge infrastructure and another server which have installed harbor are needs. A face recognition application, which can be found at https://hub.docker.com/r/otestack/face-detect-demo, is used to validate the functions of the OTE. Before start testing, you need to push the image to the harbor server.
Test Architecture
For test architecture, We use one IEC edge cluster with 3 nodes as the basic infrastructure and install the OTE-stack platform in it. After everything is ready, we test the function of deploy a application through the OTE website which is installed in the master node of IEC cluster.
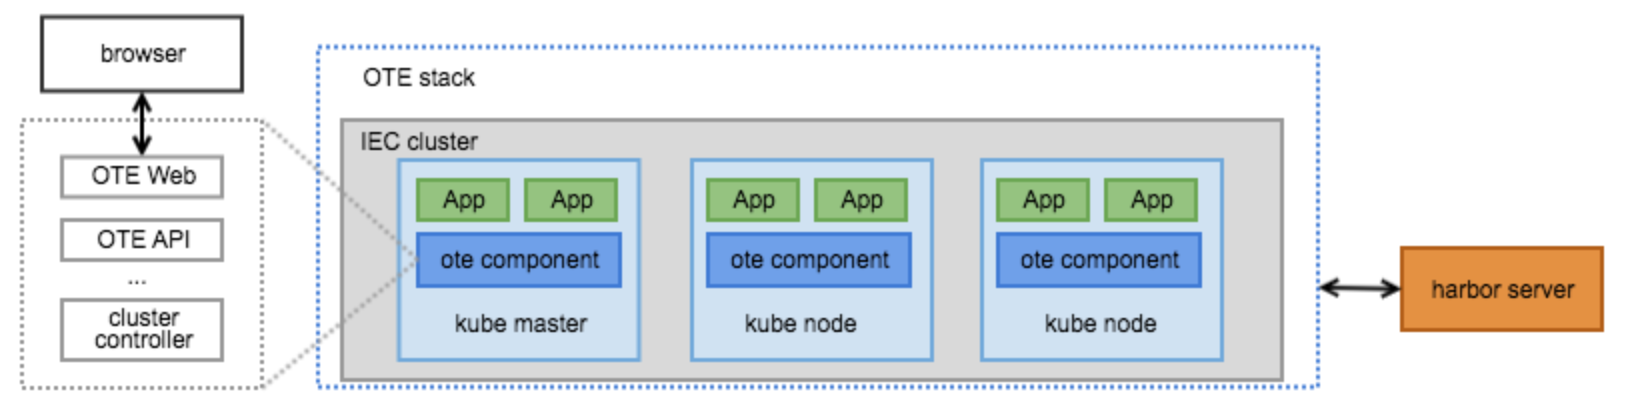
In this test scenarios, a face recognition application will be deploy to the IEC cluster via browser. The app is a server that detects the face in an image sent by client and outputs the position of objects. The usage of the server is shown in Step 4.
Test Steps
Step 1: Run OTE web platform via your browser and create a user for testing
- After everything is installed successfully(In terms of the detail installation, refer to Video+Security+Monitory+R3+Installation+Document), open browser on PC and visit the website: IP Address + 8995(Port Number).
- Create a new user `testuser` and audit it by administrator account at system management page.
- Create a new business with the new logged-in user and audit it by administrator account too. Then, a new namespace named ns1 related to the business will be created in all cluster managed by OTE.
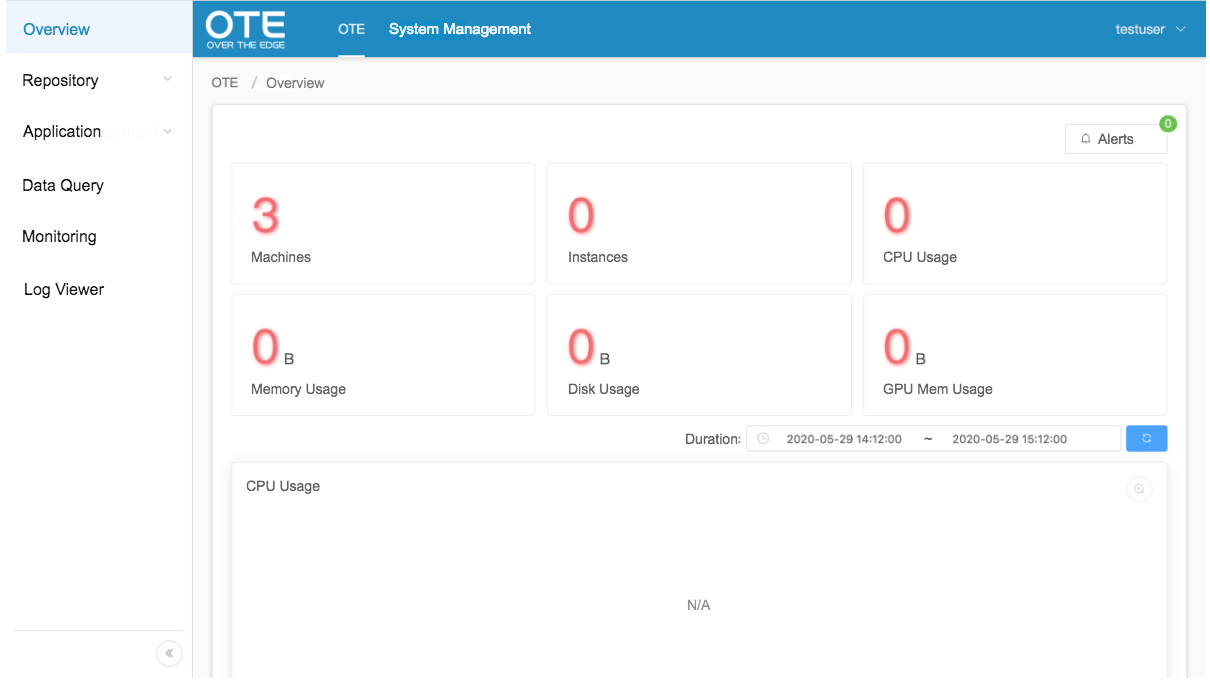
- And now you can browse the overview page which contains information of node and resource usage with new user.
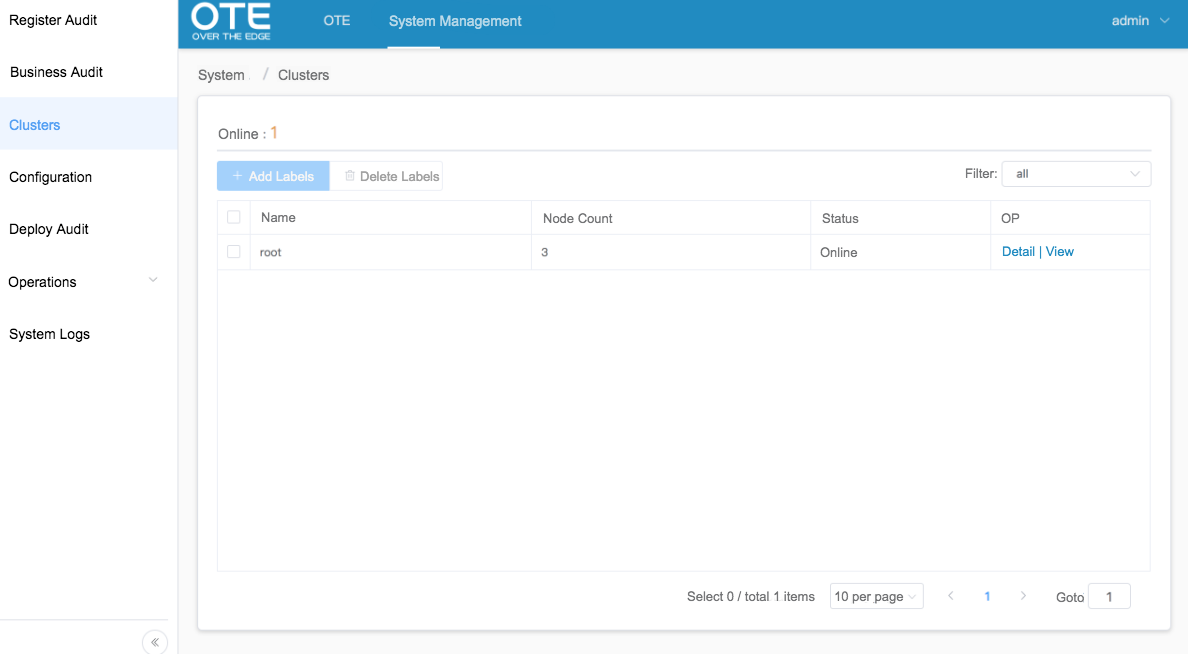
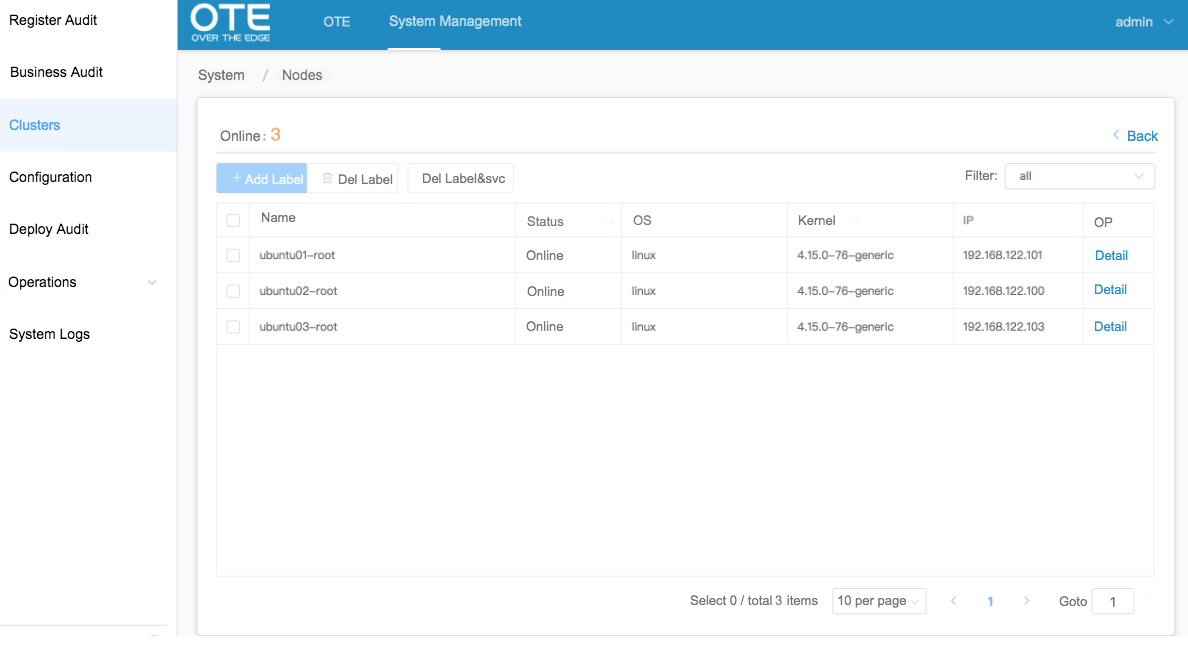
- Furthermore, you can view more informations about edge cluster and node under the admin account.
Step 2: Create a new application and deploy it to root edge cluster
- First, create a registry account at page "Image Repository" and then add a new project "arm-test" for creating a new repository address "your_harbor_address/arm-test". The new user account will be used to log in to the harbor registry and push/pull the images from registry.
- Run docker cli in command terminal and push the prepared demo image to the registry with the user account just created.
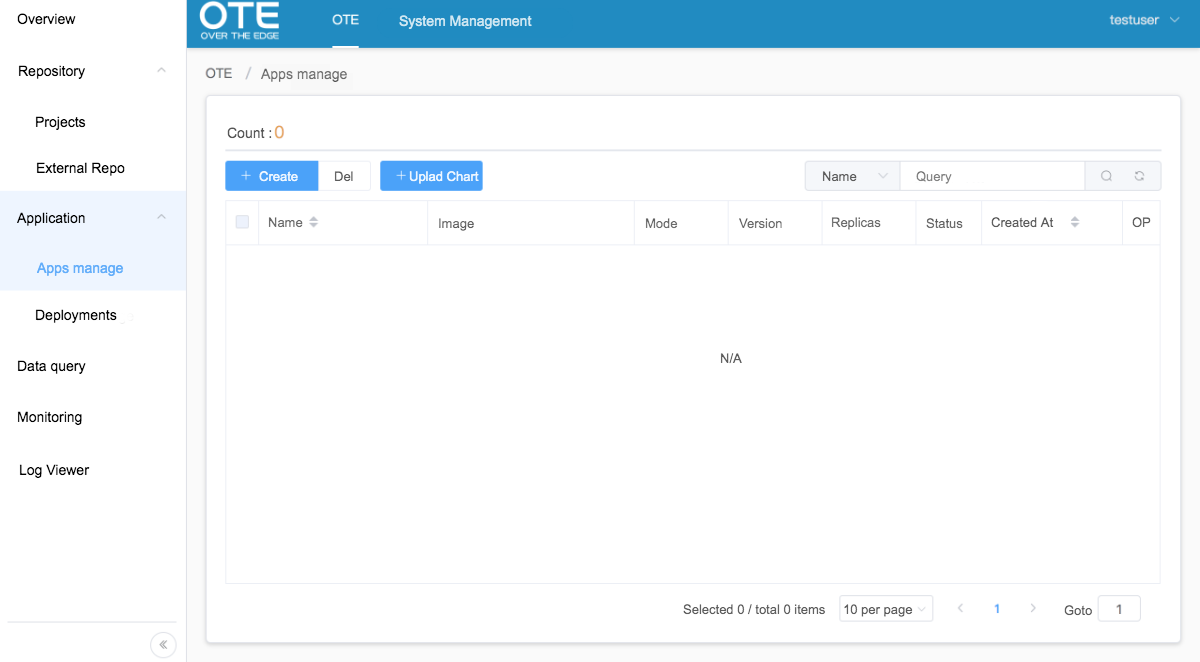
- Open the page "Application management" and click the button "new application".
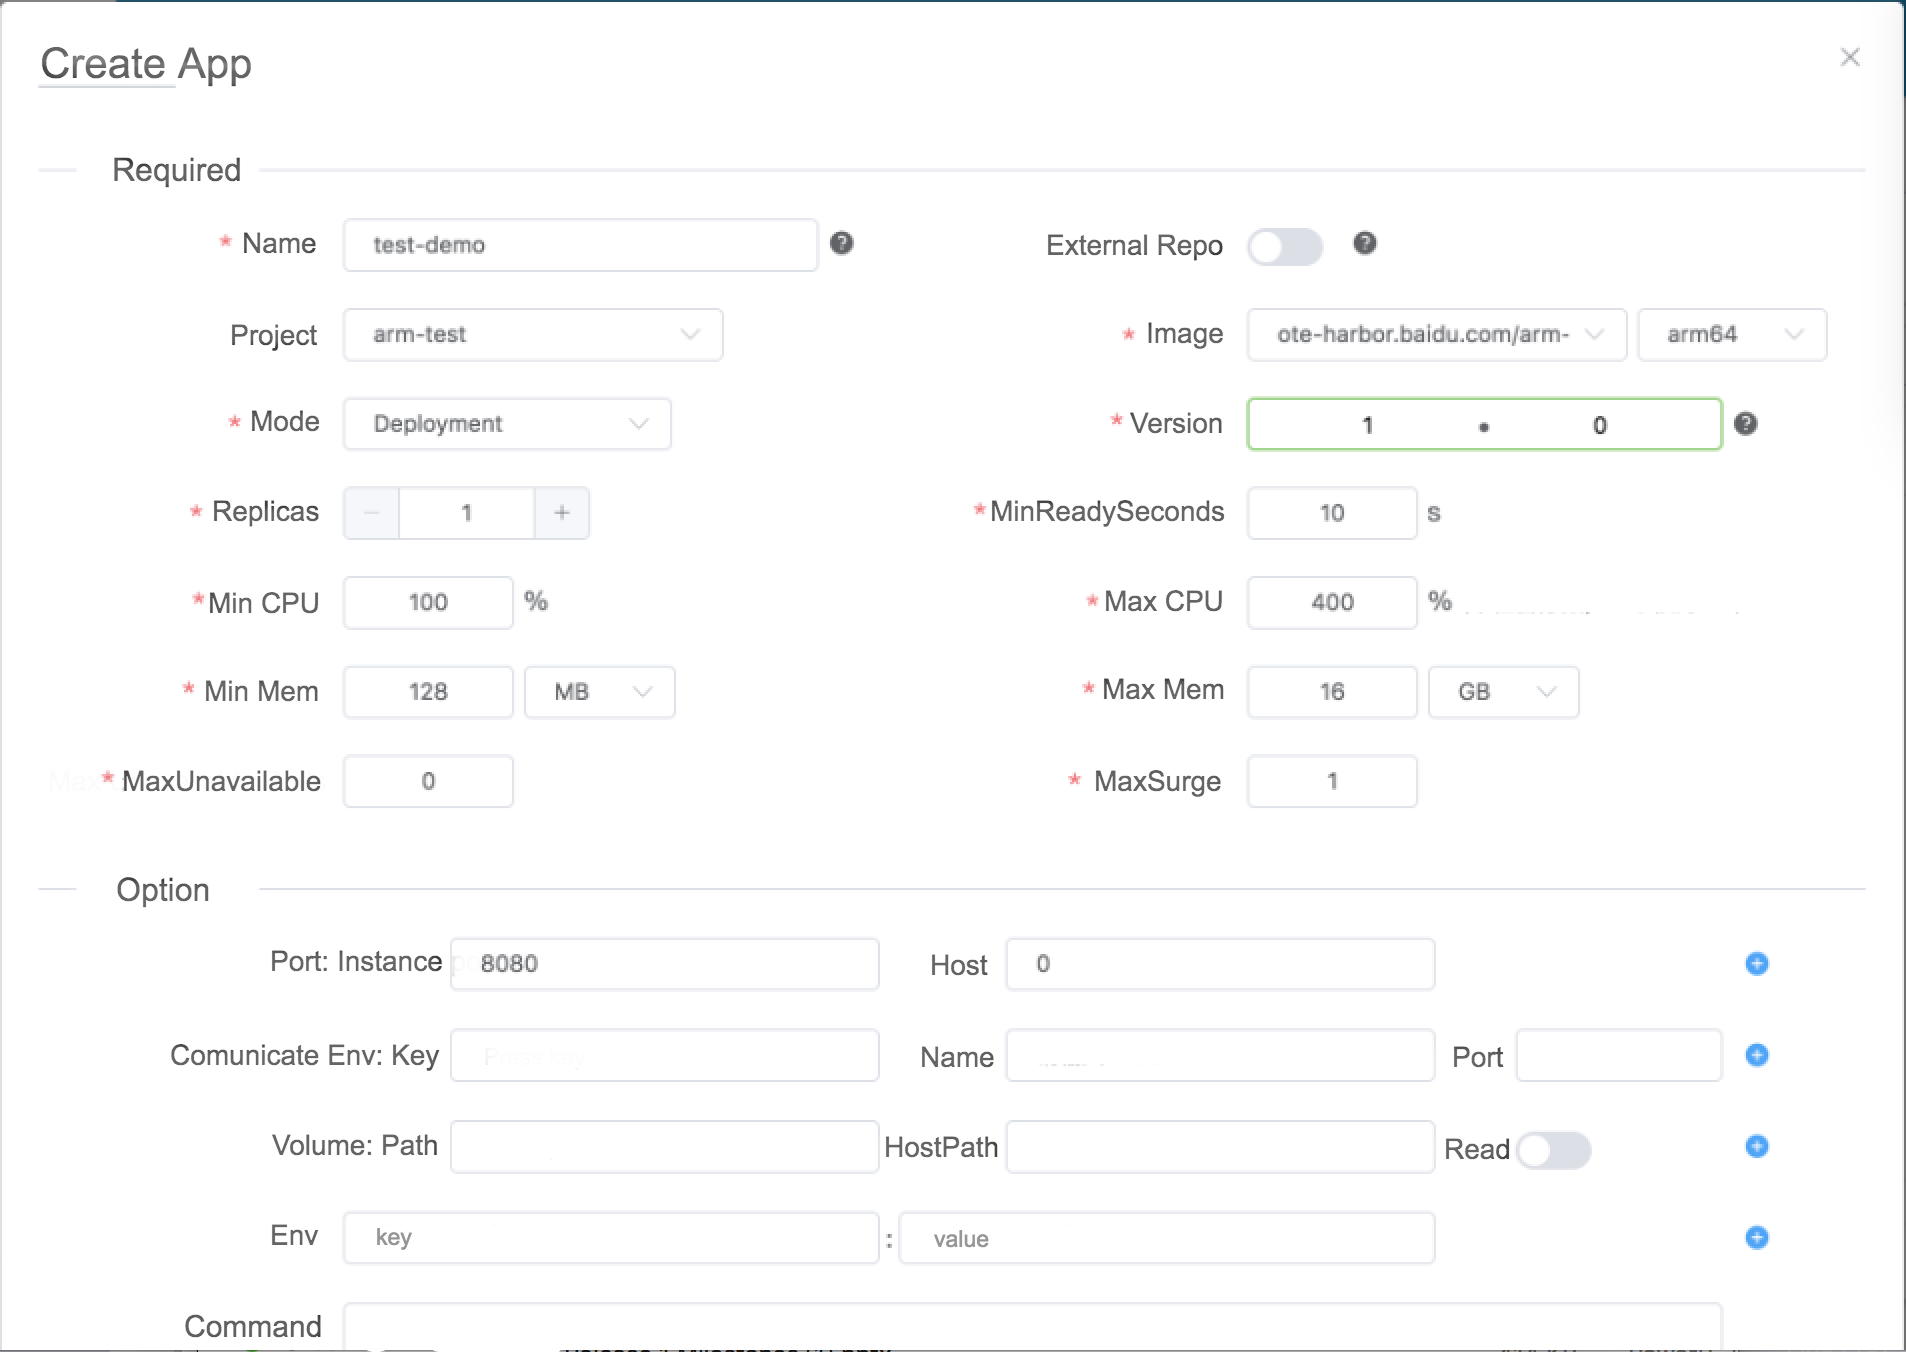
- Create new application template by fill below informations.
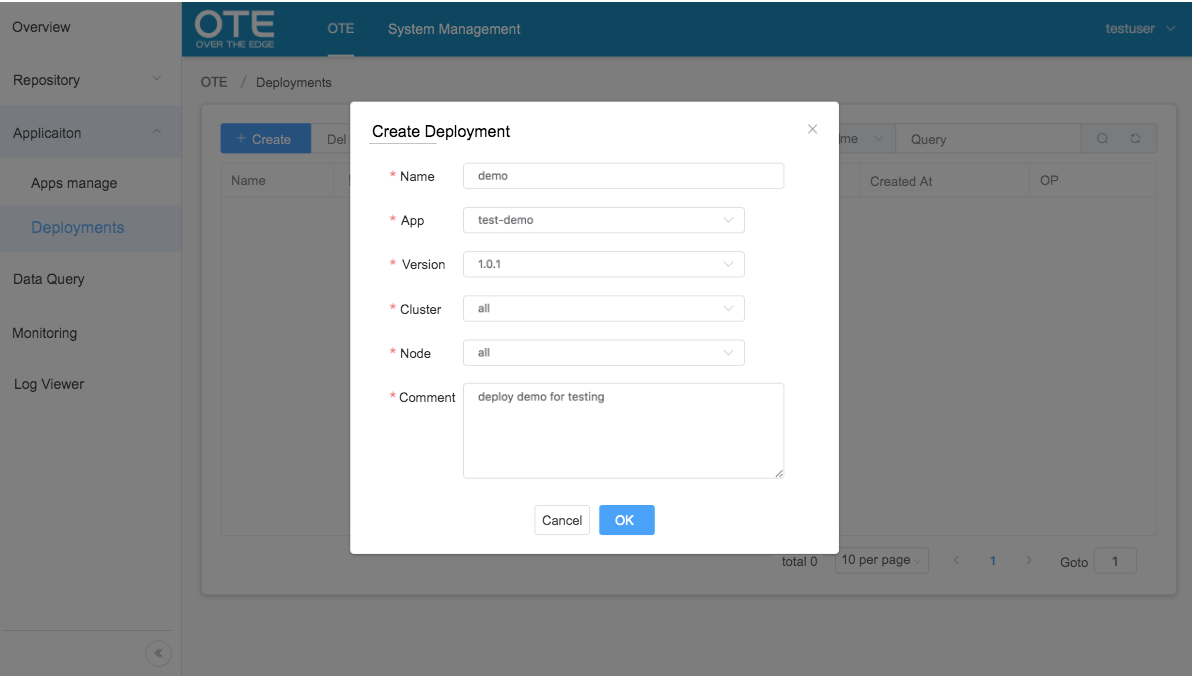
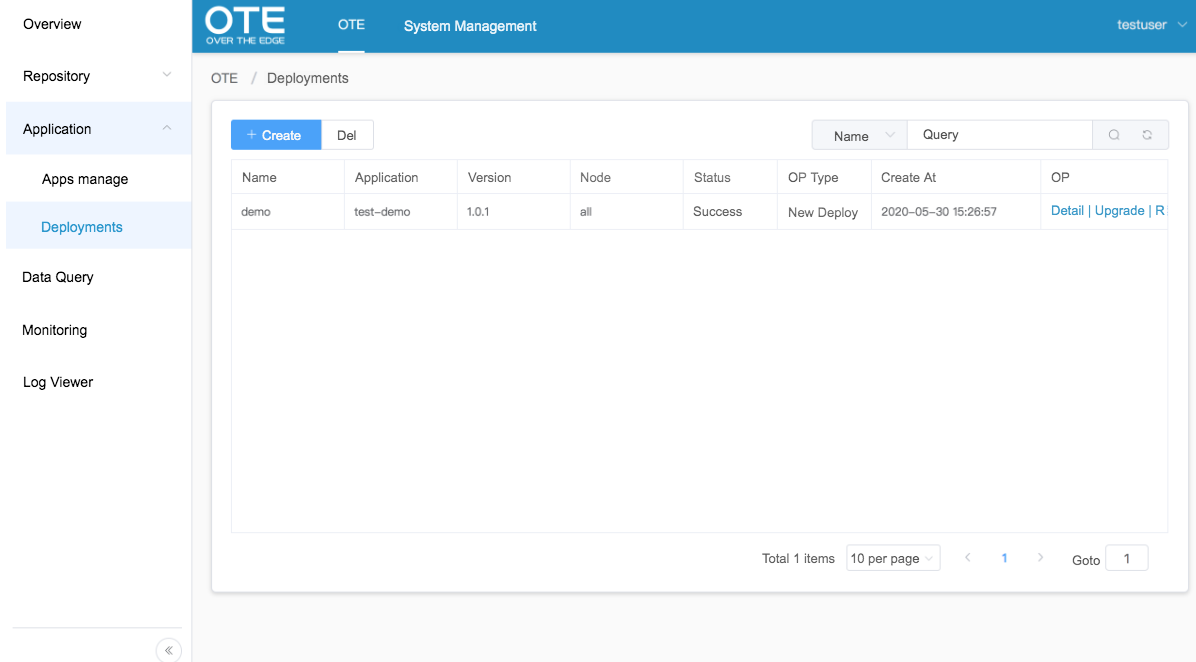
- Deploy above application to specified edge cluster and check the result of deployment by refreshing page.
Step 3: Check if the application have deployed
- SSH to the master node of edge cluster or copy the kubeconfig file related to edge cluster to $HOME/.kube .
- Run command `kubectl get svc,pod -n ns1` to check if the pod is running well. The below figure shows the portal of demo and we can access the demo through 10.247.22.115:8080.

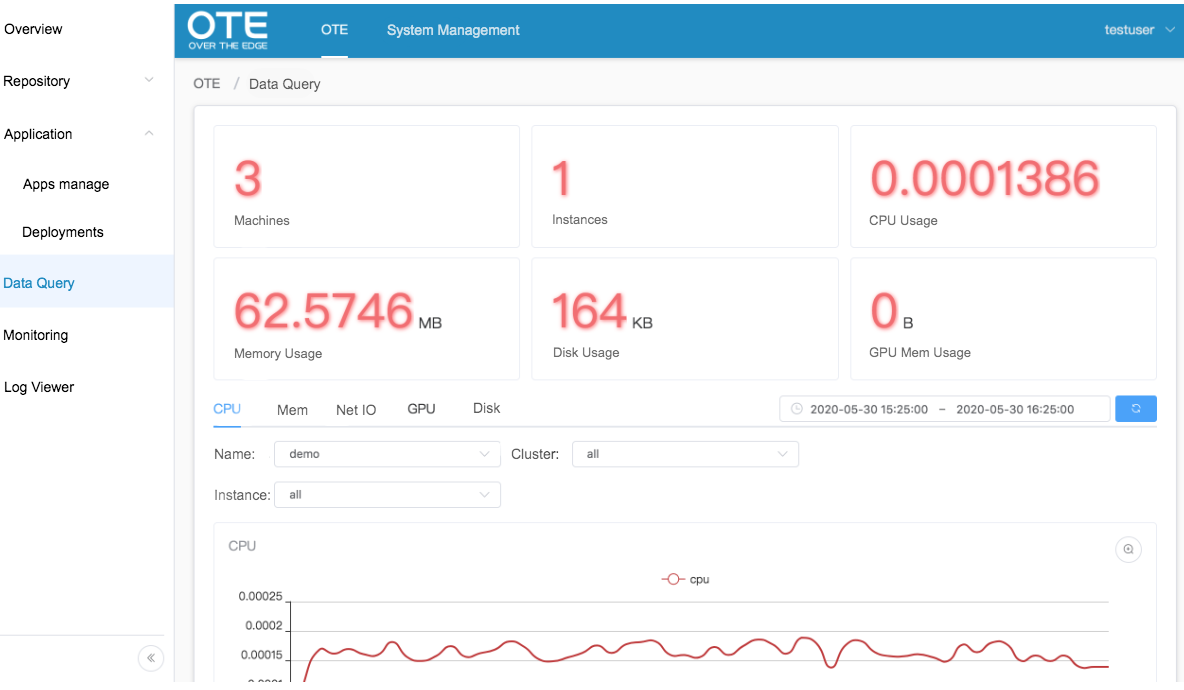
- If the application have deployed, the resource usage will be collected to OTE. The page "Data query" will show the informations of the running application.
Step 4: Test the application
- Prepare a picture for face detection, for example: http://aip.bdstatic.com/portal-pc-node/dist/1590550949362/images/technology/face/detect/demo-card-2.jpg
Send request to the face server through the ip:port got by last step
$ # prepare image
$ wget http://aip.bdstatic.com/portal-pc-node/dist/1590550949362/images/technology/face/detect/demo-card-2.jpg
$ # make a request
$ image=demo-card-2.jpg
$ echo '{"image": "'$(base64 -w 0 $image)'"}' > data.json
$ curl -X  POST 10.247.22.115:8080/face_detect -d@data.json
{"objects": [{"location": {"x1": 898, "y1": 217, "x2": 1154, "y2": 518}, "prob": 0.9999696016311646}, {"location": {"x1": 444, "y1": 331, "x2": 700, "y2": 657}, "prob": 0.9997757077217102}]}