Versions Compared

Key

  • This line was added.
  • This line was removed.
  • Formatting was changed.

...

Section
bordertrue


Column
width20

Nokia OpenEdge Servers

Login to the controller-1 BMC ip using a web browser (https://xxx.xxx.xxx.xxx).

Go to Settings/Media Redirection/General Settings.

Select the Remote Media Support.

Select the Mount CD/DVD.

Type the NFS server IP address.

Type the NFS share path.

Select the nfs in Share Type for CD/DVD.

Click Save.

Click OK to restart the VMedia Service.

Go to Settings/Media Redirection/Remote Images.

Select the image for the first CD/DVD device from the drop-down list.

Click the play button to map the image with the server’s CD/DVD devices. The Redirection Status changes to Started when the image redirection succeeds.

Go to Control & Maintain/Remote Control to open the Remote Console.

Reset the server.

Press F11 to boot menu and select boot from CD/DVD device.


Column
width20

HP Servers

Login to iLo for Controller 1 for the installation

Go to Remote Console & Media

Scroll to HTML 5 Console

  • URL

 http://XXX.XXX.XXX.XX:XXXX/REC_RC1/install.iso -> Virtual Media URL →

  • NFS 

< IP to connect for NFS file system>/<file path>/install.iso

Check “Boot on Next Reset” -> Insert Media

Reset System


Column
width20

Dell Servers

Go to Configuration/Virtual Media

Scroll down to Remote File Share and enter the url for ISO into the Image File Path field.

  • URL:

http://XXX.XXX.XXX.XX:XXXX/REC_RC1/install.iso

  • NFS

< IP to connect for NFS file system>/<file path>/install.iso>

 Select Connect.

Open Virtual Console, and go to Boot

Set Boot Action to Virtual CD/DVS/ISO

Then Power/Reset System

Be sure to read the note below on Dell servers


Column
width20

Ampere Servers

Darrin Vallis

Download install.iso from the TA Repository. Note 1/24/20: Build 273 supports Ampere Lenovo servers only. Waiting for Jenkins build to incorporate Hawk hardware detector. Use rec_install_testbuild.iso for Hawk based openEDGE sleds.

Mount install.iso as NFS share on Linux file system in same network as REC cluster

Download and unzip ampere_virtual_media_v2.zip

Edit mount_media.sh and dismount_media.sh. Set IPMI_LOCATION to IP address of Node 1 BMC, NFS_IP to IP of NFS server, ISO_LOCATION to NFS path for install.iso

Run mount_media.sh. This will connect install.iso as a CDROM on Node 1

Boot Node 1 into BIOS. Force boot from CD by selecting "Save & Exit" tab on BIOS, Boot Override → CDDROM

REC Telco Appliance will begin installation

See instructions below


Column
width20

Marvell Servers

@ Carl Yang <carlyang@marvell.com>


...

Note:  When the deployment to all the nodes has completed, “controller-1” will reboot automatically.

Note
titleSpecial Attention Required on Dell

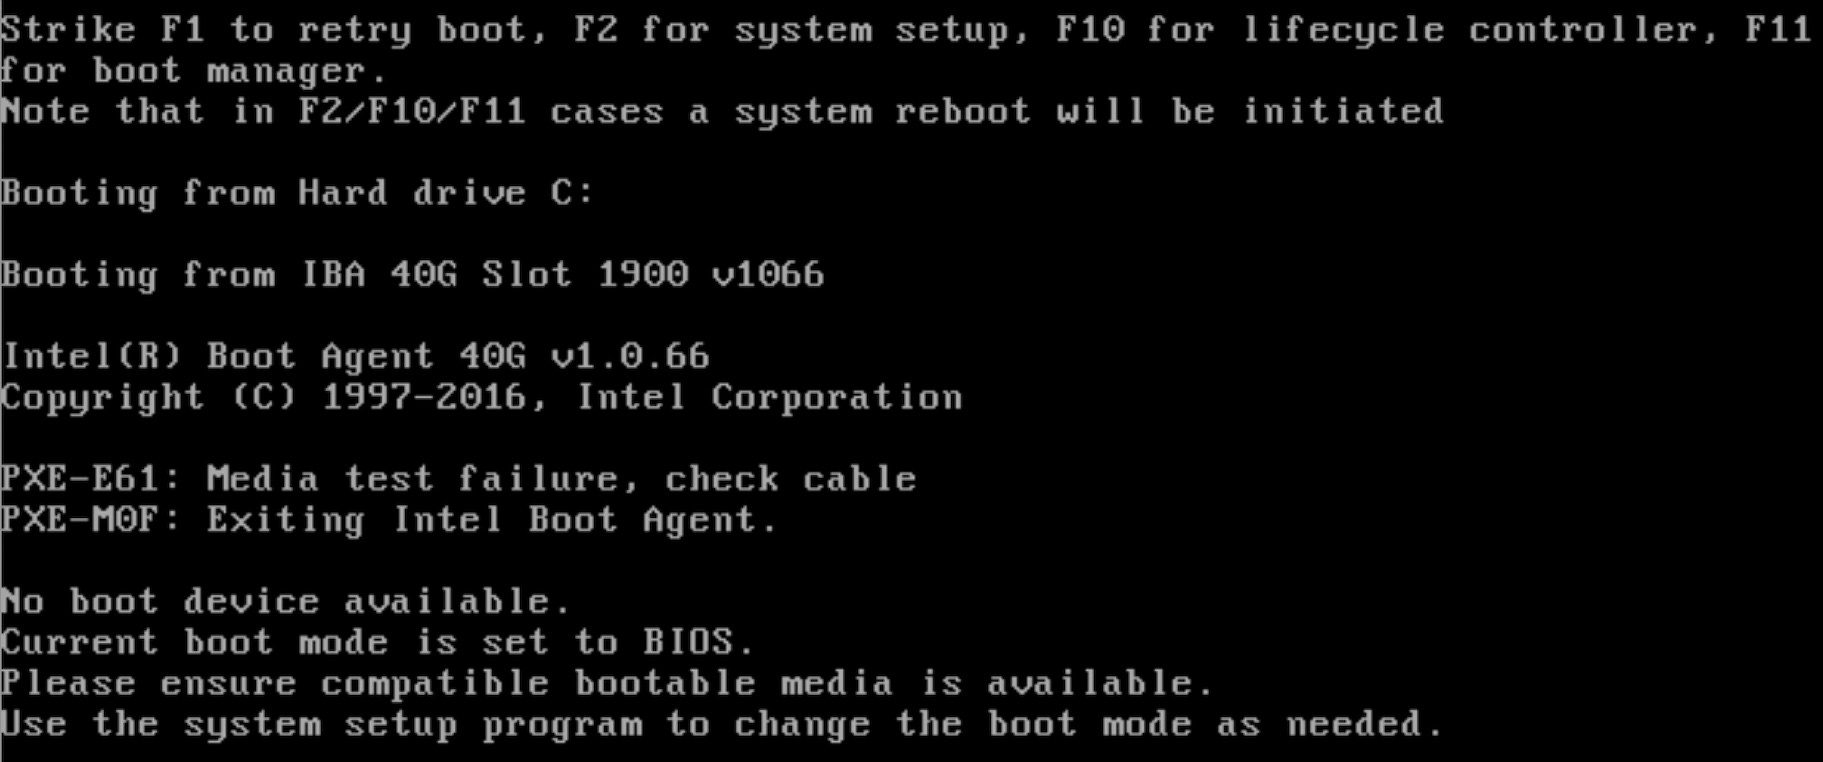
A Note on deploying on DELL severs:

Currently, a manual step is required when doing an installation on Dell servers.  After the networking has been set up and the deployment has started, the following message will be shown on the console screen on controller-2 and controller-3:

Image Modified

At this point, both controller-2 and controller-3 should be set to boot from virtual CD/DVD/ISO.

To do this:

  • Log on to the iDrac web interface
  • Select "Launch Virtual Console"
  • In the Virtual Console:
    • Select "Boot | Virtual CD/DVD/ISO" and confirm
    • Select "Power | Reset System (Warm Boot)" and confirm

Again, this needs to be done for both controller-2 and controller-3.  After this, the installation should continue normally.


As a reference, during this time, viewing the file /srv/deployment/log/cm.log on controller-1 will show the following:

   FAILED - RETRYING: Verify node provisioning state. Waiting for 60mins max. (278 retries left).

   FAILED - RETRYING: Verify node provisioning state. Waiting for 60mins max. (277 retries left).

   FAILED - RETRYING: Verify node provisioning state. Waiting for 60mins max. (276 retries left).

This will continue until the above manual step is completed or a timeout happens.  After the manual step, the following messages will appear:

   ok: [controller-2 -> localhost]

   ok: [controller-3 -> localhost]

Verifying Deployment

A post-installation verification is required to ensure that all nodes and services were properly deployed.

...