...
The community lab project is part of the CI, Blueprint Validation Lab TSC Subcommittee. To request resources within the lab for your plugfest, please complete the Lab Topology Template for BluePrints and submit it to the Subcommittee for review.
Usage Guide
Community Lab Dashboard
Getting Started
The community lab dashboard can be found at akraino-lab.iol.unh.edu.

Before getting started with the community lab you must log in to the dashboard. We are currently working to support LFID, but in the meantime we ask that you login using your Linux Foundation Jira account.
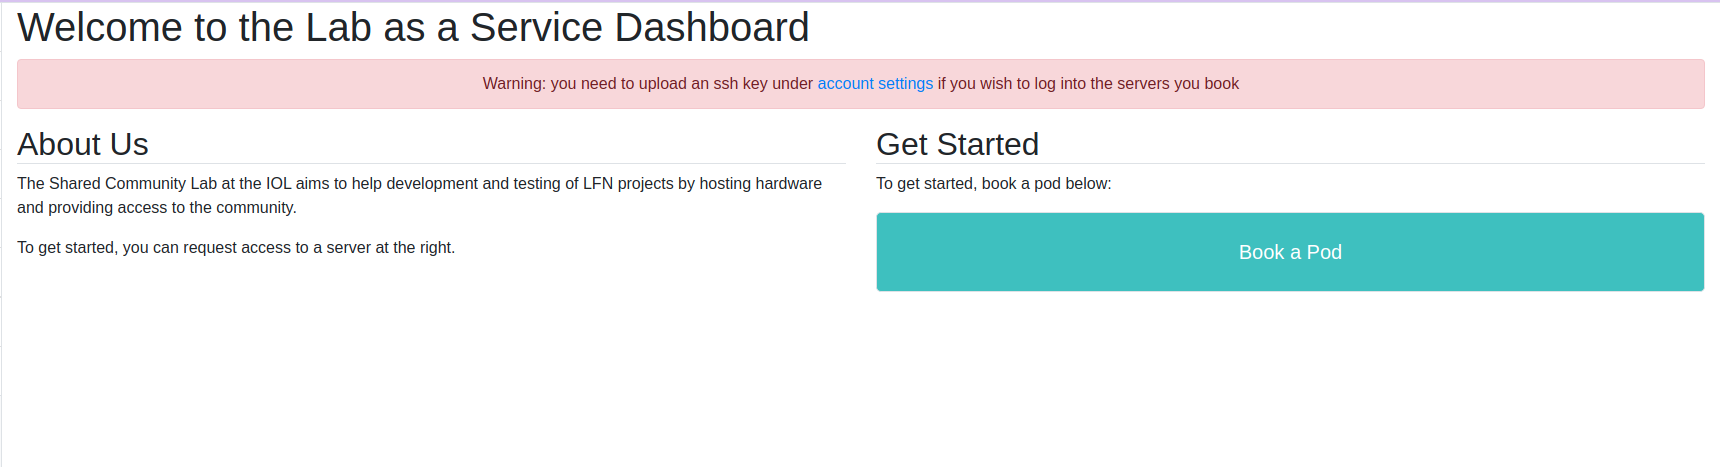
After your first time logging in you will need to add your ssh key to your account. Click the account settings link in the banner and then upload your file under the portion that says SSH Public Key.
Making a Booking
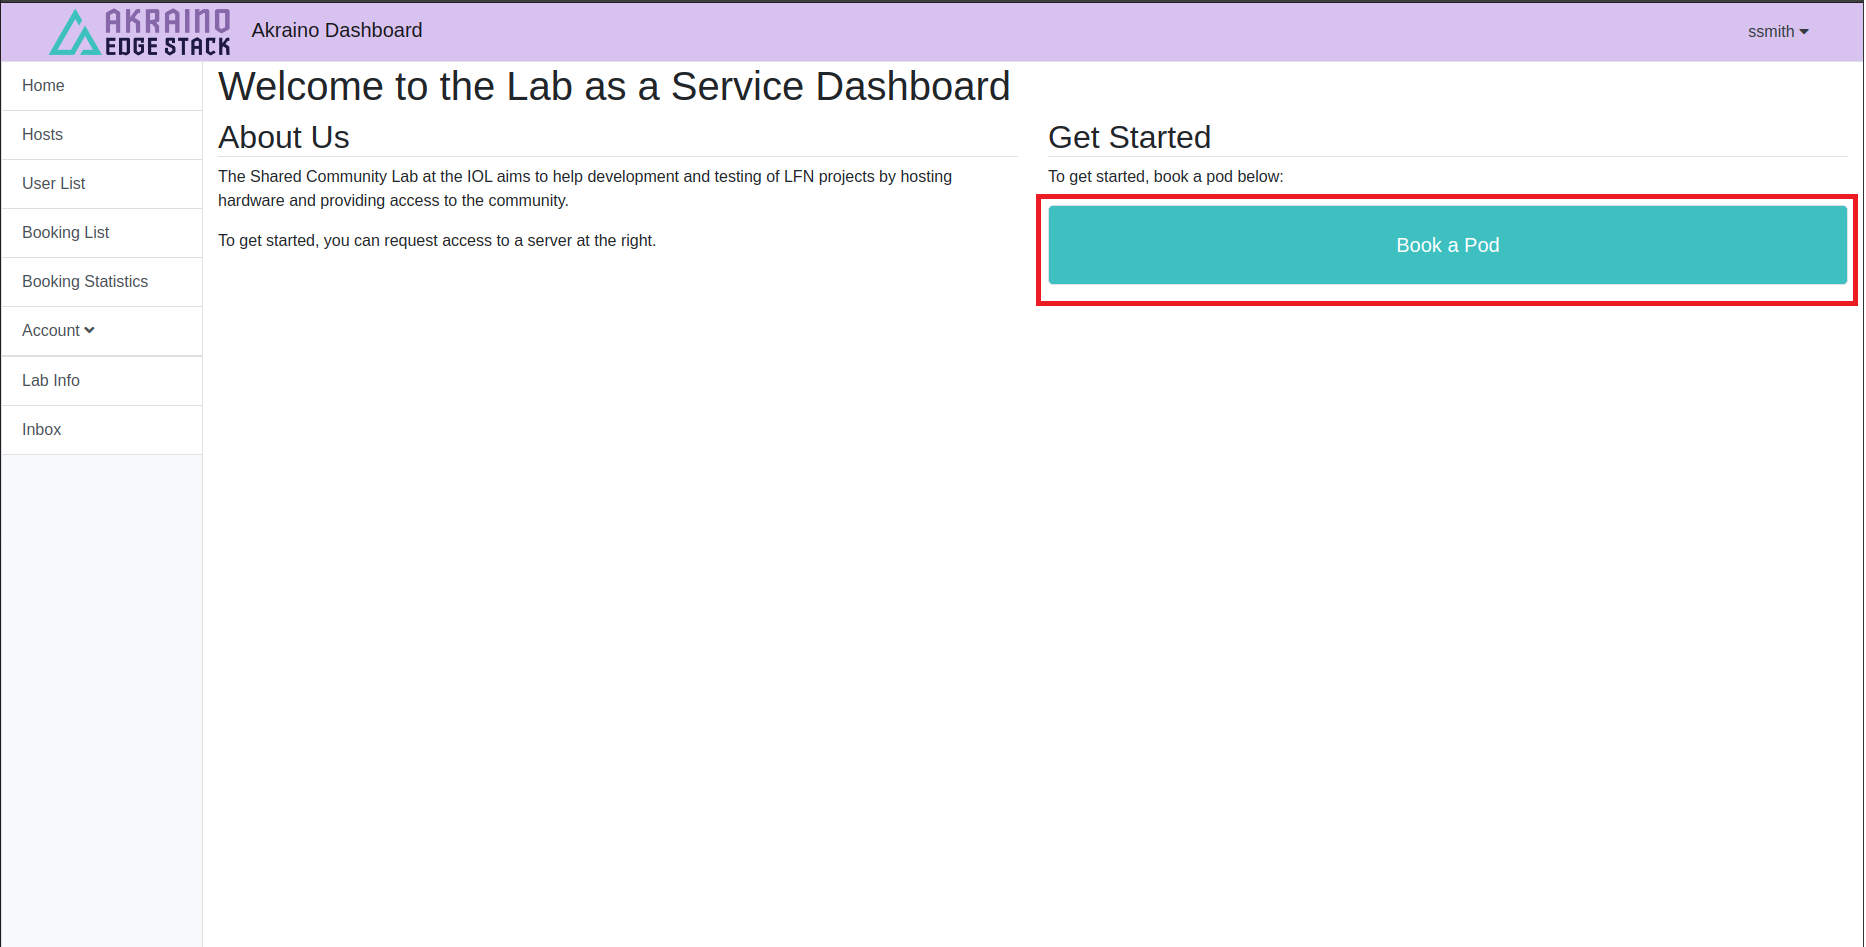
After logging in you will be redirected to the home page with the option to book a pod. Click the Book a Pod button to get started.
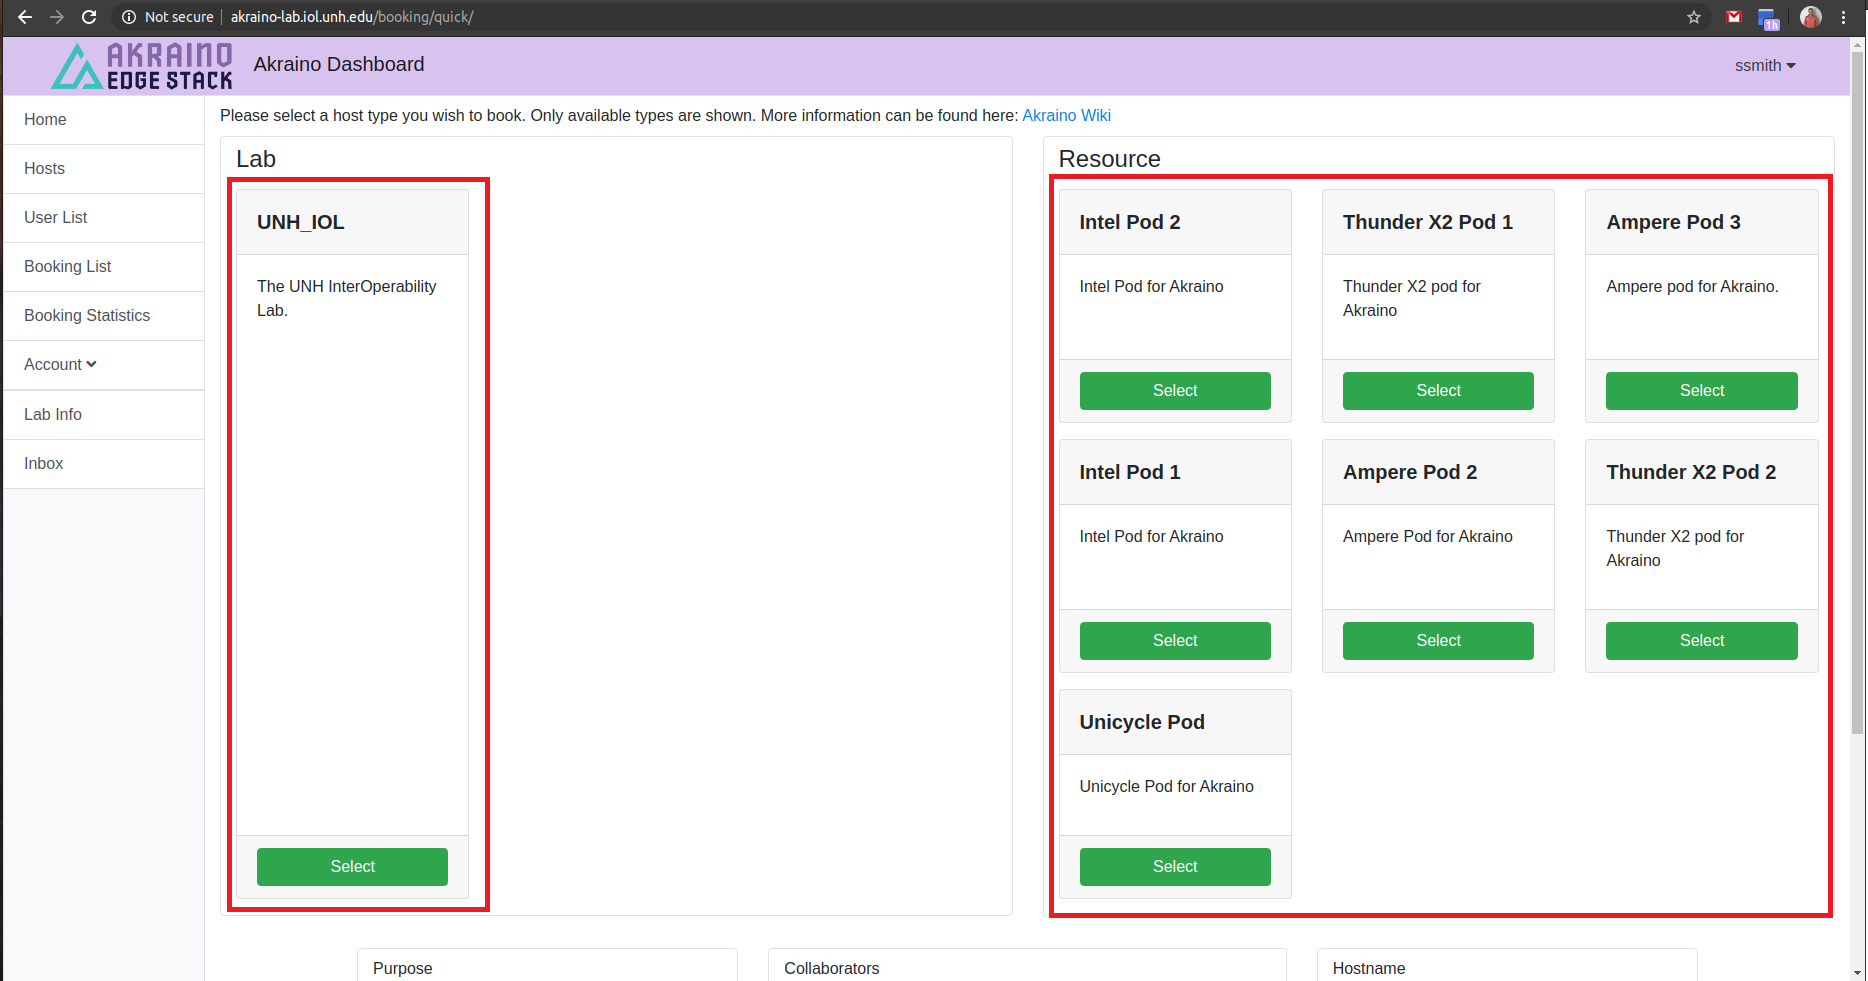
Here you can see the menu for booking a pod. On the left hand side select a lab, then the quantity of all resources will be displayed for that lab. Select an available Pod and then scroll down.

At this point you need to enter some information about your booking. Define the Purpose and Project as specific as possible (we can use this information in the future to better assist the community.) Next you can use the slider to set the length of your booking. This slider only has a maximum of 21 days, but if you need more time you can extend your booking as you get closer to your end date. The Collaborators field is were you can add team members to your booking. Adding collaborators will notify them via email and they will be able interact with the resources the same way you can. Hostname defines the name of the user you have access to on a server. Once you're ready press Confirm and you will be redirected to the booking detail page.
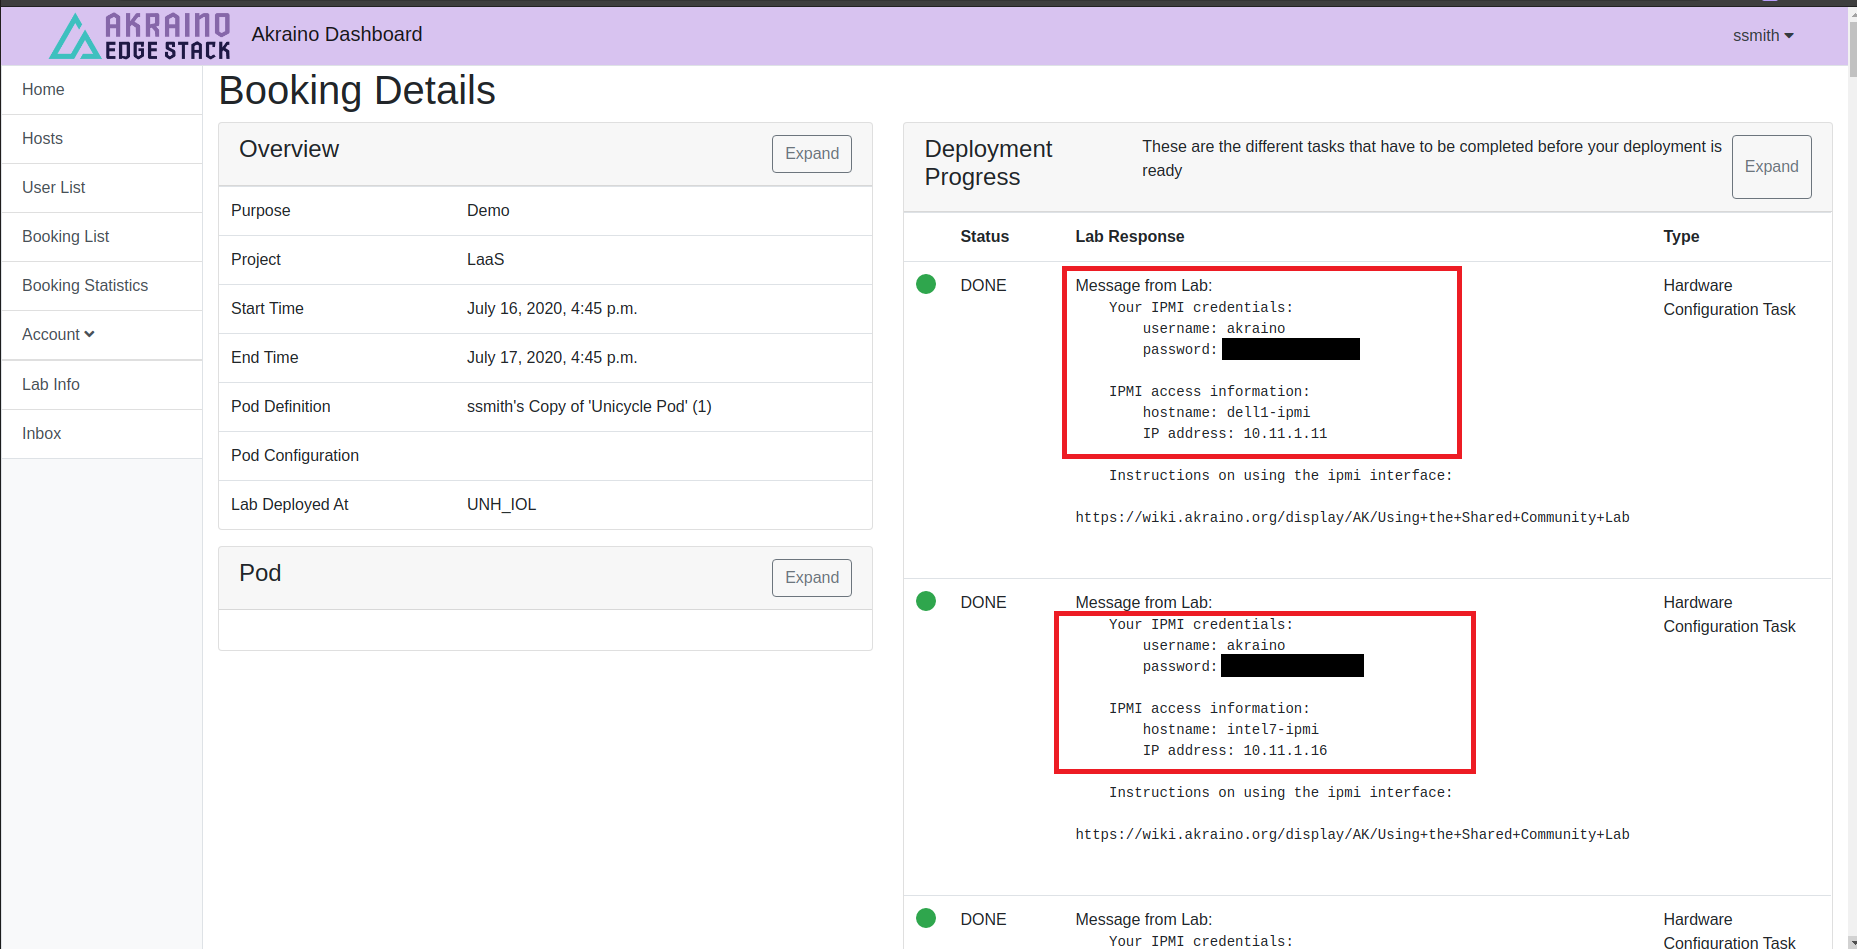
This page is the most important for you booking. Here you can see all of the IPMI login info for your hosts. Additionally it provides a link on how to use the community lab, you can access that link here. This page gives you more specific information on how to use ipmitool and how to connect through the VPN. Scrolling down on this page you will also see ssh information for how to access your hosts. Before you can use the hosts though, you need to follow the instructions provided in your booking email. This will provide your VPN file, as well as instructions to reset the password for your VPN account.
This page can take a while to update. If it takes several hours for this page to show you login information for the hosts in your Pod, please contact the IOL Akraino team at akraino-lab@iol.unh.edu.
Viewing and Managing your Bookings

To access the booking detail page from the home page you can select Account > My Bookings as shown above.
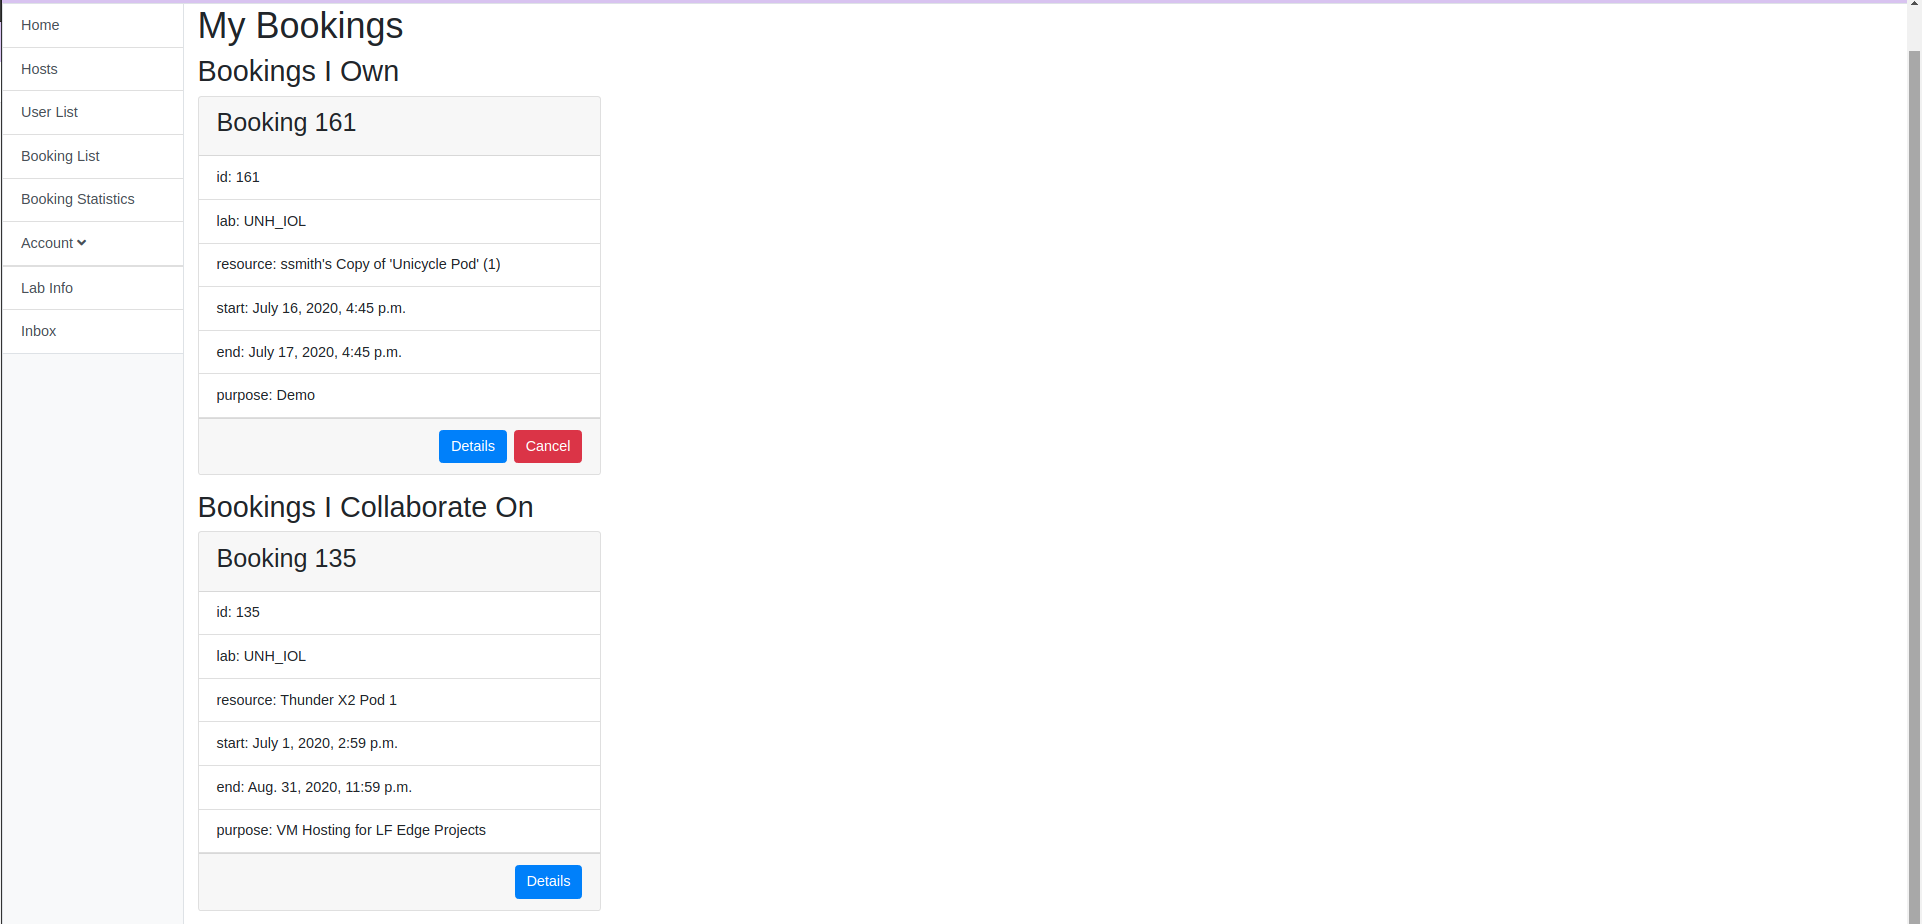
From this page you can see your bookings as well as the bookings you collaborate on. By clicking the details button on your booking you can get the booking information page.
You can also press the Cancel button to prematurely conclude your booking.
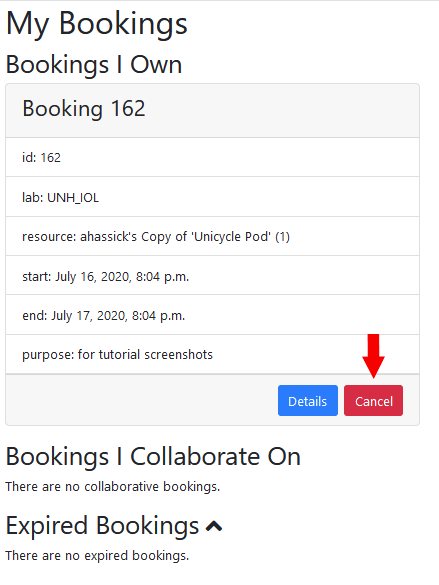
Be Warned
Before you cancel your booking, ensure that you have already pulled all important data off of your hosts.
After your booking becomes inactive, we can not guarantee that any of your data is recoverable.
If at any point you encounter a problem in the booking process or you think you have discovered a bug, please email the Akraino team at akraino-lab@iol.unh.edu.
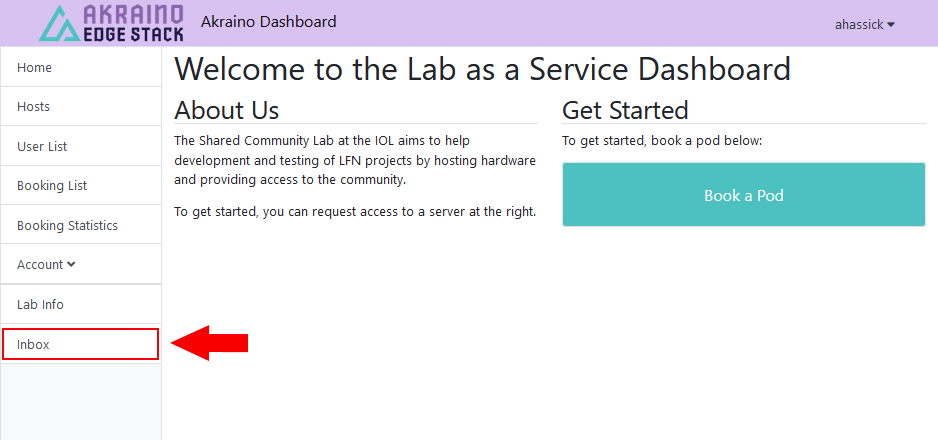
Notification Inbox
You can find all of your notifications, which also contain important information on how to access your hosts, by clicking on the Inbox button on the left margin.
These notifications should also be emailed to you automatically. In the case that they are not, you can still access them here.
Account Request & VPN Setup
Through the Dashboard
The dashboard will automatically create a VPN account for you, and an email will be sent to you containing your credentials.
Getting One Manually
To get a VPN account manually, you must send a request to akraino-lab@iol.unh.edu and then we will make you an account. Please provide your full name, the Akraino Blueprint you are working on, and the Pod you would like access to. Please allow up to 1 business day to get the account setup.
Once we have made your account, you will receive an automated email with the username and a temporary password as well as an “ovpn” config file. Then on your OpenVPN client just import that file and enter in your username and temporary password. After you connect, you must reset your password by going to https://resolute.akr.iol.unh.edu/ipa/ui, this will take you to our FreeIPA server and once you put in the information it will ask you to put in your own password. Once you've changed your password, disconnect from the VPN, update your password on your client, and reconnect. You should be able to continue using that password in the future.
Please be aware that your company may need to open up a firewall hole for OpenVPN to work correctly.
If you have any issues please contact us at akraino-lab@iol.unh.edu.
Lab documentation is being moved over to the LF Edge Wiki, as lab operation and oversight is assumed by the LF Edge TAC and the lab subcommittee
LF Edge Shared Lab WikiPlease do NOT request accounts for other users, we will not send passwords or login credentials to 3rd parties.
Host & Pod Access
This will be slightly different for each pod, but each pod will have an IPMI/LOM connection available. This connection will be reachable through the VPN and from the public network of the pod, and can be used to control the automated install or deployment onto the pod, depending on the desired blueprint. Each pod has its own documentation page in this wiki space.
...