...
Installation High-Level Overview
The blueprint provides single command one click deployment and command-line interface for installing the EALTEdge blueprint components.
...
| No | Usage |
|---|---|
| 1 | Jump Host (One Click Deployment Node) |
| 2 | MECM (Controller) |
| 3 | MEC Host (Edge Node) |
All the nodes should have internet connectivity , network interface and network connectivity between the VM's.
...
Login to the Jump Host and perform the below configuration steps (Steps : as below-
1. Generate public key : #ssh-keygen
...
** Install in unsecured mode - Dev mode
root@akraino-mec-0002:~# ansible-playbook ealt-all.yml -i ealt-inventory.ini --tags "mecm" --extra-vars "operation=install mode=dev"
...
root@akraino-mec-0002:~#cd ~/ealt-edge/ocd/infra/playbooks
Note: The CLI Commands to setup the environment should be executed only from above path.
3. Edit the Configuration File : ealt-inventory.ini with the details of MECM and MEC Hosts.
...
4. Execute the below command to install EALTEdge Environment
In non secure mode
root@akraino-mec-0002:~#ealt init all
Above command will install the various component. Refer the below table for detail information.
Other CLI Commands:
or
root@akraino-mec-0002:~#ealt init mecmroot@akrainoall -mec-0002:~#ealt init mep
Following packages will be installed in the cluster in the respective nodes:-
MECM : Docker, Kubernetes , Helm, Grafana, Calico, PostgresSQL and AppLCM.
MEC Host: Docker, K3S, Helm, RabbitMQ, Prometheus, CAdvisor, Kong, Vault, Cert-Manager , PostgresSQL, MEP Server and MEP Agent.
Deploying Application Packages : Using CLI
Precondition : The EALTEdge Environment should be installed. One MECM and one MEC Host atleast.
Pre-configuration : Need to set the below parameters as environment variables on VM where EALTEdge CLI is being installed.
export ONBOARDPACKAGEPATH= <Path where Application CSAR Package is kept in the Node where CLI is running>
export MECMClusterIP=<IP of MECM Node> #IP of Node where MECM is installed.
export MECMClusterPort=30001 #(Node Port of applcm service running on MECM)
Command Supported:-
Application Package Management CLI Commands:
- Package On Boarding : root@akraino-mec-0002:~#ealt app create -f "sample_app.csar "
- Package Info Query: root@akraino-mec-0002:~#ealt app info -i "<package id number>"
- Package Delete: root@akraino-mec-0002:~#ealt app delete -i "<package id number>"
Application Life Cycle Management CLI Commands:
- Application Instance Creation on MEC Host: root@akraino-mec-0002:~#ealt applcm create -i appdid "<id>" -n "<name>" -d "<description>"
- To start the application instance on MEC Host: root@akraino-mec-0002:~#ealt applcm start -i appid "<id>" -n "<hostname>" -o "<hostip>"
- To get the application instance details : root@akraino-mec-0002:~#ealt applcm info -i appid "<id>"
- To terminate the application instance: root@akraino-mec-0002:~#ealt applcm kill -i appid "<id>"
- To delete the application on MEC Host: root@akraino-mec-0002:~#ealt applcm delete -i appid "<id>"
Snapshot Deployment Overview
Not Applicable
Special Requirements for Virtual Deployments
N/A
Install Jump Host
N/A
Verifying the Setup - VM's
N/A
Upstream Deployment Guide
Upstream Deployment Key Features
N/A
Special Requirements for Upstream Deployments
N/A
Scenarios and Deploy Settings for Upstream Deployments
N/A
Including Upstream Patches with Deployment
N/A
Running
N/A
Interacting with Containerized Overcloud
N/A
Verifying the Setup
Verifying EALTEdge Deployment
Currently the verification is manually done.
- Login to the MECM Node and check whether K8S cluster is installed.
- Check grafana and AppLCM services are running as PODS.
- Login to MEC Host and check K3S is installed.
Developer Guide and Troubleshooting
Uninstall Guide
Using Ansible Playbooks
...
-mode dev
In Secure Mode (TLS Enabled)
root@akraino-mec-0002:~#ealt init all --mode prod
Above command will install the various component. Refer the below table for detail information.
Other CLI Commands:
Command to Install only MECM Node.
root@akraino-mec-0002:~#ealt init manager
To Install MECM node in Secure Mode
root@akraino-mec-0002:~#ealt init manager -m prod
Command to Install only MEC Host (MEP Node)
root@akraino-mec-0002:~#ealt init edge
or
root@akraino-mec-0002:~#ealt init edge -m dev
MEC Host in Secure (TLS/HTTPS) Mode
root@akraino-mec-0002:~#ealt init edge -m prod
Following packages will be installed in the cluster in the respective nodes:-
MECM pkgs: Docker, Kubernetes , Helm, Grafana, Calico, PostgresSQL and AppLCM.
MEC Host pkgs: Docker, K3S, Helm, RabbitMQ, Prometheus, CAdvisor, Kong, Vault, Cert-Manager , PostgresSQL, MEP Server and MEP Agent.
Deploying Application Packages : Using CLI
Prerequisite : The EALTEdge Environment should be installed. One MECM and one MEC Host at least.
Pre-configuration : Need to set the below parameters as environment variables on the Virtual Machine / Host where EALTEdge Command Line Interface tool is being installed.
export ONBOARDPACKAGEPATH= <Path where Application CSAR Package is kept in the Node where CLI is running>
export MECMClusterIP=<IP of MECM Node> #IP of Node where MECM is installed.
export MECMClusterPort=30001 #(Node Port of applcm service running on MECM)
To enable HTTPS Mode while using CLI, additional configurations have to be done. The configurations are as follows:
export CertificateKeyFile=<Path of CA Cert>
export EALTSSLMode=1 #If need to disable https mode modify the flag to 0
export MECMClusterIP='edgegallery.org' #Map the DNS Name to the MECM IP in /etc/hosts file.
Command Supported:-
Application Package Management CLI Commands:
- Package On Boarding : root@akraino-mec-0002:~#ealt app create -f "sample_app.csar "
- Package Info Query: root@akraino-mec-0002:~#ealt app info -i "<package id number>"
- Package Delete: root@akraino-mec-0002:~#ealt app delete -i "<package id number>"
Application Life Cycle Management CLI Commands:
- Application Instance Creation on MEC Host: root@akraino-mec-0002:~#ealt applcm create -i appdid "<id>" -n "<name>" -d "<description>"
- To start the application instance on MEC Host: root@akraino-mec-0002:~#ealt applcm start -i appid "<id>" -n "<hostname>" -o "<hostip>"
- To get the application instance details : root@akraino-mec-0002:~#ealt applcm info -i appid "<id>"
- To terminate the application instance: root@akraino-mec-0002:~#ealt applcm kill -i appid "<id>"
- To delete the application on MEC Host: root@akraino-mec-0002:~#ealt applcm delete -i appid "<id>"
Snapshot Deployment Overview
Not Applicable
Special Requirements for Virtual Deployments
N/A
Install Jump Host
N/A
Verifying the Setup - VM's
N/A
Upstream Deployment Guide
Upstream Deployment Key Features
N/A
Special Requirements for Upstream Deployments
N/A
Scenarios and Deploy Settings for Upstream Deployments
N/A
Including Upstream Patches with Deployment
N/A
Running
N/A
Interacting with Containerized Overcloud
N/A
Verifying the Setup
Verifying EALTEdge Deployment
Currently the verification is manually done.
- Login to the MECM Node and check whether K8S cluster is installed.
- Check grafana and AppLCM services are running as PODS.
- Login to MEC Host and check K3S is installed.
Developer Guide and Troubleshooting
Uninstall Guide
Using Ansible Playbooks
root@akraino-mec-0002:~#ansible-playbook ealt-all-uninstall.yml -i ealt-inventory.ini --extra-vars "operation=uninstall"
root@akraino-mec-0002:~#ansible-playbook ealt-all-uninstall.yml -i ealt-inventory.ini --tags "infra" --extra-vars "operation=uninstall"
root@akraino-mec-0002:~#ansible-playbook ealt-all-uninstall.yml -i ealt-inventory.ini --tags "mecm" --extra-vars "operation=uninstall"
root@akraino-mec-0002:~#ansible-playbook ealt-all-uninstall.yml -i ealt-inventory.ini --tags "mep" --extra-vars "operation=uninstall"
Using CLI
root@akraino-mec-0002:~#ealt clean all
root@akraino-mec-0002:~#ealt clean mecm
root@akraino-mec-0002:~#ealt clean mep
Vault documentation
**This document explains how to generate certificate by using vault and cert manager**
##Cluster Architecture

##Make a cluster
##The Image try to put with reference to our environment, with reference to EALT Edge. Can make a picture where Vault will be running in MEC Host (as Root CA) , ##Cert Manager and Applications (App1, App2)
##1. Add helm repo
```
helm repo add hashicorp https://helm.releases.hashicorp.com
helm install vault hashicorp/vault
```
##2. Generate root token and Unseal Key
```
kubectl exec vault-0 -- vault operator init -key-shares=1 -key-threshold=1 -format=""
```
##Note: Root token we will use when we will login vault pod, Unseal Key and Root token will looks like below ex-
##Unseal Key 1: QcTX47IacKidIjFWSrkGLiQG1fwaqoInEz0SqAZ7rMs=
##Initial Root Token: s.A0SXgscZxbCeJRd1AjsVzvUU
##Generated Unseal key need to put in below command then vault will start running as a pod
```
kubectl exec -ti vault-0 -- vault operator unseal <Unseal Key>
```
##Vault is initialised as a pod
##By using below command can login in vault pod
```
kubectl exec -it vault-0 -- /bin/sh
```
##Vault Initialisation and Configuration Steps
####Once we initialize the vault pod we get unseal key and root token, need to put the root token
```
vault login <root token>
```
##Enable the PKI secrets engine
##By default, the secrets engine will mount at the name of the engine. To enable the secrets engine at a ##different path, use the -path argument.
```
vault secrets enable pki
```
##Keep the value in sync with the comment. 30 days, Increase the TTL by tuning the secrets engine. The default value of 30 days may be too short
```
vault secrets tune -default-lease-ttl=2160h -max-lease-ttl=87600h pki
```
##Configure a CA certificate and private key. It can generate ##its own self-signed root
## ealtedge.com is a your common_name or base url
```
vault write pki/root/generate/internal common_name=ealtedge.com ttl=8760h
```
##Update the CRL location and issuing certificates. These values can be updated in the future.
```
vault write pki/config/urls issuing_certificates="http://127.0.0.1:8200/v1/pki/ca" crl_distribution_points="http://127.0.0.1:8200/v1/pki/crl"
```
##It will allow your domain and subdomain
```
vault write pki/roles/my-role allowed_domains=ealtedge.com allow_subdomains=true max_ttl=8760h
```
##Generate a new credential by writing to the /issue endpoint with the name of the role
##The output will include a dynamically generated private key and certificate which corresponds to the ##given role
##The issuing CA and trust chain is also returned for automation simplicity
```
vault write pki/issue/my-role common_name=www.ealtedge.com
```
####Enabling AppRole in Vault
```
vault auth enable approle
```
##Writing vault policy
```
vault policy write pki-policy -<<EOF
path "pki*" { capabilities = ["create", "read", "update", "delete", "list", "sudo"]}
EOF
```
##Write Auth role
```
vault write auth/approle/role/my-role secret_id_ttl=8760h token_num_uses=0 token_ttl=2160h token_max_ttl=8760h secret_id_num_uses=0 policies=pki-policy
```
##Note:-
##my-role - is the role name
##secret_id_ttl - (Optional) The number of seconds after which any SecretID expires
##token_num_uses - (Optional) The period, if any, in number of seconds to set on the token
##token_ttl - (Optional) The incremental lifetime for generated tokens in number of seconds. Its current value will be referenced at renewal time
##token_max_ttl - (Optional) The maximum lifetime for generated tokens in number of seconds. Its current value will be referenced at renewal time
##secret_id_num_uses - (Optional) The number of times any particular SecretID can be used to fetch a token from this AppRole, after which the SecretID will expire. ##A value of zero will allow unlimited uses.
##Read Auth role
##Here it will give you role id which you need to use in vault-approle-issuer.yml
```
vault read auth/approle/role/my-role/role-id
```
##Generate secret id
```
vault write -f auth/approle/role/my-role/secret-id
```
##By using above 2 command role id and secret id you need to pass in below command
```
vault write auth/approle/login role_id=<role-id> secret_id=<secret-id>
```
###########################
##If the command successful then vault configuration and authentication via approle is completed
###########################
##YAML files to be modified
##First execute below yaml file
```
kubectl apply -f cert-manager.yaml
```
##Need to replace with the latest secret id in base64 format by using below command
##Secret id already generate when we are executing vault command, need to use same secret id here
```
echo secret-id | base64
```
##The output of above command has to be replaced in the vault-apply-secret.yml file data.secretId
```
kubectl apply -f vault-apply-secret.yml
```
##No you will get one ip where your vault is running so that ip you can get by using below command
##Copy vault ip from below command
```
kubectl get svc
```
##Now vault ip and role id need to replace in vault-approle-issuer.yml file
##Role id already generated when we are executing vault commands
```
kubectl apply -f vault-approle-issuer.yml
```
##NOTE: spec.vault.server: IP here you need to change vault ip which you will get when u ren 'kubectl get svc'
##spec.vault.auth.roleId this is you need to replace and need to put latest role id which you get in 'vault read auth/approle/role/my-role/role-id'
##Then final we need to execute below yaml file
```
kubectl apply -f vault-cert-certificate.yml
```
#######################################
Certificate generate process completed
#######################################
##Now get ca certificate use below command
```
curl http://10.43.130.35:8200/v1/pki/ca/pem
```
##10.43.130.35 is your vault ip, need to replace with latest vault ip

Kong documentation
**This document explains how to configure mep and kong**
##set up the EALT Environment. Refer the Installation Guide[Specify the installation guide wiki url]
##Mep will install as a pod
##First create setup by using below command server running in https
```
ansible-playbook ealt-all.yml -i ealt-inventory.ini --extra-vars "operation=install mode=prod"
```
##For http use below command
```
ansible-playbook ealt-all.yml -i ealt-inventory.ini --extra-vars "operation=install mode=dev"
```
##Mep will install as a pod
##MEP services will be running in the MEC Host (MEP)
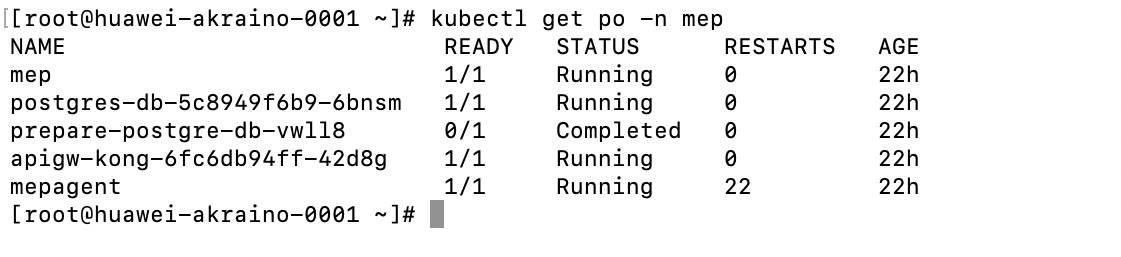
##Check the mep running or not use below command
```
kubectl get po -n mep
```
##Output -

```
kubectl get svc -n mep
```
##Output -

##Configure Kong
##HTTPS Env - Rest API request Adding Services and Adding Route in Kong API Gateway
```
https://www.ealtedge.org:30012/services
https://www.ealtedge.org:30012/routes
```
##DNS mapping should be done correctly
##HTTPS Env - Rest API request deleting route and services
```
https://www.ealtedge.org:30012/services/http-mp1
https://www.ealtedge.org:30012/routes/mp1
```
##HTTP Env - Rest API request Adding Services and Adding Route in Kong API Gateway
```
http://www.ealtedge.org:30011/services
http://www.ealtedge.org:30011/routes
```
##DNS mapping should be done correctly
##HTTP Env - Rest API request deleting route and services
```
http://www.ealtedge.org:30011/services/http-mp1
http://www.ealtedge.org:30011/routes/mp1
```
##To verify the configurations done in Kong.
##Trigger the below Rest API
##In HTTP mode.
```
http://www.ealtedge.org:30010/mp1/mep/mec_service_mgmt/v1/applications/id123456/services
```
##In HTTPS Mode
```
https://www.ealtedge.org:30011/mp1/mep/mec_service_mgmt/v1/applications/id123456/services
```
##Get certificate from MEP server
##Login MEP server
```
cd /tmp/mepserver/deploy/
```
##Given path you will get all required certificates
```
ca.crt
tls.key
tls.crt
```
##ca.crt client certificate
##tls.key is a server key
##tls.crt server certificate

Using CLI
root@akraino-mec-0002:~#ealt clean all
root@akraino-mec-0002:~#ealt clean mecm
root@akraino-mec-0002:~#ealt clean mep
Troubleshooting
Error Message Guide
N/A
Maintenance
...