| HTML |
|---|
<script type="text/javascript" src="https://jira.akraino.org/s/c11c0bd6cdfdc04cacdf44e3072f7af4-T/ah7phx/78002/b6b48b2829824b869586ac216d119363/2.0.26/_/download/batch/com.atlassian.jira.collector.plugin.jira-issue-collector-plugin:issuecollector/com.atlassian.jira.collector.plugin.jira-issue-collector-plugin:issuecollector.js?locale=en-US&collectorId=c49ec9c2"></script> <script type="text/javascript">window.ATL_JQ_PAGE_PROPS = { "triggerFunction": function(showCollectorDialog) { jQuery("#myCustomTrigger").click(function(e) { e.preventDefault(); showCollectorDialog(); }); }}; </script>

<div style=" z-index:1000; background-color:#a00; position:fixed; bottom:0; right:-125px; display:block; transform:rotate(-45deg); overflow:hidden; white-space:nowrap; box-shadow:0 0 10px #888;" > <a href="#" id="myCustomTrigger" style=" border: 1px solid #faa; color: #fff; display: block; font: bold 125% 'Helvetica Neue', Helvetica, Arial, sans-serif; margin: 1px 0; padding: 10px 110px 10px 200px; text-align: center; text-decoration: none; text-shadow: 0 0 5px #444; transition: 0.5s;" >Report Issue</a> </div> |
| Table of Contents |
|---|
| Children Display |
|---|
...
| Blueprint | Servers | Dataplane | Validated HW details | Validated by |
|---|---|---|---|---|
| Rover | Dell 740XD | ATT Rover Validation HW, Networking and IP plan | AT&T | |
| Ericsson | ||||
| Rover | HP 380 Gen10<INSERT LINK TO ATT HP SERVER SPEC> | ATT Rover Validation HW, Networking and IP plan | AT&T |
Preflight Requirements
...
The automated deployment process configures the new Rover Server based on a set of user defined values specific to each Rover pod. These values must be defined and stored in a yaml site and pod specific input configuration file before the Rover pod deployment process can be started.
...
Click 'Upload' to allow you to select the Rover site and pod specific input yaml file:
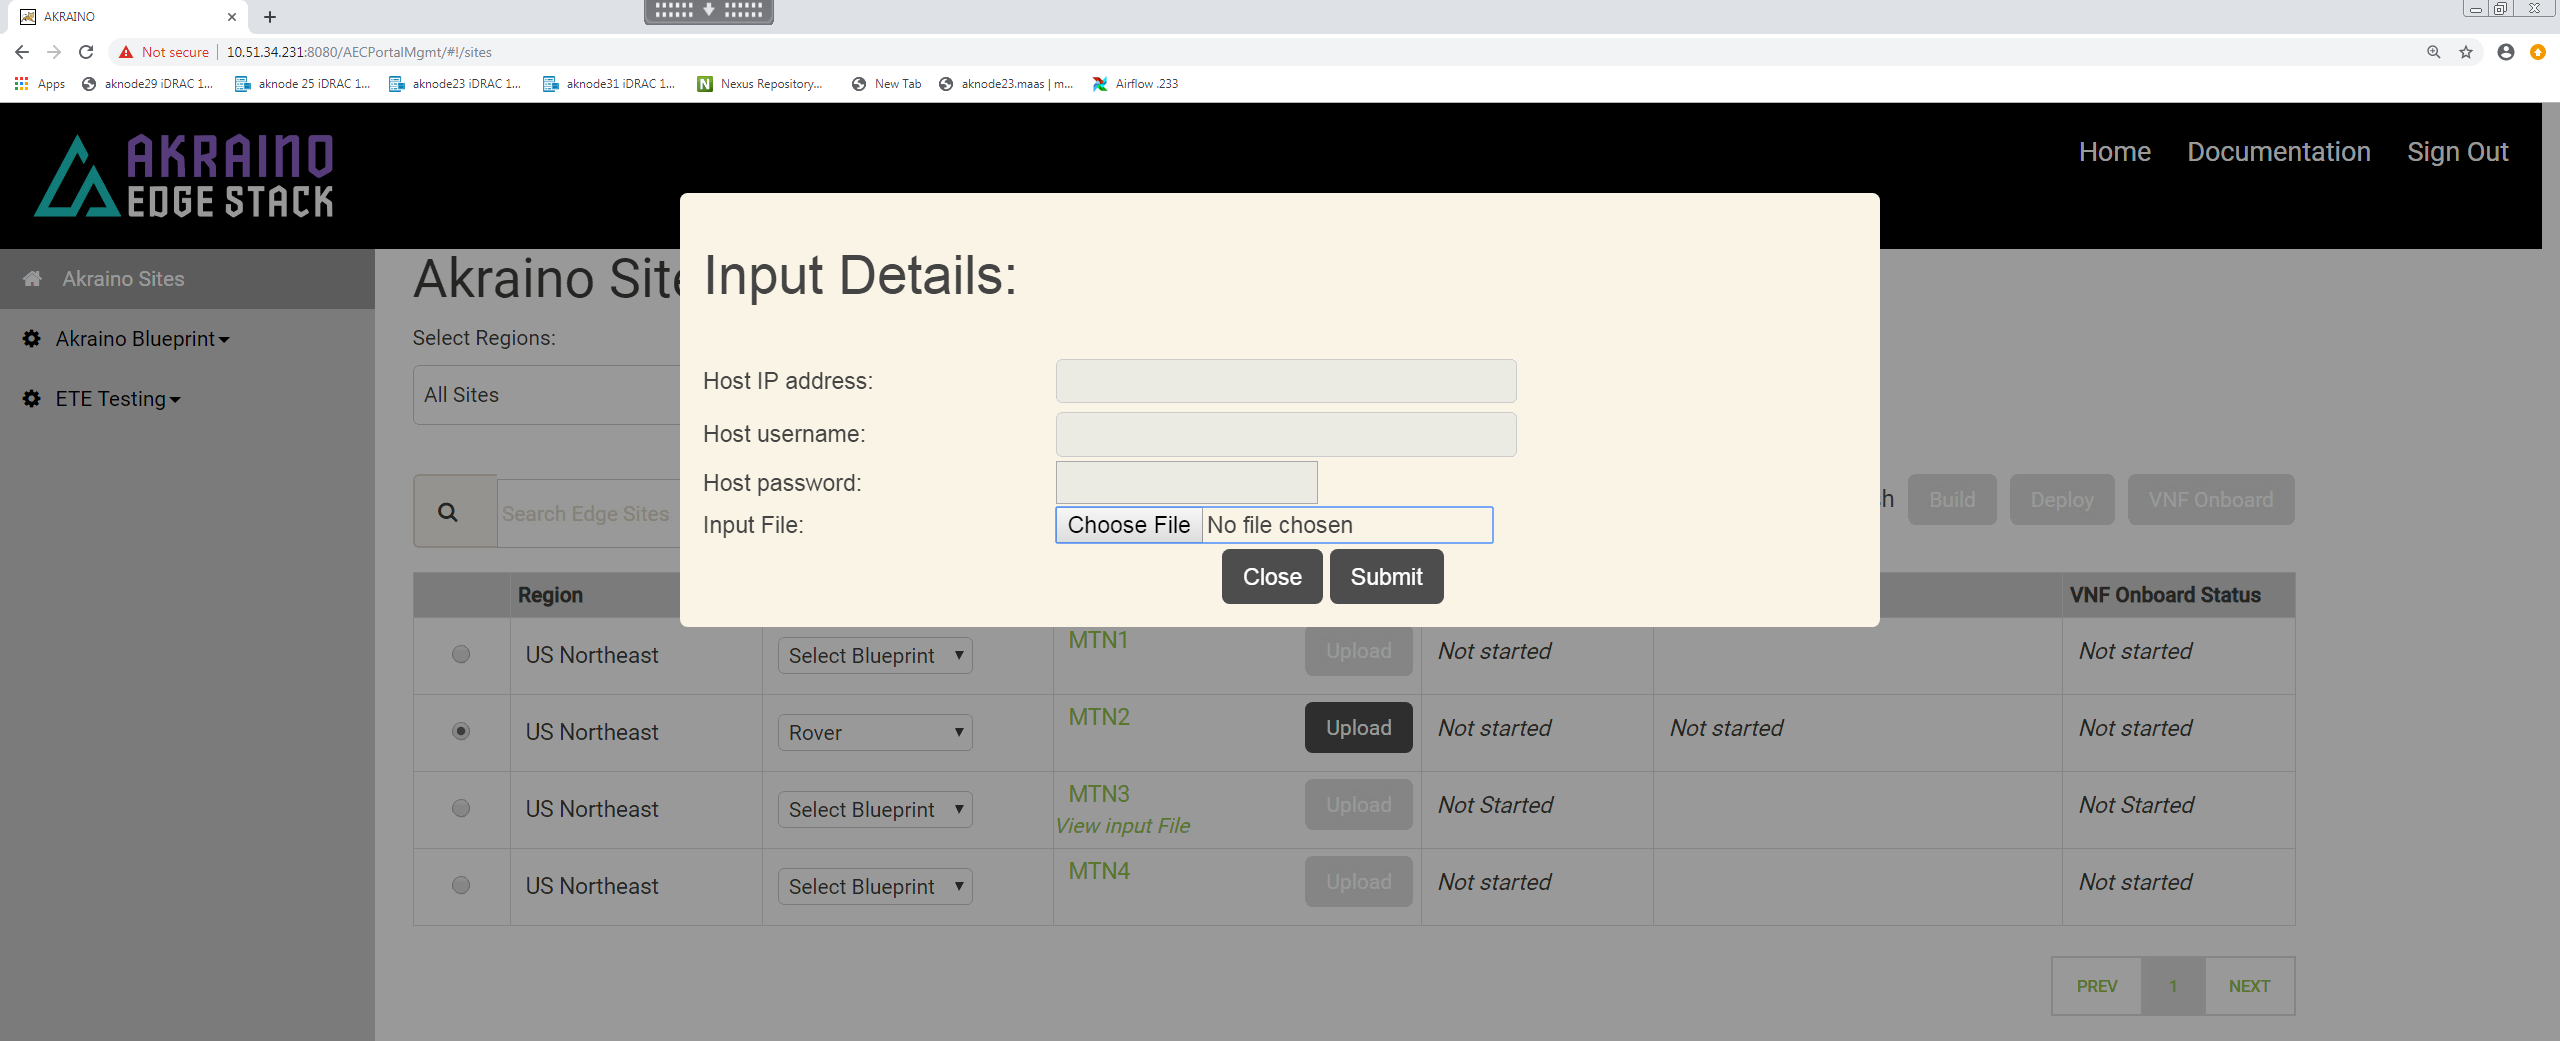
Choose the input file that you have created for the new Rover pod you want to deploy then click 'Submit'.
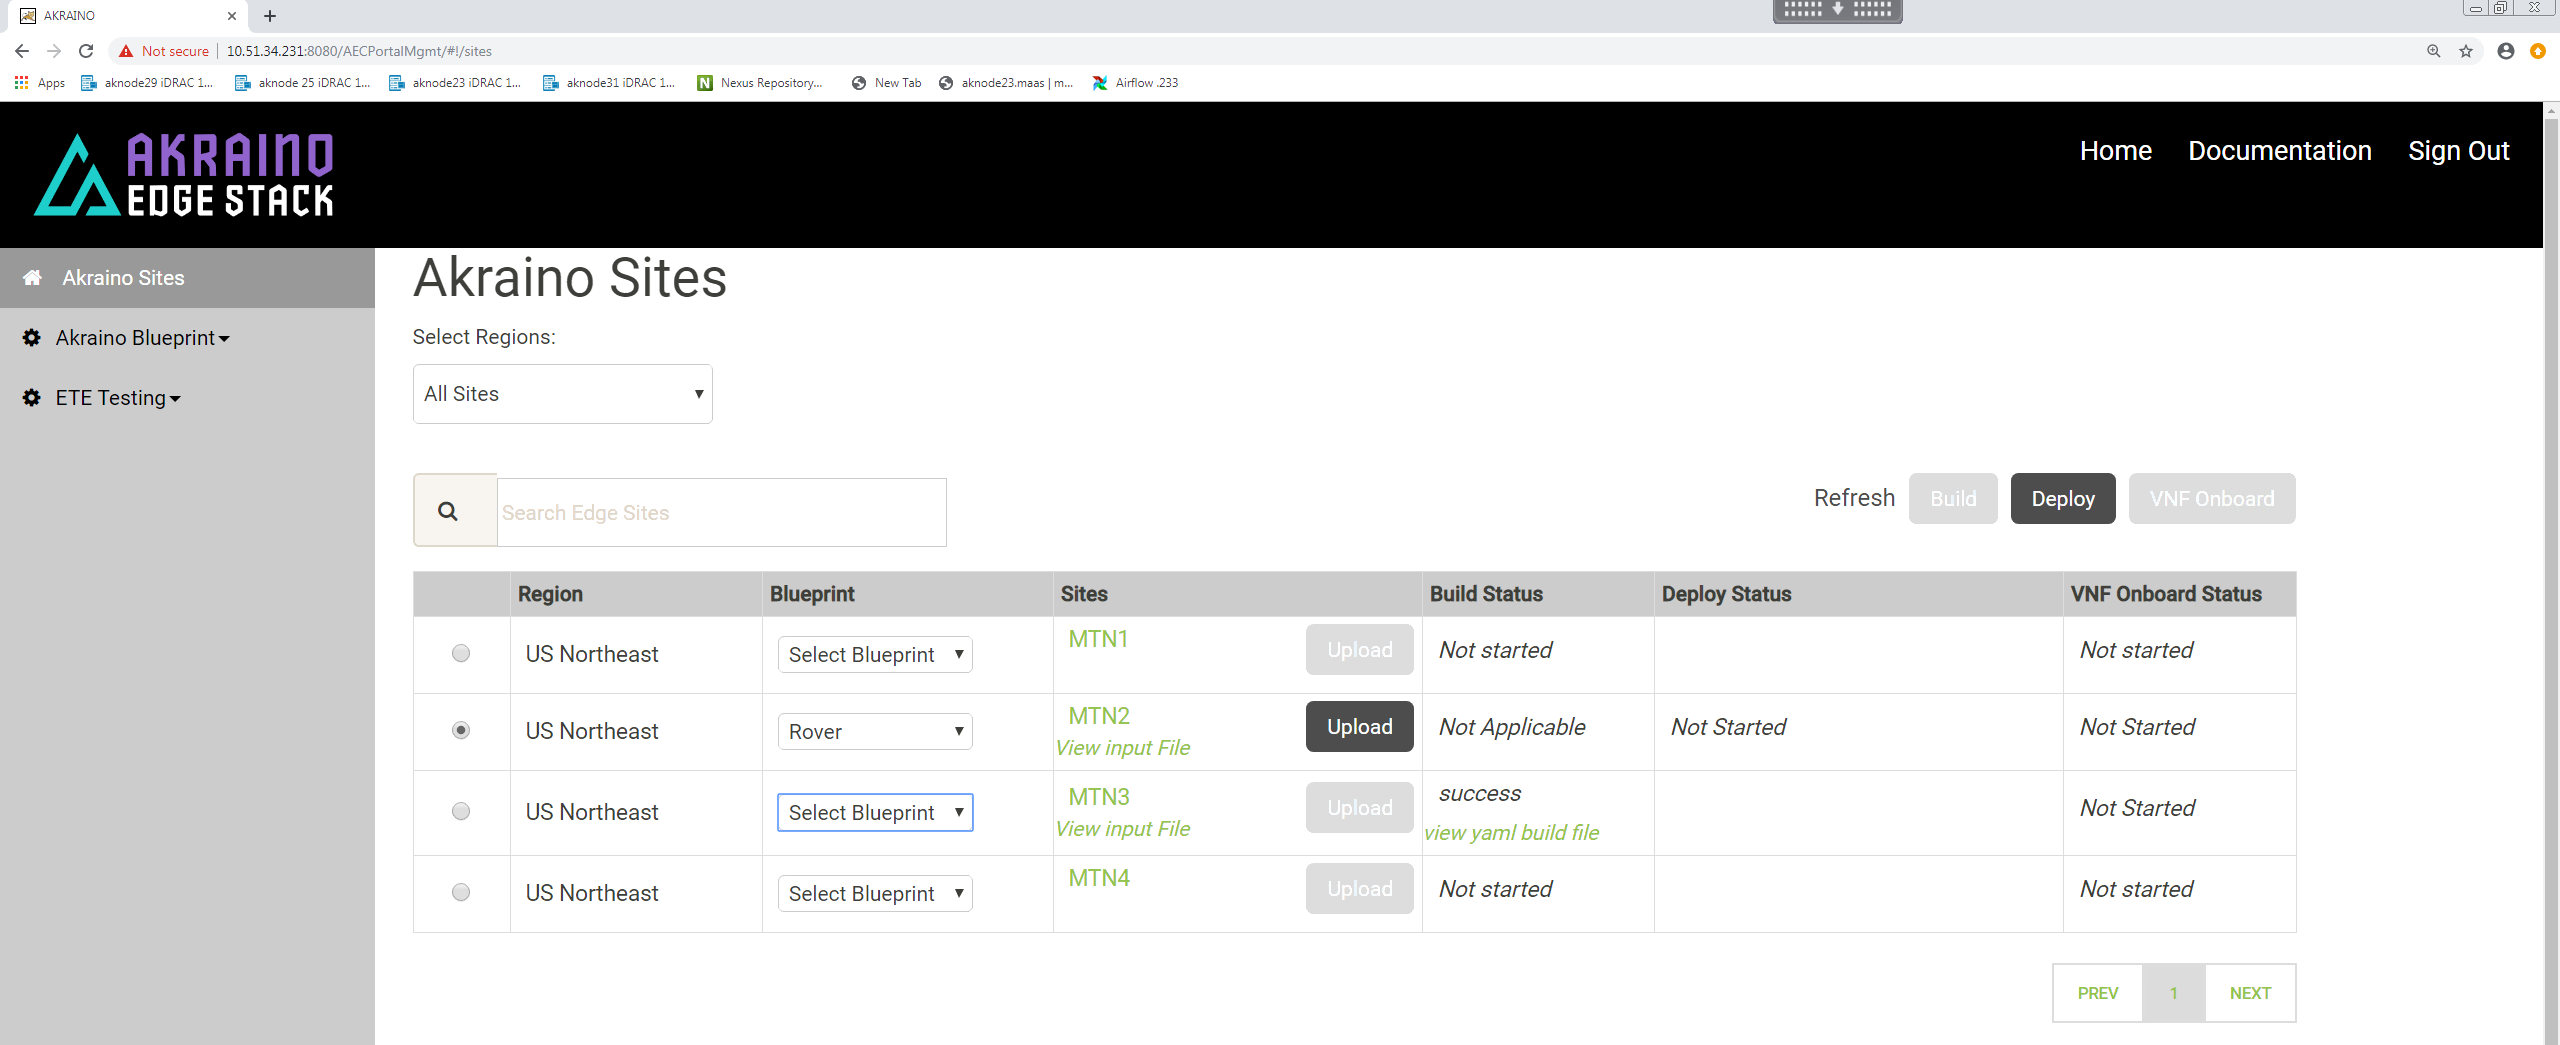
For Rover pod deployment there is no 'Build' step.
Make sure the pod you intend to deploy is still selected.
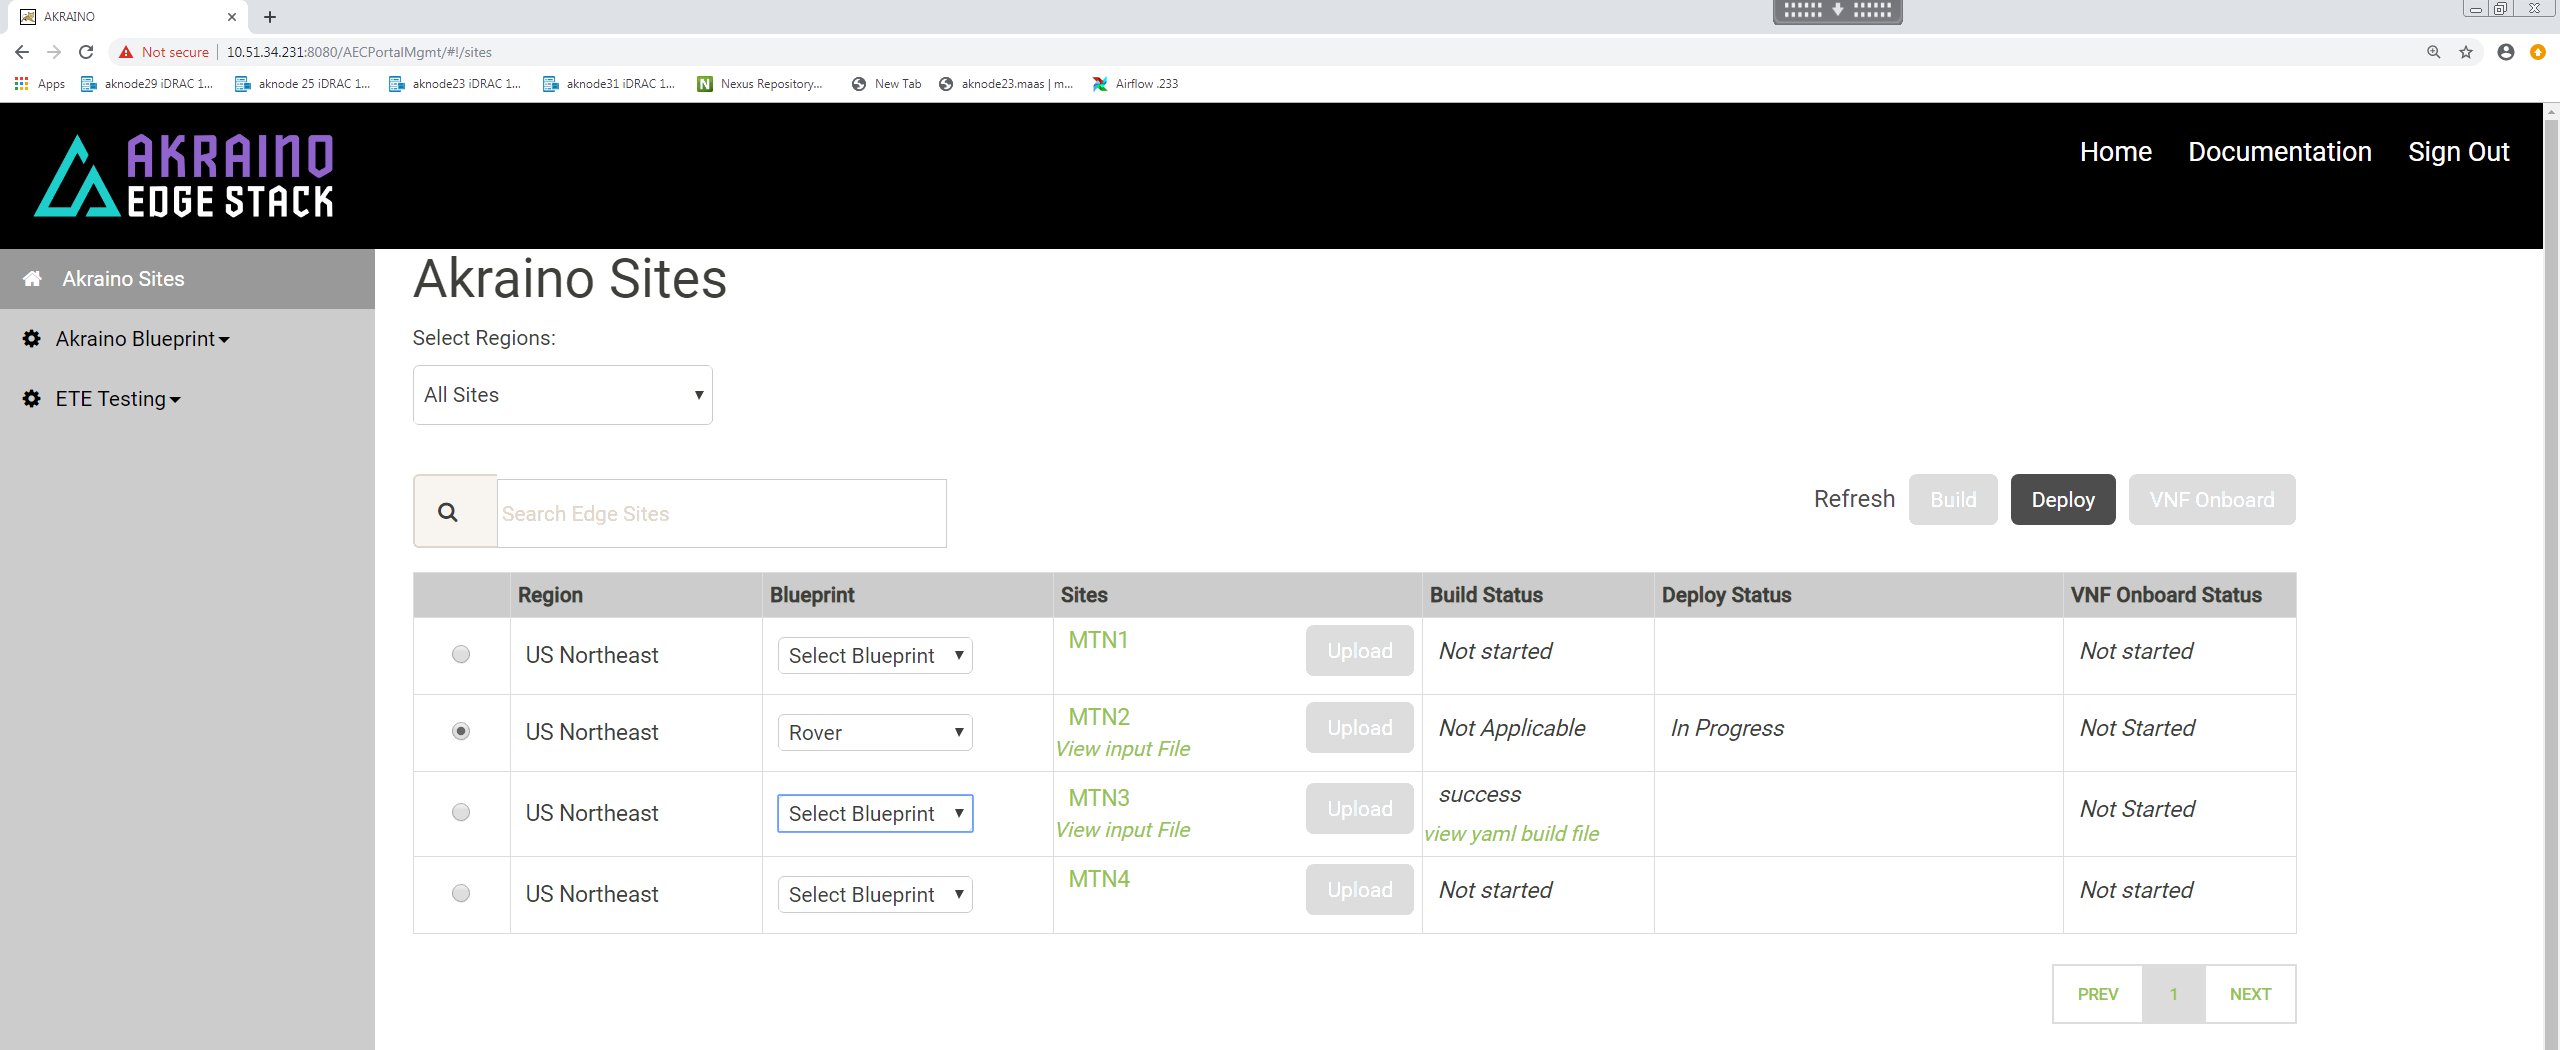
To initiate the automated deployment click 'Deploy'. You should see the status change to 'In Progress'.
The deployment may take <insert ballpark time>a couple of hours to complete.
It is also possible to follow the progress deployment in a number of ways including from the logs on the RC, monitoring the DHCP server on the RC and the virtual console of the iDRAC/iLO on the Rover server being deployed. Details are shown in the Deployment Walk-Throughs section of the release documentation.
...
If the pod deploys successfully you will see the UI change to show the following <may need to click refresh?><insert UI at end>a 'Success' message.
And the scriptexecutor.log file will show <insert log at end>the process completed successfully.
Rover Pod Site Specific Configuration Input Files
...