1. Overview
The Blueprint Validation User Interface (Bluval UI) provides a user-friendly way for displaying blueprints validation test results. Based on these results, the status of a blueprint can be determined (mature, incubation state, etc.).
It is a web application based on ONAP portal SDK, version 2.4.0 (Casablanca). It consists of the front-end and back-end parts. The front-end part is based on HTML, CSS, and AngularJS technologies. The back-end part is based on Spring MVC and Apache Tomcat technologies.
2. Bluval UI overview
The Bluval UI can be reached in the following address:
The login page is displayed in Figure 1.
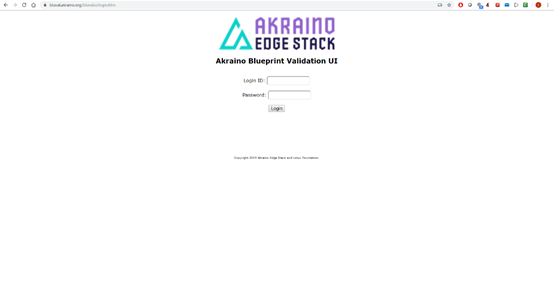
Figure 1. Bluval UI login page
The user must apply for an appropriate account creation. Details about the user account creation can be found in subsection 12.1.
When a user logs in, a redirection is performed towards the landing page displayed in Figure 2.
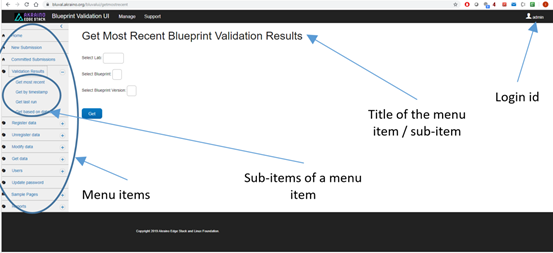
Figure 2. Bluval UI landing page
The general format of a Bluval UI page is the following:
- Display of the menu items. This is depicted in the left side of a page, as shown in Figure 2.
- Display of the selected menu sub-items. This is depicted under the selected menu, as shown in Figure 2.
- Display of the title of the selected menu item / sub-item. This is shown in the upper part of a page, as is illustrated in Figure 2.
- Display of the user’s login id. This is shown in the upper right part the page, as is illustrated in Figure 2.
The logout process is supported by clicking on the login id and then on log out button.
3. Using the “Validation Results” menu
The “Validation results” menu is used for retrieving blueprint validation results from Nexus.
This menu is available for the following roles: admin, TSC member, Lab owner.
The “Validation Results” menu includes four sub-items, namely “Get most recent”, “Get by timestamp”, “Get last run” and “Get based on dates”.
3.1 Get most recent
This sub-item should be selected when the most recent validation results of a blueprint are needed. Currently, the last 100 results are retrieved and displayed. The corresponding page is depicted in Figure 2. It should be noted that this page is also used as the landing page of the Bluval UI.
A user should define the following data:
- This defines the lab in which validation results will be searched.
- This defines the blueprint for which results will be displayed.
- Selected Blueprint version. This defines the version of the blueprint for which results will be displayed.
When the button ‘Get’ is clicked, the page shown in Figure 3 is illustrated.

Figure 3. Display of the Blueprint validation results
The user can use the following filters on the results, as is depicted in Figure 3:
- Blueprint layer. The layer of the blueprint
- The overall outcome of the test execution (‘SUCCESS’ or ‘FAILURE’)
- The timestamp associated with a result
Moreover, the following data is displayed for each result, as shown in Figure 3:
- The lab
- The Blueprint name
- The Blueprint version
- The timestamp associated with the result
- The date and time of the result creation
- Whether the optional test cases have been used
- Whether all layers of the blueprint have been used
- The used blueprint layers
- The submission to which this results is associated
- The overall outcome
It should be noted that the user can be further informed about a result by clicking on the button available in the ‘result’ column. Then, the modal illustrated in Figure 4 will be displayed, based on which the user can select a specific test suite of a layer to be demonstrated.
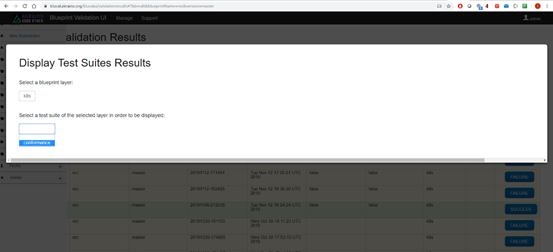
Figure 4. Selection of test suites
Next, details based on these selections will be listed, as is illustrated in Figure 5. Some of these details are the following: test statistics, test execution log and sub-suite robot keywords. The user can hide or show details about the last two items by clicking on them.
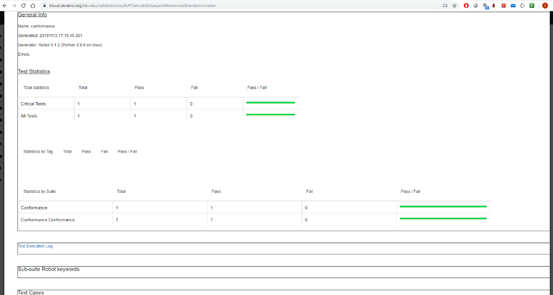
Figure 5. General Info, Test statistics and Test execution log of a test suite
By scrolling down, the test cases section is shown. Here, details about the test cases of the test suite are depicted, as is illustrated in Figure 6.
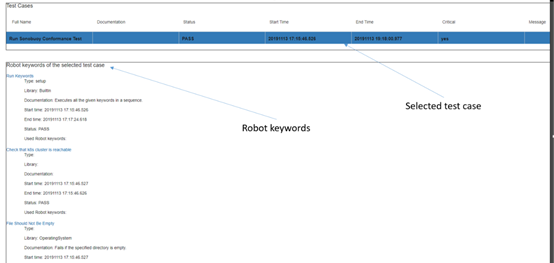
Figure 6. Test cases of a test suite
By clicking on a specific test case, the user can be informed about the used robot keywords of this case.
3.2 Get by Timestamp
This sub-item should be selected when only a result is needed whose timestamp is known. The corresponding page is depicted in Figure 7.
A user should define the following data:
- This defines the lab in which validation results will be searched.
- This defines the blueprint for which results will be displayed.
- Selected Blueprint version. This defines the version of the blueprint for which results will be displayed.
- This defines the timestamp associated with the result.
When the button ‘Get’ is clicked, the same workflow should be used as with the one described in the subsection 3.1.
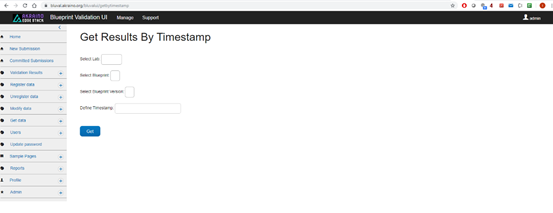
Figure 7. The page of “Get by timestamp” sub-item.
3.3 Get last run
This sub-item should be selected when the last result associated with the combination of the following data is needed:
- This defines the lab in which validation results will be searched.
- This defines the blueprint for which results will be displayed.
- Selected Blueprint version. This defines the version of the blueprint for which results will be displayed.
- Blueprint layer
- Whether optional test case have been used
- The overall outcome
The corresponding page is shown in Figure 8.
When the button ‘Get’ is clicked, the same workflow should be used as with the one described in the subsection 3.1.
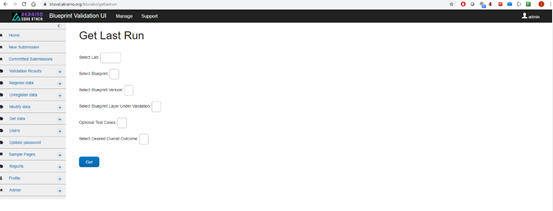
Figure 8. The page of “Get last run” sub-item.
3.4 Get results based on date
This sub-item should be selected when the results associated with the combination of the following data is needed:
- This defines the lab in which validation results will be searched.
- This defines the blueprint for which results will be displayed.
- Selected Blueprint version. This defines the version of the blueprint for which results will be displayed.
- Date of the result creation
The corresponding page is shown in Figure 9.
When the button ‘Get’ is clicked, the same workflow should be used as with the one described in the subsection 3.1.
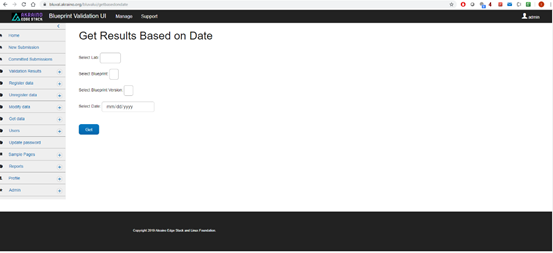
Figure 9. The page of “Get based on dates” sub-item.
4. Using the “New Submission” menu
TBD
5. Using the “Committed Submissions” menu
TBD
6. Using the “Register data” menu
The “Register data” menu is used for registering data within the context of the Bluval UI. It should be noted that this UI automatically registers data based on the results fetched from Nexus. This menu should be used as a complementary feature.
This menu is available for the following roles: admin, and TSC member.
The “Register data” menu includes five sub-items, namely “Lab”, “Blueprint”, “Layer”, “Timeslot” and “Blueprint Instance”.
6.1 Lab
Here, the labs and their silos can be registered, as shown in Figure 10.
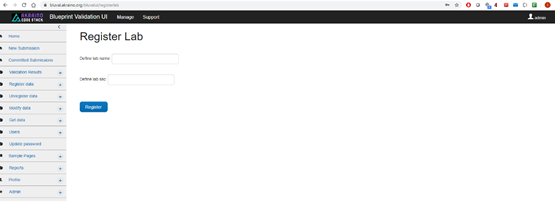
Figure 10. The page of “Register Lab” sub-item
Only then can the Bluval UI retrieve results from Nexus associated with a lab.
6.2 Blueprints
TBD
6.3 Layer
TBD
6.4 Timeslots
TBD
6.5 Blueprint Instances
TBD
7. Using the “Unregister data” menu
TBD
8. Using the “Modify data” menu
TBD
9. Using the “Get data” menu
TBD
10. Using the “Users” menu
TBD
11. Using the “Update password” menu
The “Update password” menu is used for updating the password of a specific user.
This menu is available for the following roles: admin, TSC member and Lab owner.
Its page is shown in Figure 11.
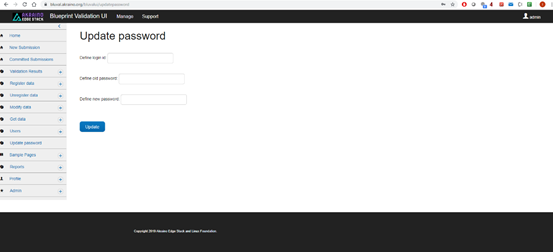
Figure 11. The page of the “Update password” item.
The following data must be defined:
- Login id. The Login id of the user whose password needs to be updated
- Old password. The old password of the user
- New password. The new password of the user
12. Appendix
12.1 Bluval UI user account creation
The following information is needed in order for a user account to be created:
- Login id. This is the desired user id
- Please refer to subsection 12.2 for the supported roles.
An email should be sent to featureprojects@lists.akraino.org with the aforementioned information. If the corresponding user account is approved, a confirmation email will be sent back with the initial user password. When the user is logged in, this password should be changed using the ‘Update password’ menu tab (refer to subsection 11).
12.2 Roles
Currently, the following roles are supported by the Bluval UI:
- Admin. This role can be assigned only to one user, namely the admin user. It gives full control of the Bluval UI. This role supports the following features:
- Submission of a blueprint for validation
- Retrieval of blueprint submissions
- Retrieval of validation results
- Registration of data, such as lab, blueprint, blueprint instance, layer and timeslots
- Un-registration of data, such as lab, blueprint, blueprint instance, layer and timeslots
- Modification of data, such as lab, blueprint, blueprint instance, layer and timeslots
- Data retrieval, such as lab, blueprint, blueprint instance, layer and timeslots
- CRUD operations on user account data
- Update of the current user password
- Creation of roles
- TSC Member. This role can be assigned to multiple users. It supports the following features:
- Submission of a blueprint for validation
- Retrieval of blueprint submissions
- Retrieval of validation results
- Registration of data, such as lab, blueprint, blueprint instance, layer and timeslots
- Un-registration of data, such as lab, blueprint, blueprint instance, layer and timeslots
- Modification of data, such as lab, blueprint, blueprint instance, layer and timeslots
- Data retrieval, such as lab, blueprint, blueprint instance, layer and timeslots
- Update of the current user password
- Lab owner. This role can be assigned to multiple users. It supports the following features:
- Retrieval of validation results
- Data retrieval, such as lab, blueprint, blueprint instance, layer and timeslots
- Update of the current user password