Installation Architecture
Due to the hardware source limitation, Connected Vehicle Blueprint is deployed in three Virtual Machines in Amazon Web Service.
(Visit CI Lab Environment Setup if you want to set up connected vehicle blueprint in CI Lab.)
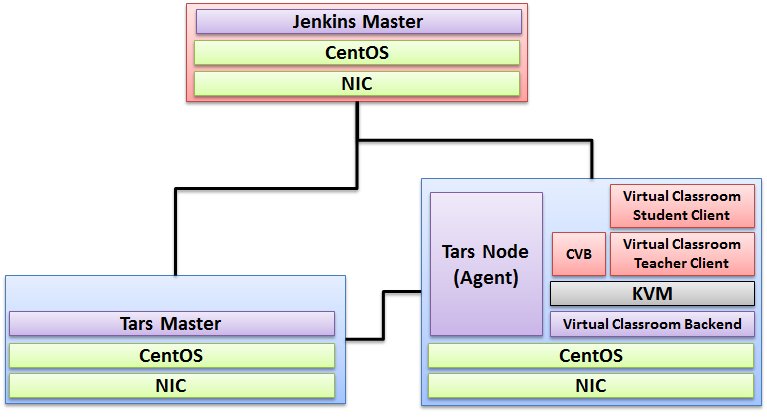
The following picture depicts the deployment architecture.
Node-0: Deploy Jenkins Master.
Node-1: Deploy Tars Master Node.
Node-2: Deploy Tars Slave(Node) and the connected vehicle applications.
Installation Hardware
Hostname | Core | RAM | HDD | NIC | Role |
Node-0 | 8 | 40GB | 3TB | 1GB | Jenkins Master |
Node-1 | 8 | 96GB | 3TB | 1GB | Tars Framework |
Node-2 | 8 | 96GB | 3TB | 1GB | Tars Node (CVB + Type4 Application + Virtual Classroom Teacher Client + Virtual Classroom Student Client) |
Installation Software
- CentOS 8
- mysql Ver 14.14 Distrib 5.6.26
- OpenStack: Rocky
- k8s:1.15.0
Installation Step by Step
Step1: Install Jenkins
Refer to the following link for installing Jenkins Mater and connect to Jenkins Slave.
https://github.com/qiuxin/Connected-Vechicle/blob/master/Doc/CI_Environment_Setup.md

Step2: Install Tarsframework
Refer to the following link for installing Tarsframework.
https://github.com/qiuxin/Tars/blob/arm/Install.md
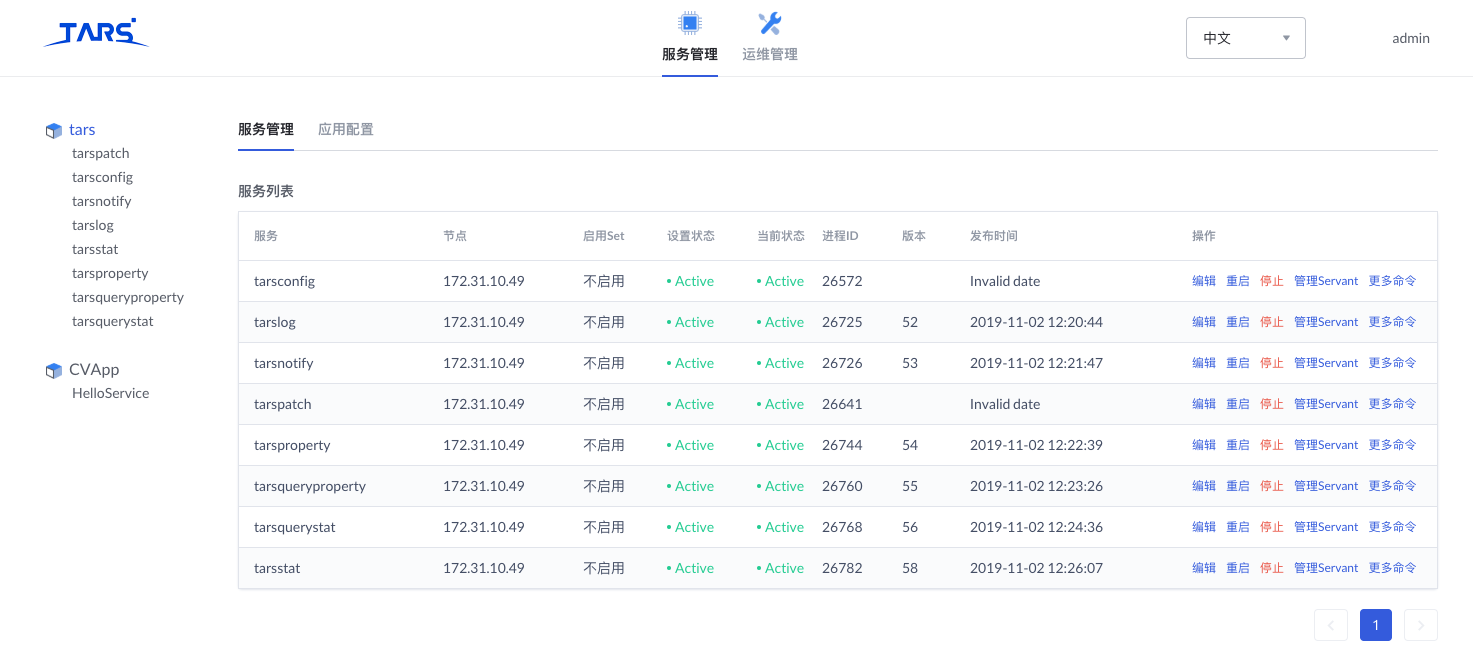
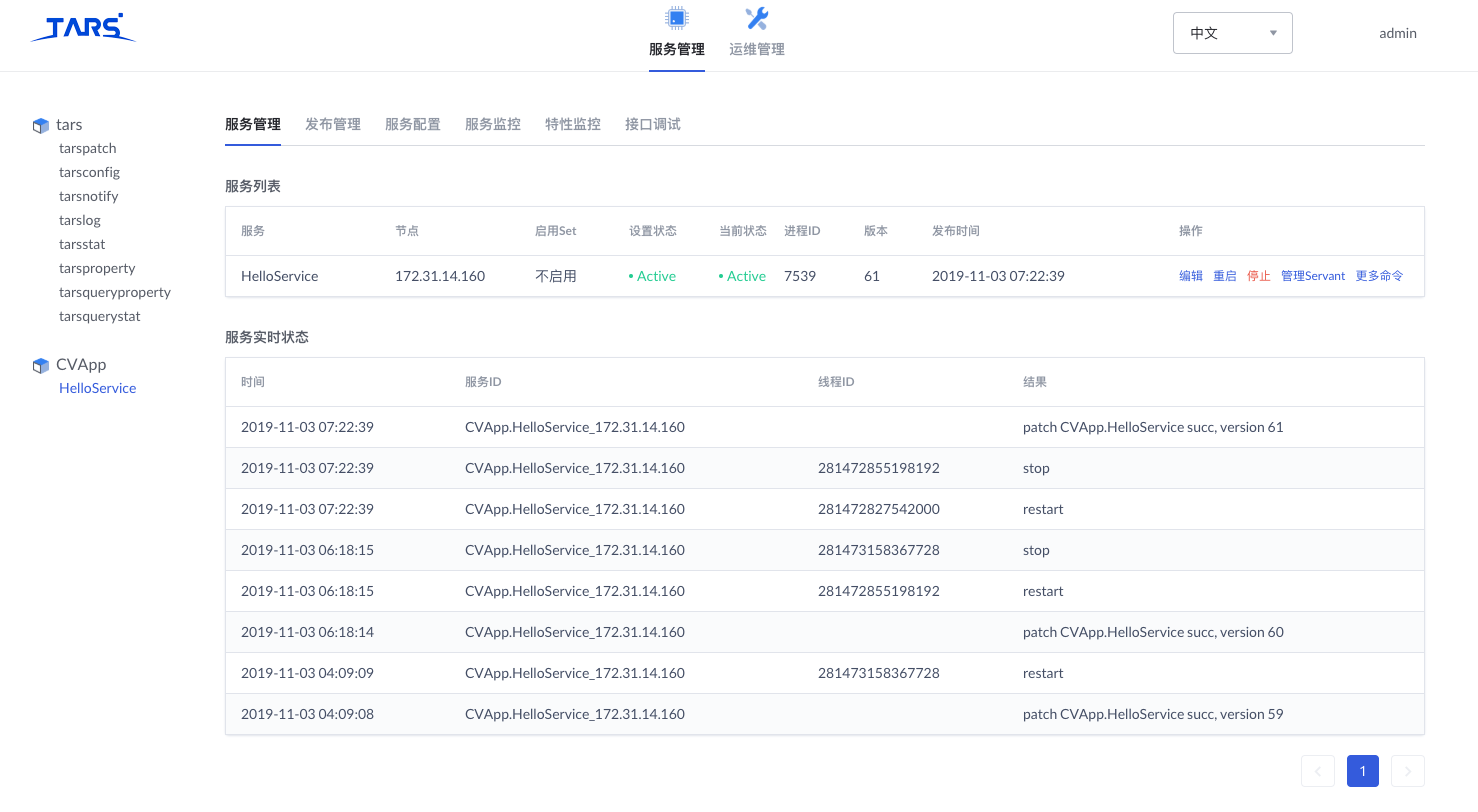
The following is the picture for Tars Framework website.
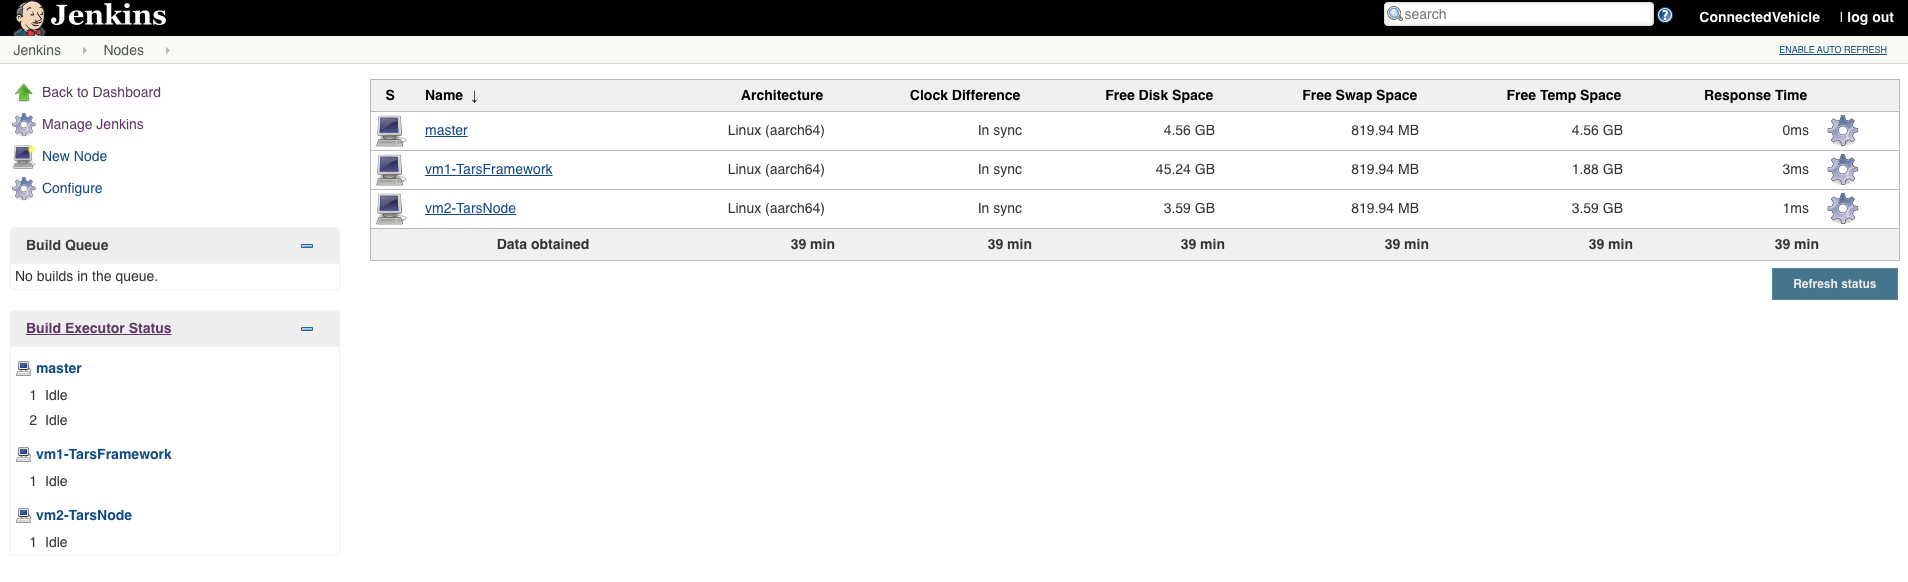
Step3: Tars Node
Refer to the following link for installing Tarsnode and connect Tarsnode to Tarsframework.
https://github.com/qiuxin/Tars/blob/arm/Install.md
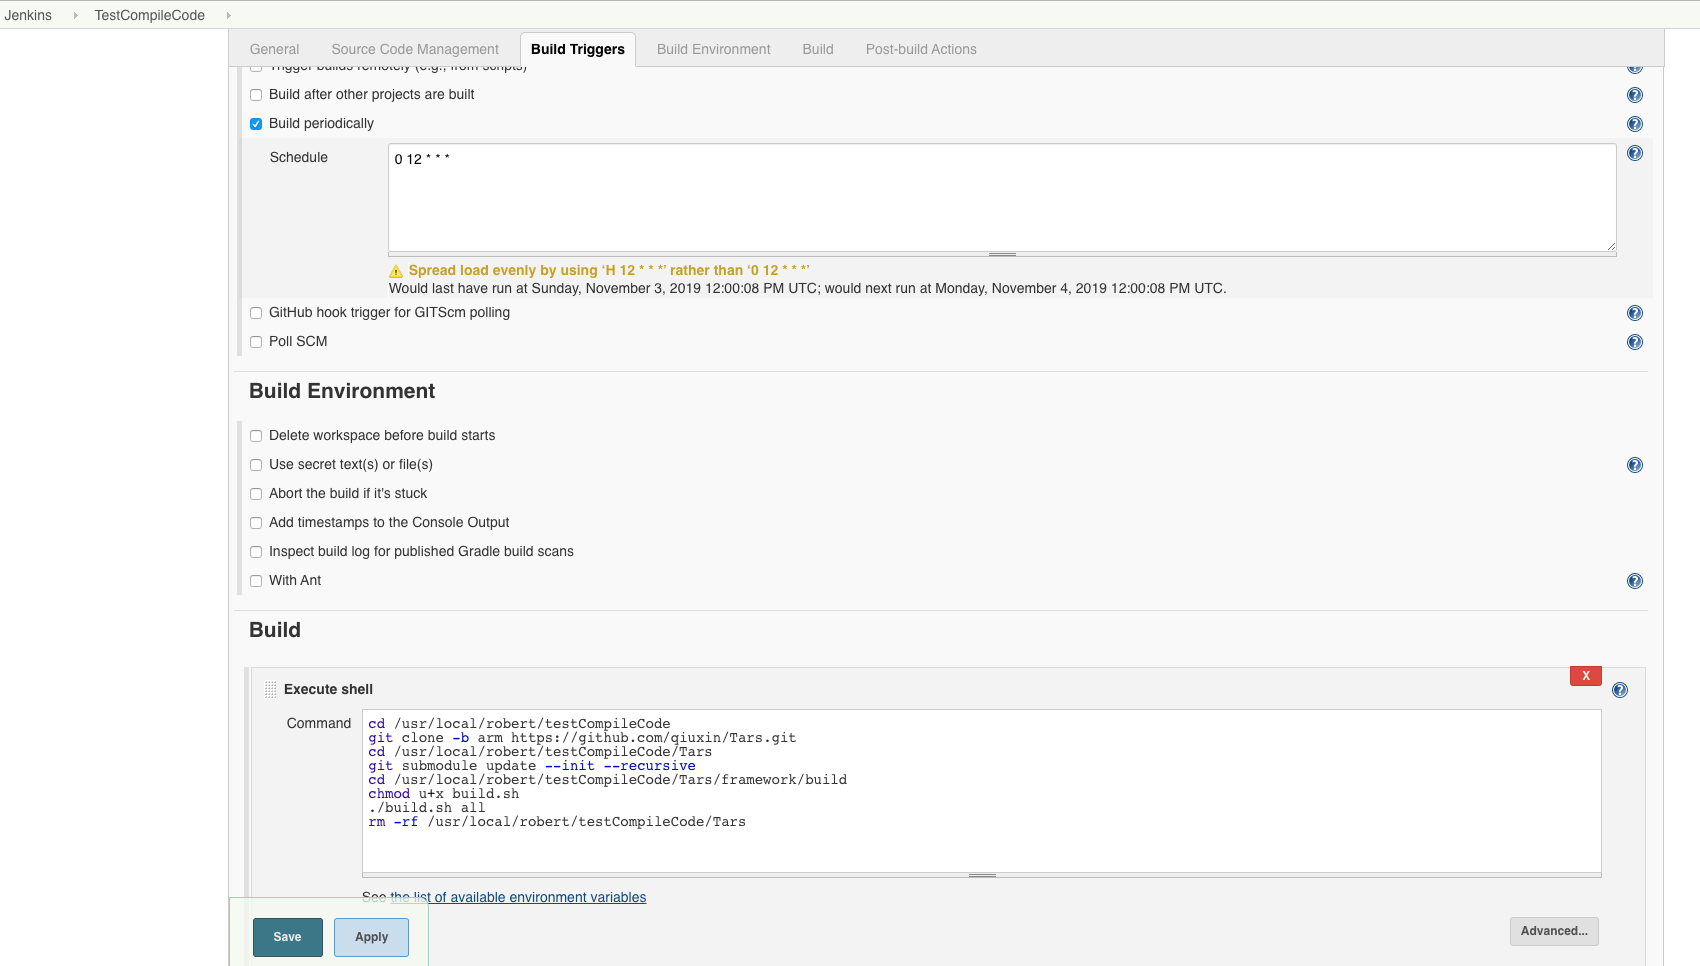
Step4: Launch CI jobs
Create CI jobs and launch CI jobs in the following way.
The detail of the Jenkins script is depicted in the Test Document.