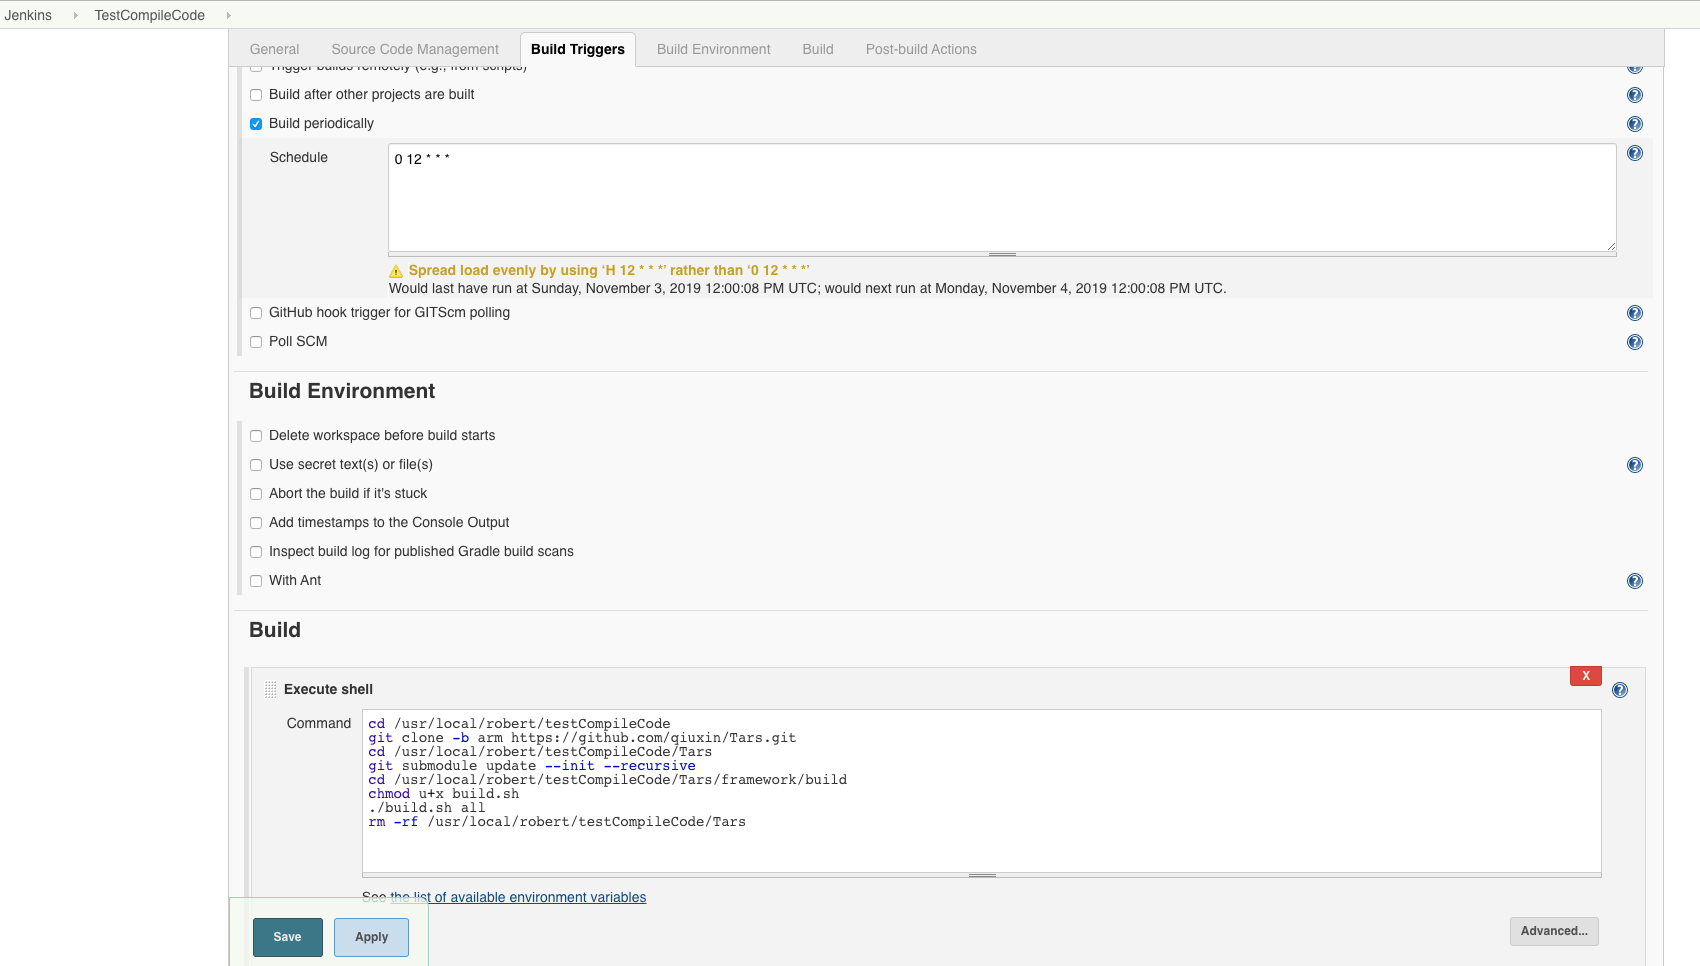
Installation Architecture
Due to the hardware source limitation, Connected Vehicle Blueprint is deployed in three Virtual Machines in Amazon Web Service.
(Visit CI Lab Environment Setup if you want to set up connected vehicle blueprint in CI Lab.)
The following picture depicts the deployment architecture.
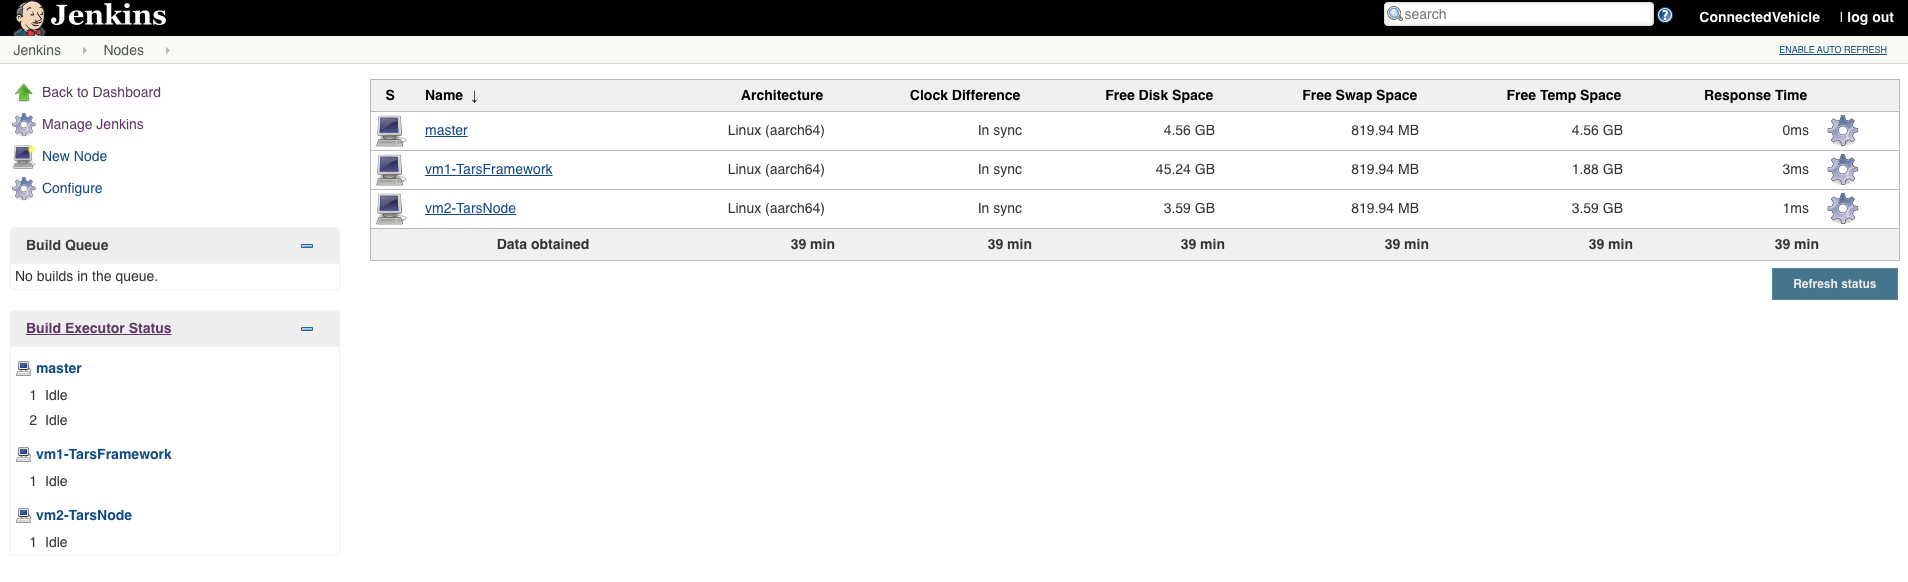
Node-0: Deploy Jenkins Master.
Node-1: Deploy Tars Master Node.
Node-2: Deploy Tars Slave(Node) and the connected vehicle applications.
Installation Hardware
Hostname | Core | RAM | HDD | NIC | Role |
Node-0 | 8 | 40GB | 3TB | 1GB | Jenkins Master |
Node-1 | 8 | 96GB | 3TB | 1GB | Tars Framework |
Node-2 | 8 | 96GB | 3TB | 1GB | Tars Node (CVB + Type4 Application + Virtual Classroom Teacher Client + Virtual Classroom Student Client) |
Installation Software
- CentOS 8
- mysql Ver 14.14 Distrib 5.6.26
- OpenStack: Rocky
- k8s:1.15.0
Installation Step by Step
Step1: Install Jenkins
Refer to the following link for installing Jenkins Mater and connect to Jenkins Slave.
https://github.com/qiuxin/Connected-Vechicle/blob/master/Doc/CI_Environment_Setup.md

Step2: Install Tarsframework
Refer to the following link for installing Tarsframework.
https://tarscloud.github.io/TarsDocs_en/installation/source.html
1. Dependency install
yum install -y glibc-devel gcc gcc-c++ bison flex make cmake psmisc ncurses-devel zlib-devel openssl openssl-devel
## install mysql
wget -i -c http://dev.mysql.com/get/mysql57-community-release-el7-10.noarch.rpm
yum -y install mysql57-community-release-el7-10.noarch.rpm
yum -y install mysql-community-server
yum -y install mysql-devel
If you have problems to install mysql with the above step, add the new mysql repository to local server with this yum command and then re-run the previous commands.
sudo yum localinstall https://dev.mysql.com/get/mysql57-community-release-el7-10.noarch.rpm
yum install mariadb-server -y
## Configure mysql
systemctl start mariadb.service
systemctl enable mariadb.service
systemctl status mariadb.service
mysql -u root -p
grep "password" /var/log/mariadb/mariadb.log
ALTER USER 'root'@'localhost' IDENTIFIED BY '${your passwd}';
flush privileges;
2. Install develop environment for Tars
yum install -y npm
npm i -g pm2
wget -qO- https://raw.githubusercontent.com/creationix/nvm/v0.33.11/install.sh | bash
source ~/.bashrc
nvm install v8.11.3
npm install -g pm2 --registry=https://registry.npm.taobao.org
mkdir Tars
cd Tars
git clone https://github.com/TarsCloud/TarsFramework.git --recursive
cd TarsFramework/build
chmod u+x build.sh
./build.sh prepare
./build.sh all
###Recompile if needed.###
./build.sh cleanall
./build.sh all
Change to user root and create the installation directory.
cd /usr/local
mkdir tars
mkdir app
chown ${normal user}:${normal user} ./tars/
chown ${normal user}:${normal user} ./app/
cd
cd Tars/TarsFramework/build/
./build.sh install or make install
The default install path is /usr/local/tars/cpp。
If you want to install on different path:
**modify tarscpp/CMakeLists.txt**
**modify TARS_PATH in tarscpp/servant/makefile/makefile.tars**
**modify DEMO_PATH in tarscpp/servant/script/create_tars_server.sh**
3.Tars framework Installation
3.0 Firewall setup
firewall-cmd --zone=public --permanent --add-service=http
firewall-cmd --add-port 3000/tcp
firewall-cmd --add-port 3001/tcp
firewall-cmd --add-port 3306/tcp
3.1. Add user
mysql -u root -p
grant all on *.* to 'tarsAdmin'@'%' identified by 'Tars@2019' with grant option;
grant all on *.* to 'tarsAdmin'@'172.22.195.10' identified by 'Tars@2019' with grant option;
grant all on *.* to 'tarsAdmin'@'Node-1' identified by 'Tars@2019' with grant option;
flush privileges;
3.2 setup mysql privileges
mysql -u root -p
>use mysql
>select Host from user where User='root';
if shown as “localhost”,we can update as follwing command:
>update user set host = '%' where user ='root';
>FLUSH PRIVILEGES;
'%'update to the host IP,and then use mysql -u root -p --host '%ip' change back'%'
cd /Tars
git clone https://github.com/TarsCloud/TarsWeb.git
mv TarsWeb web
cp -rf web /usr/local/tars/cpp/deploy/
cd /usr/local/tars/cpp/deploy
chmod a+x linux-install.sh
./linux-install.sh MYSQL_HOST MYSQL_ROOT_PASSWORD INET REBUILD(false[default]/true) SLAVE(false[default]/true)
./linux-install.sh 192.168.1.10 our_PW eno1 false false admin 3306
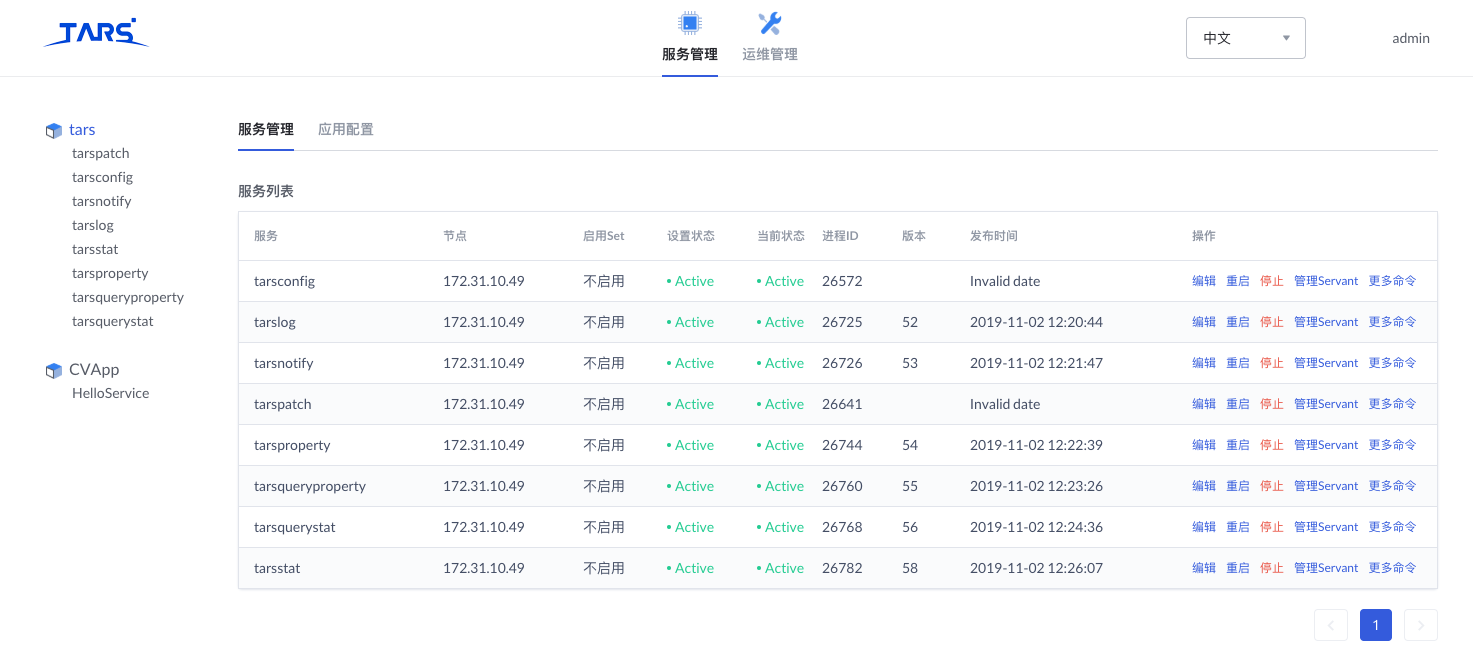
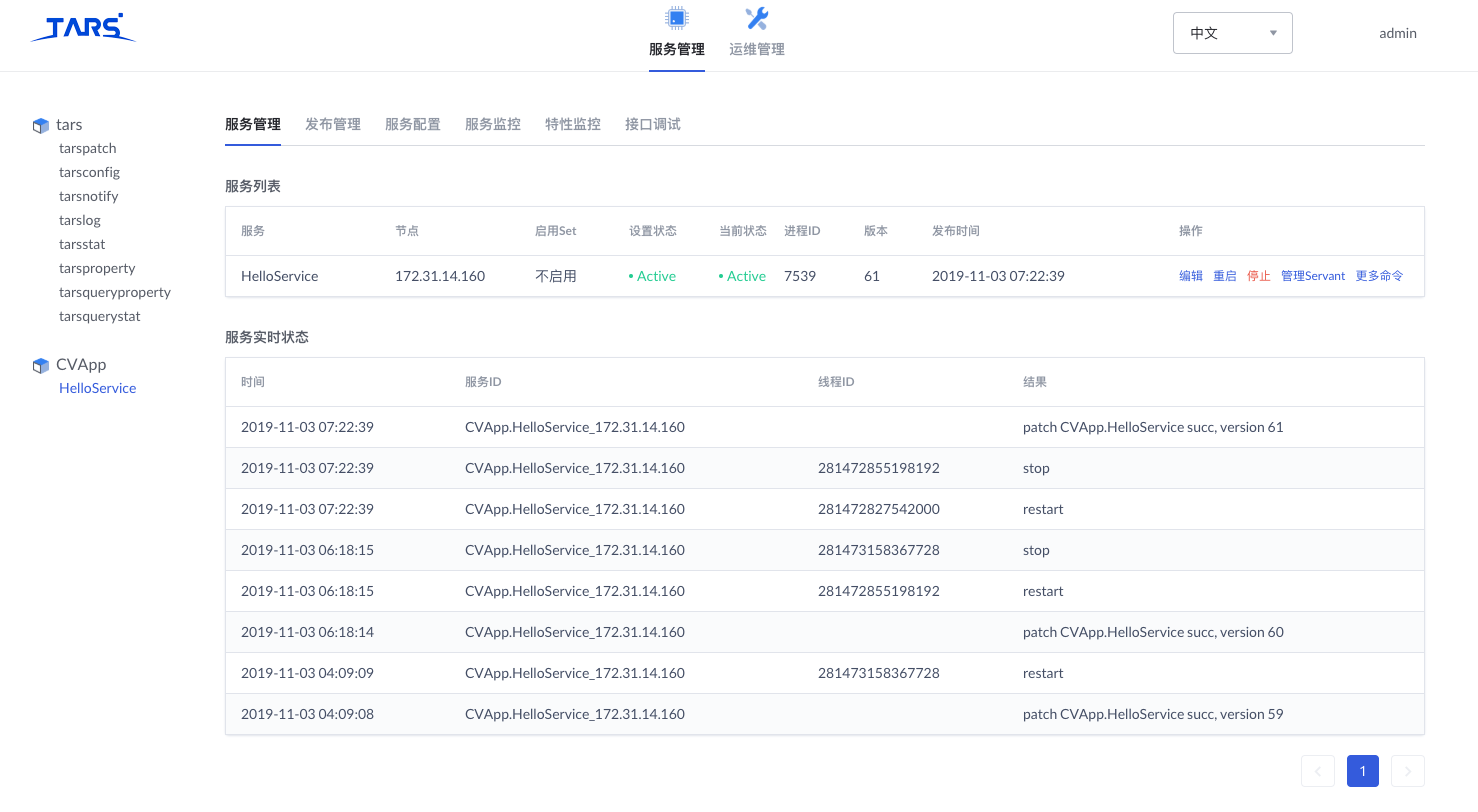
The following is the picture for Tars Framework website.
Step3: Tars Node
Refer to the following link for installing Tarsnode and connect Tarsnode to Tarsframework.
https://tarscloud.github.io/TarsDocs_en/installation/source.html
Step4: Launch CI jobs
Create CI jobs and launch CI jobs in the following way.
The detail of the Jenkins script is depicted in the Test Document.